
Create Business App (WhatsApp Cloud API) - Meta for Developers
Learn how to Create Business App in Facebook, Add Phone Number and Integrate WhatsApp Cloud API with SME Bot.
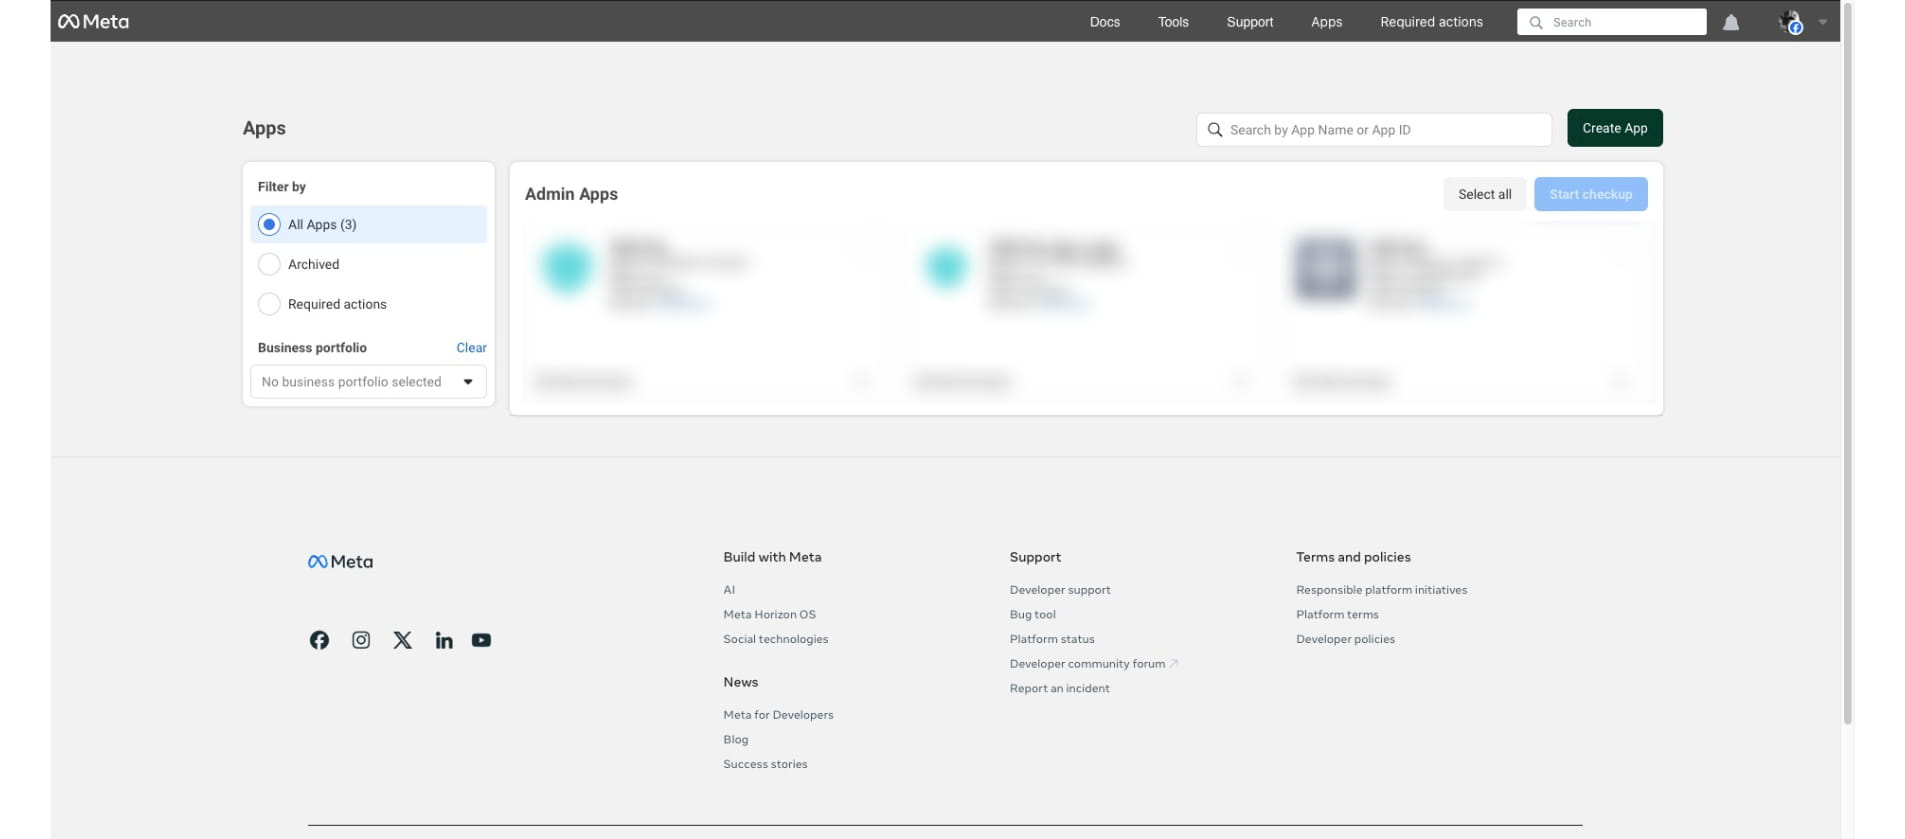
Navigate to Facebook Developers
In the Facebook Developers Account, Click "Create App"
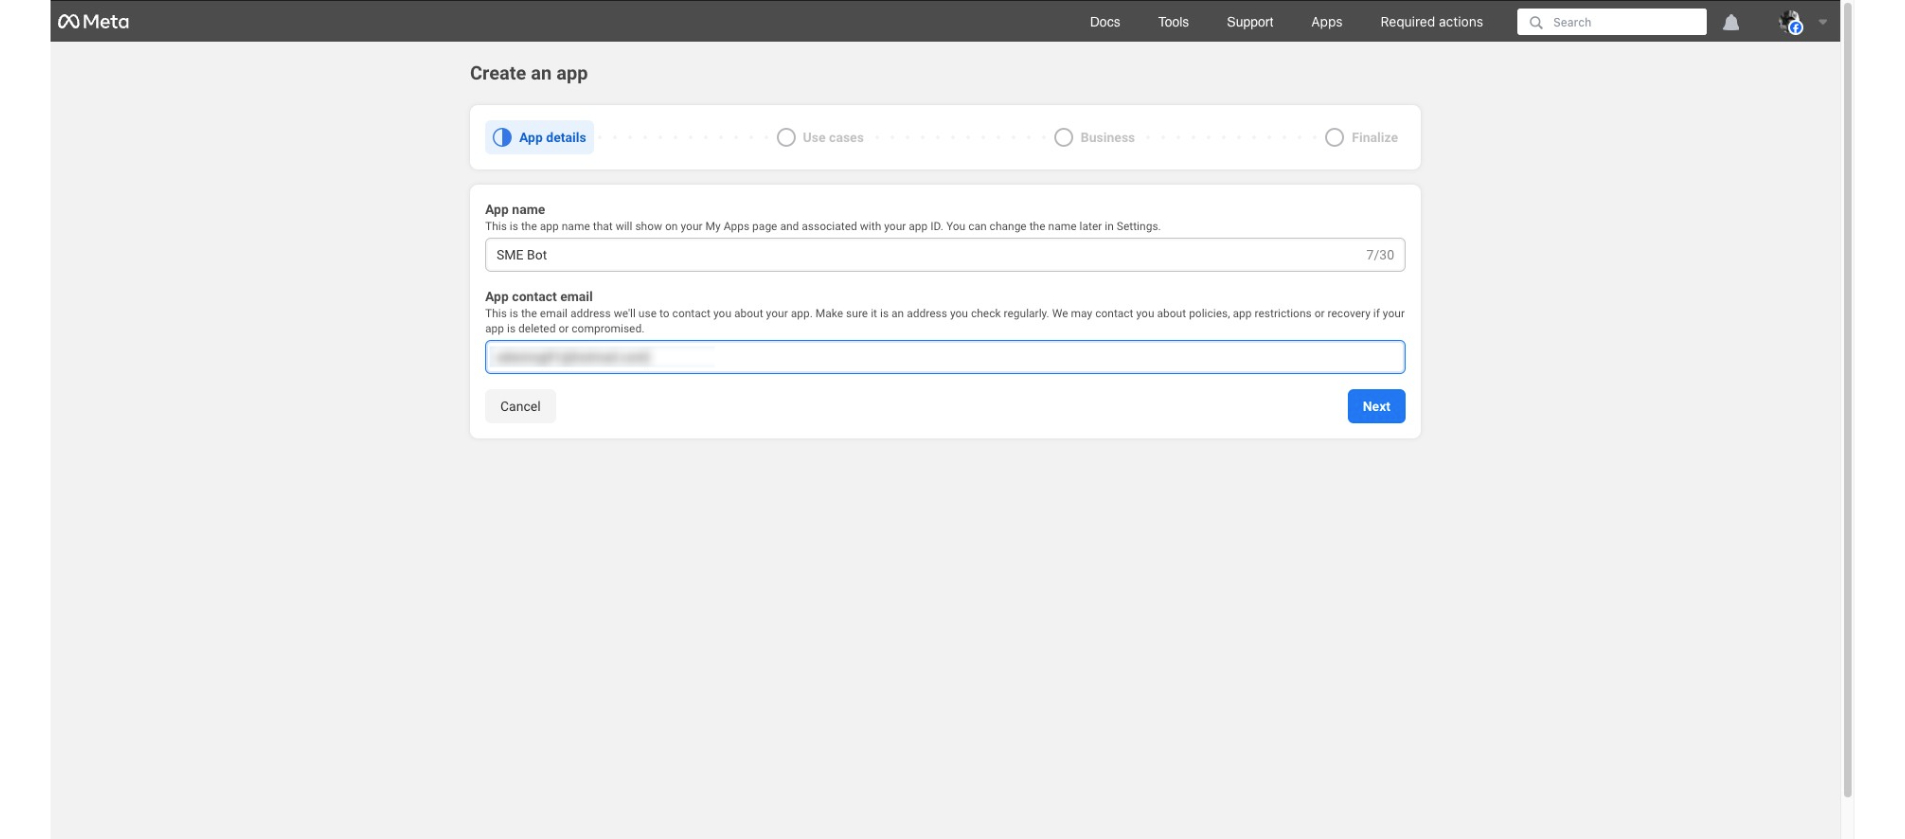
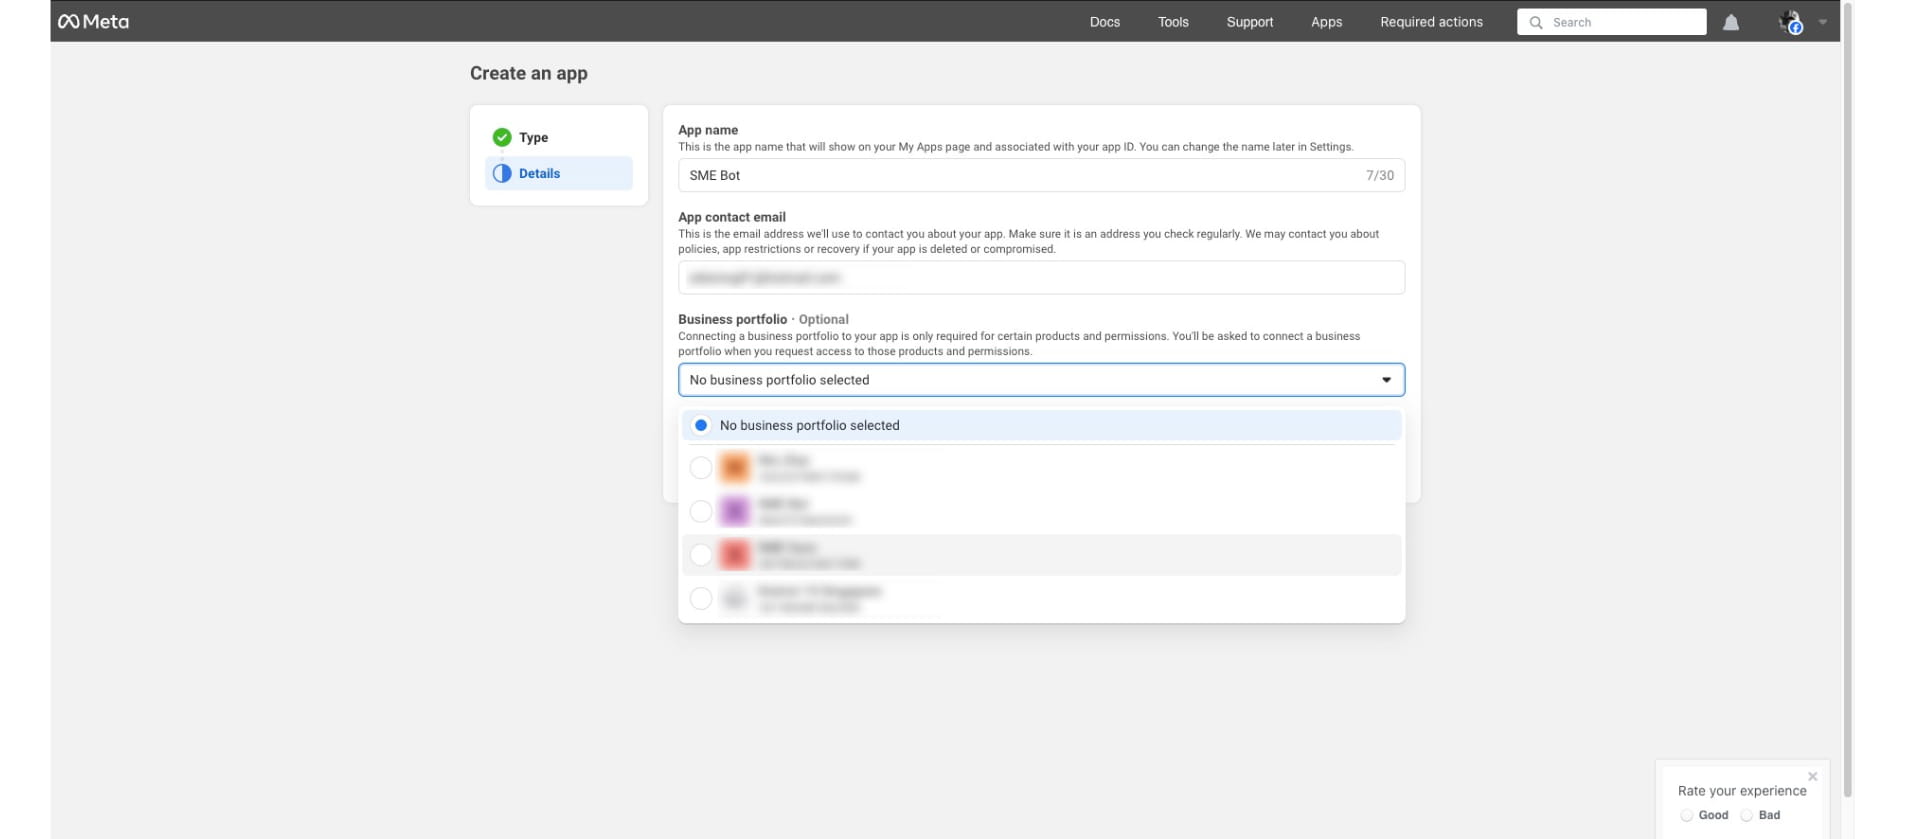
Provide your App Name and the App Contact Email. Click "Next"
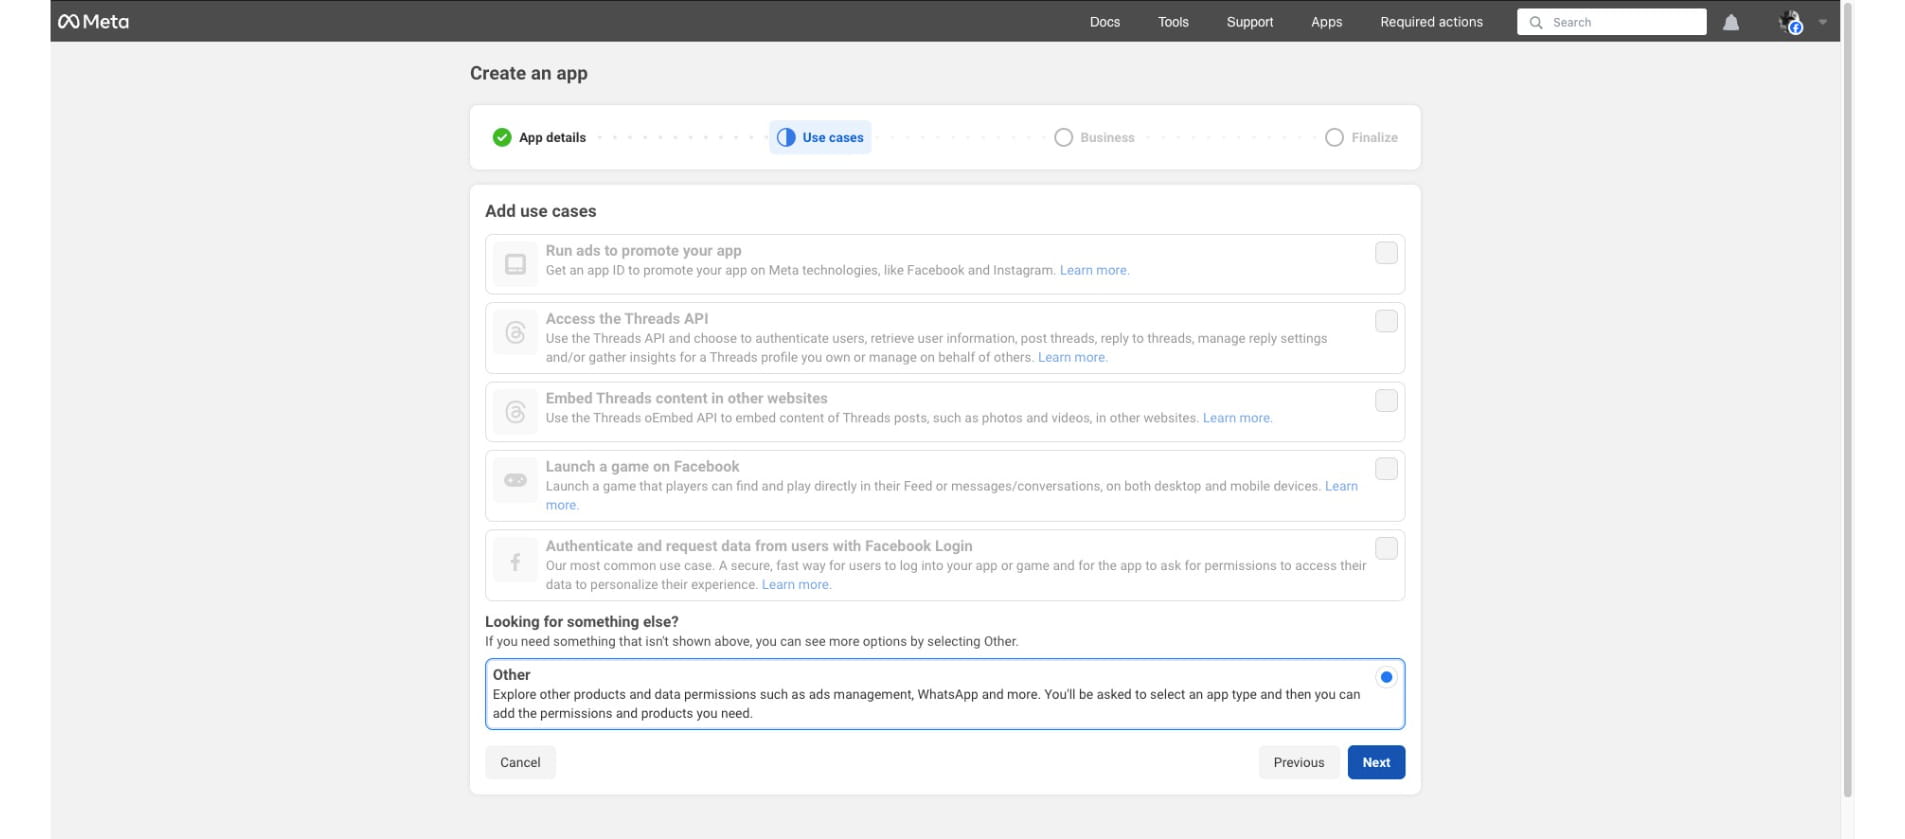
Select "Other" or the option where it include WhatsApp.
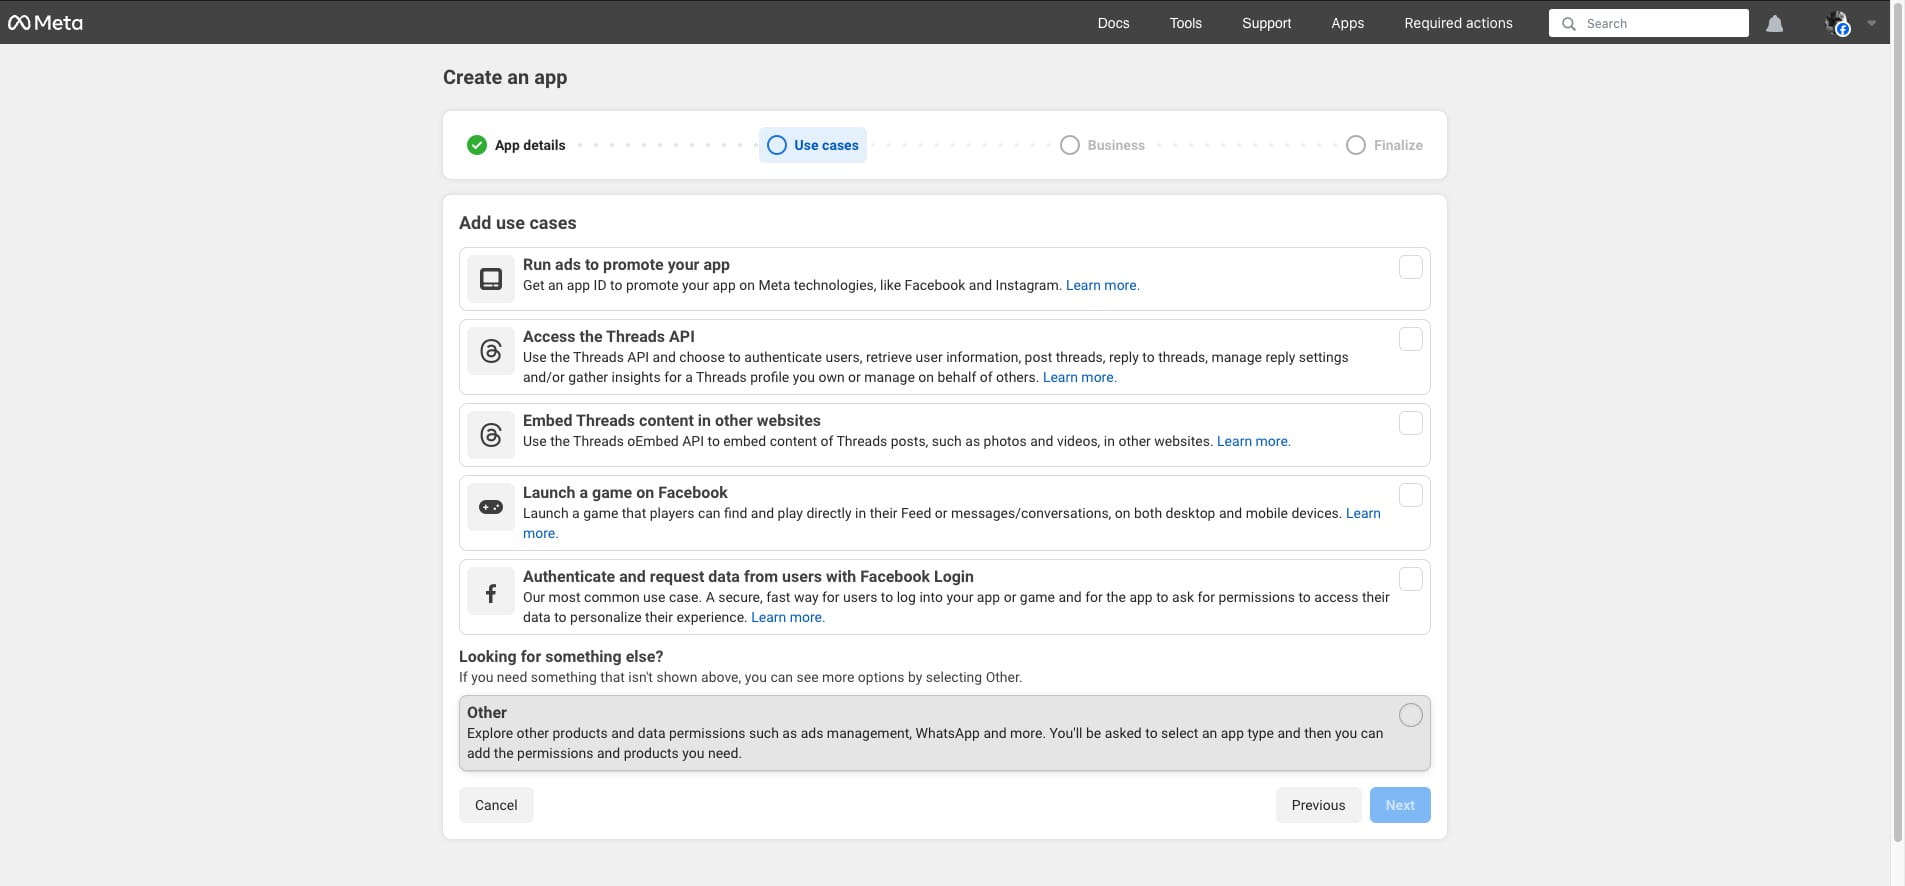
Click "Next"
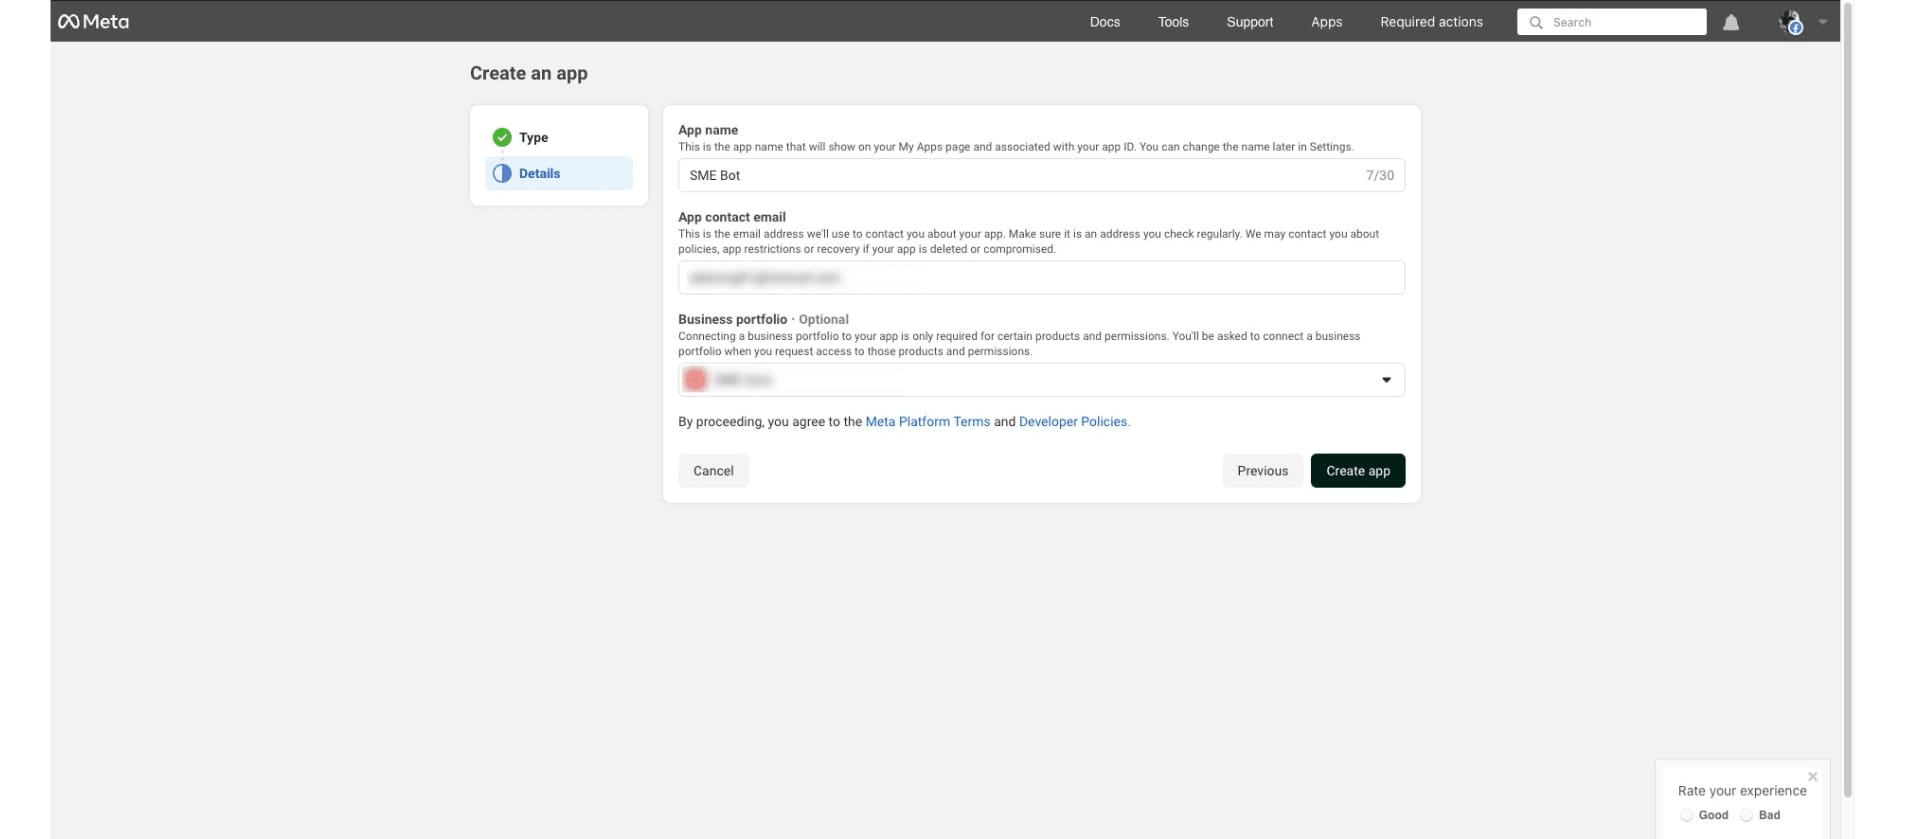
Click the dropdown under "Business Portfolio" to associate your app with the intended business portfolio.
Click "Create app"
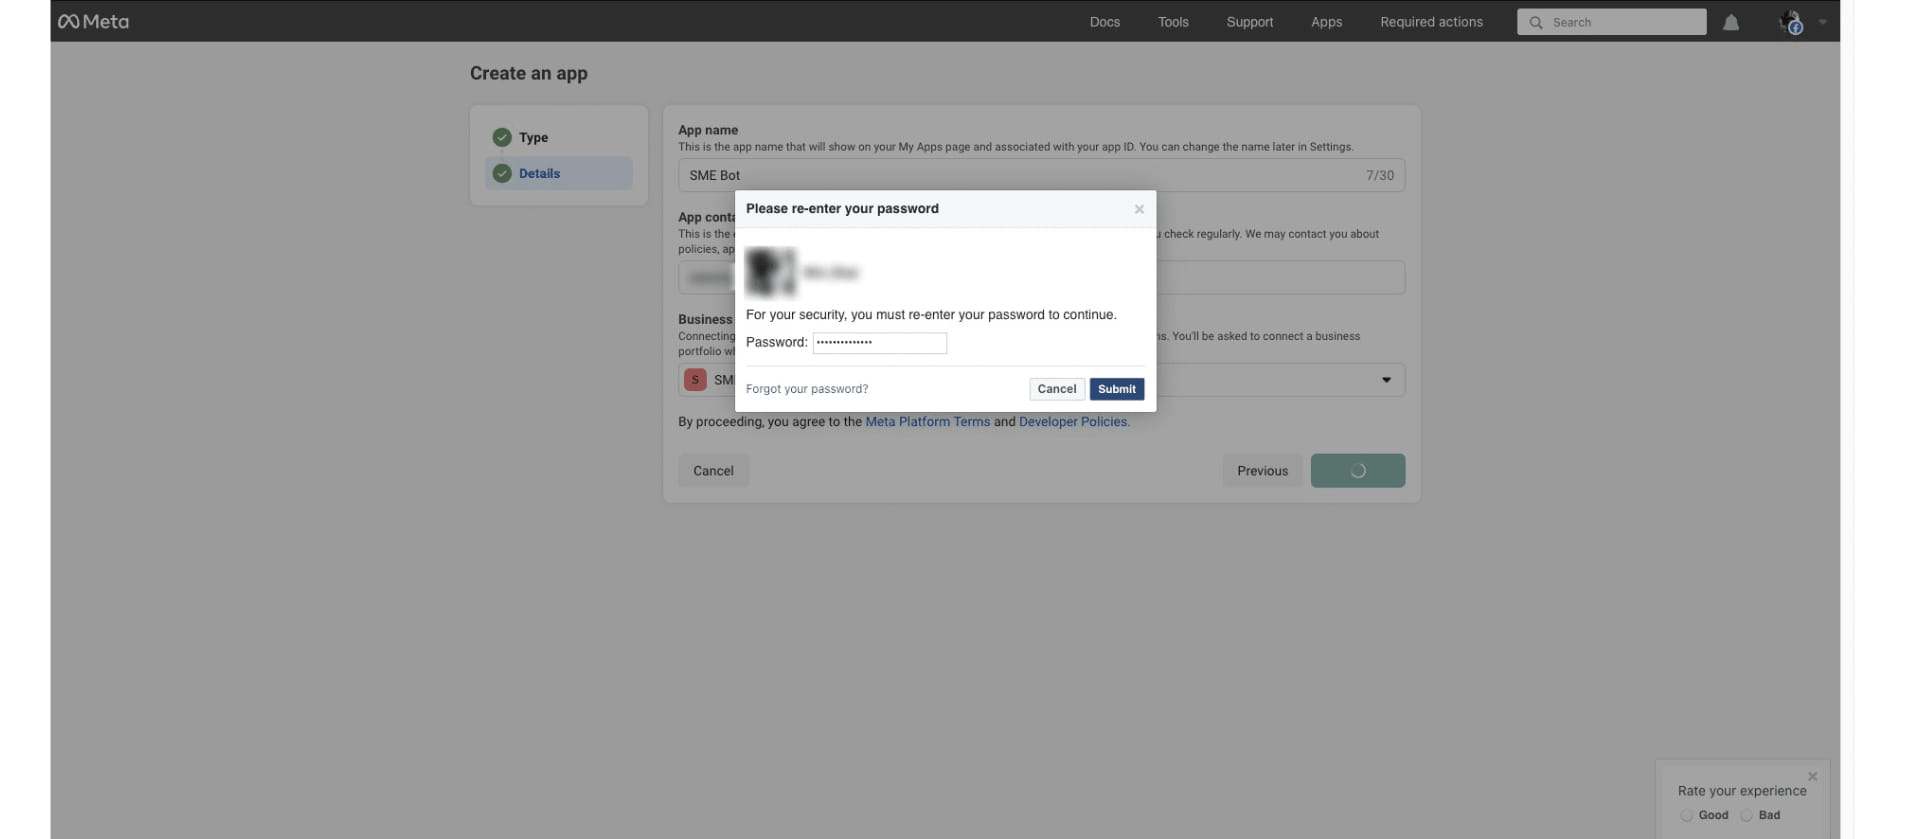
Re-enter your password and click "Submit"
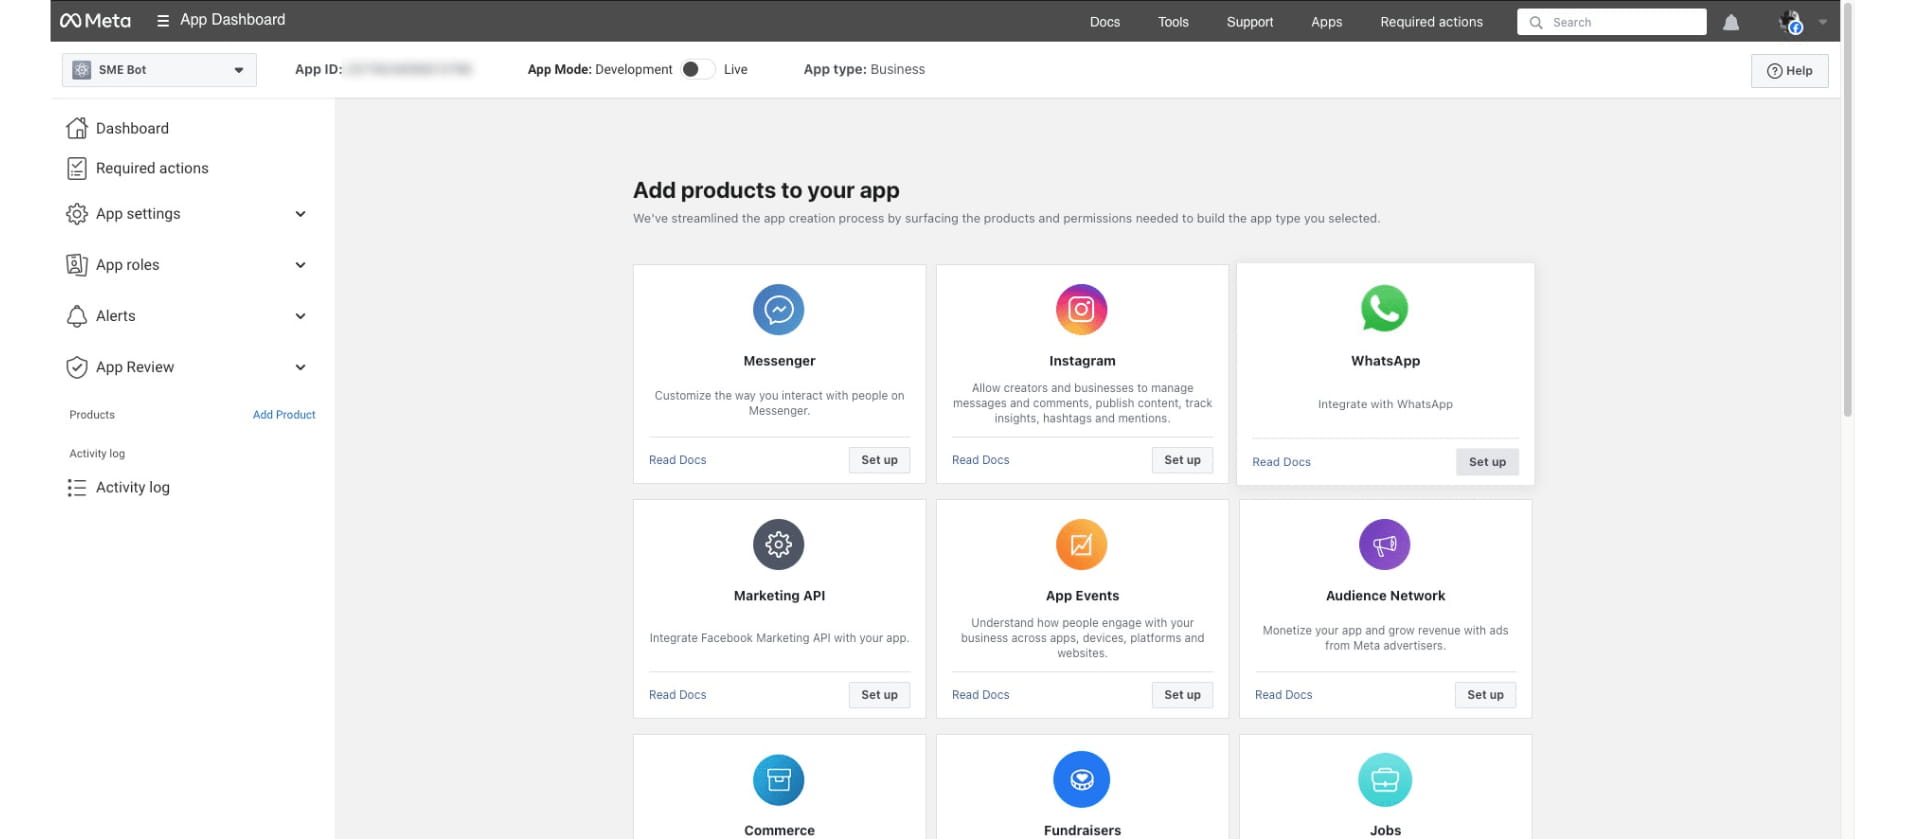
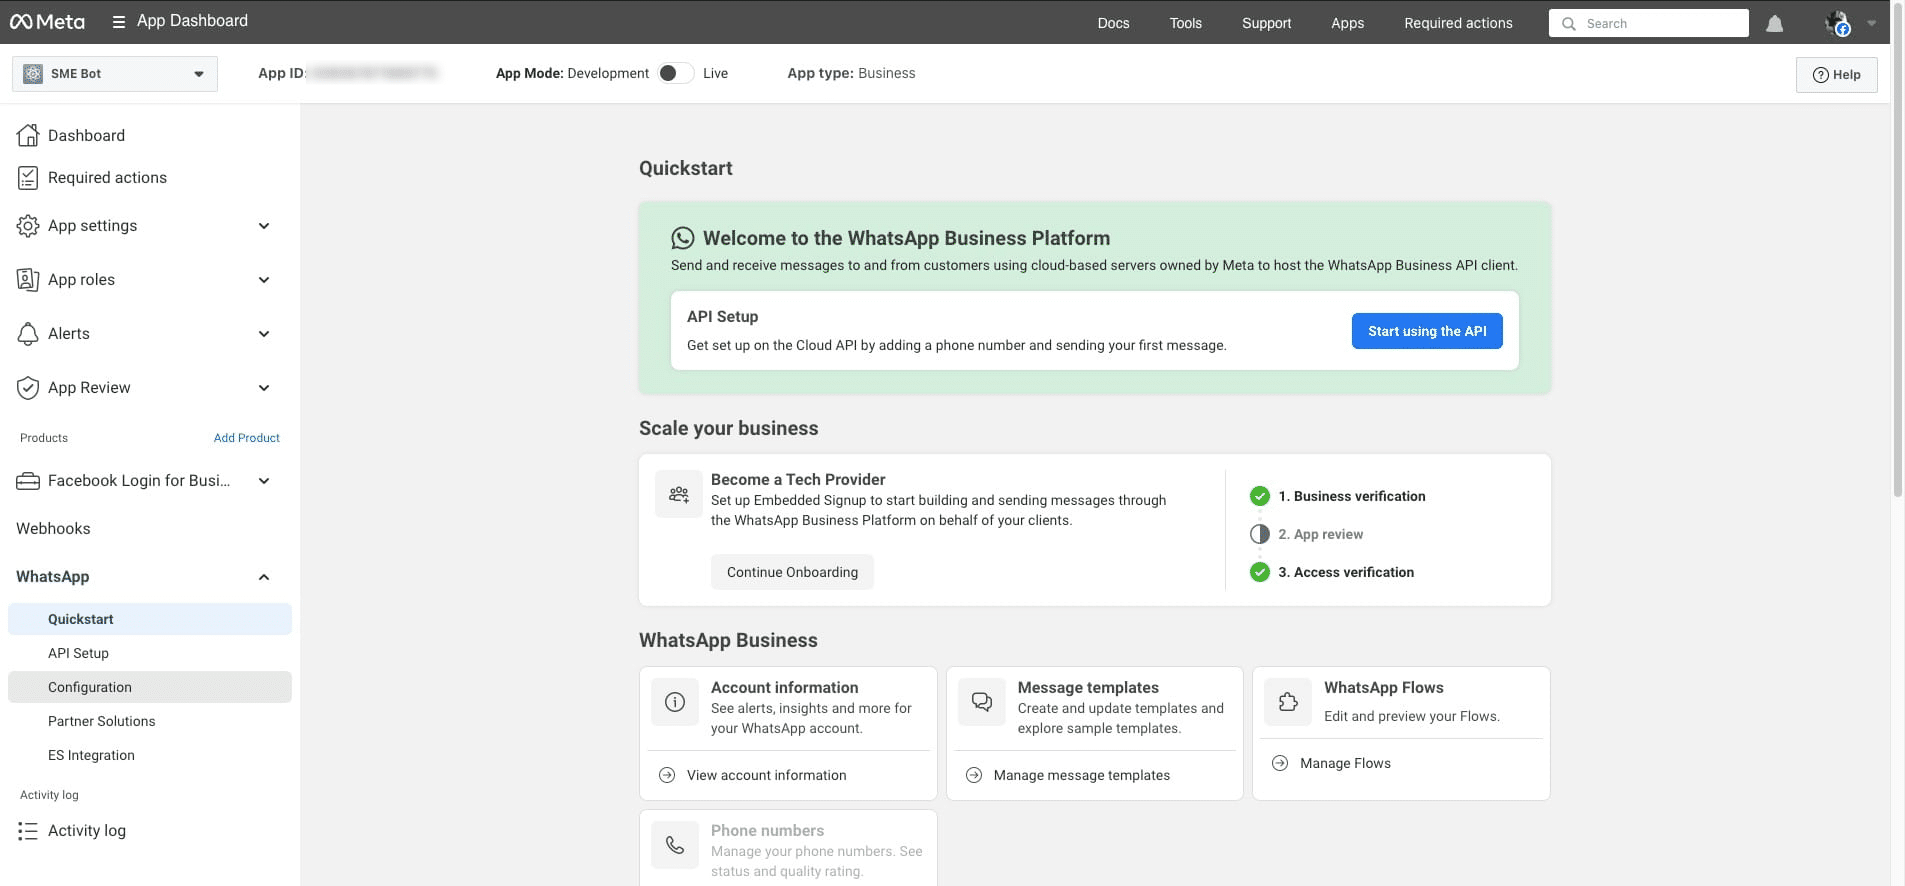
Click "Set Up" under WhatsApp.
Under WhatsApp, click "Configuration" .
Enter the Callback URL as https://app.smebot.ai/webhooks/whatsapp.php and set the Verify Token as whatsapp
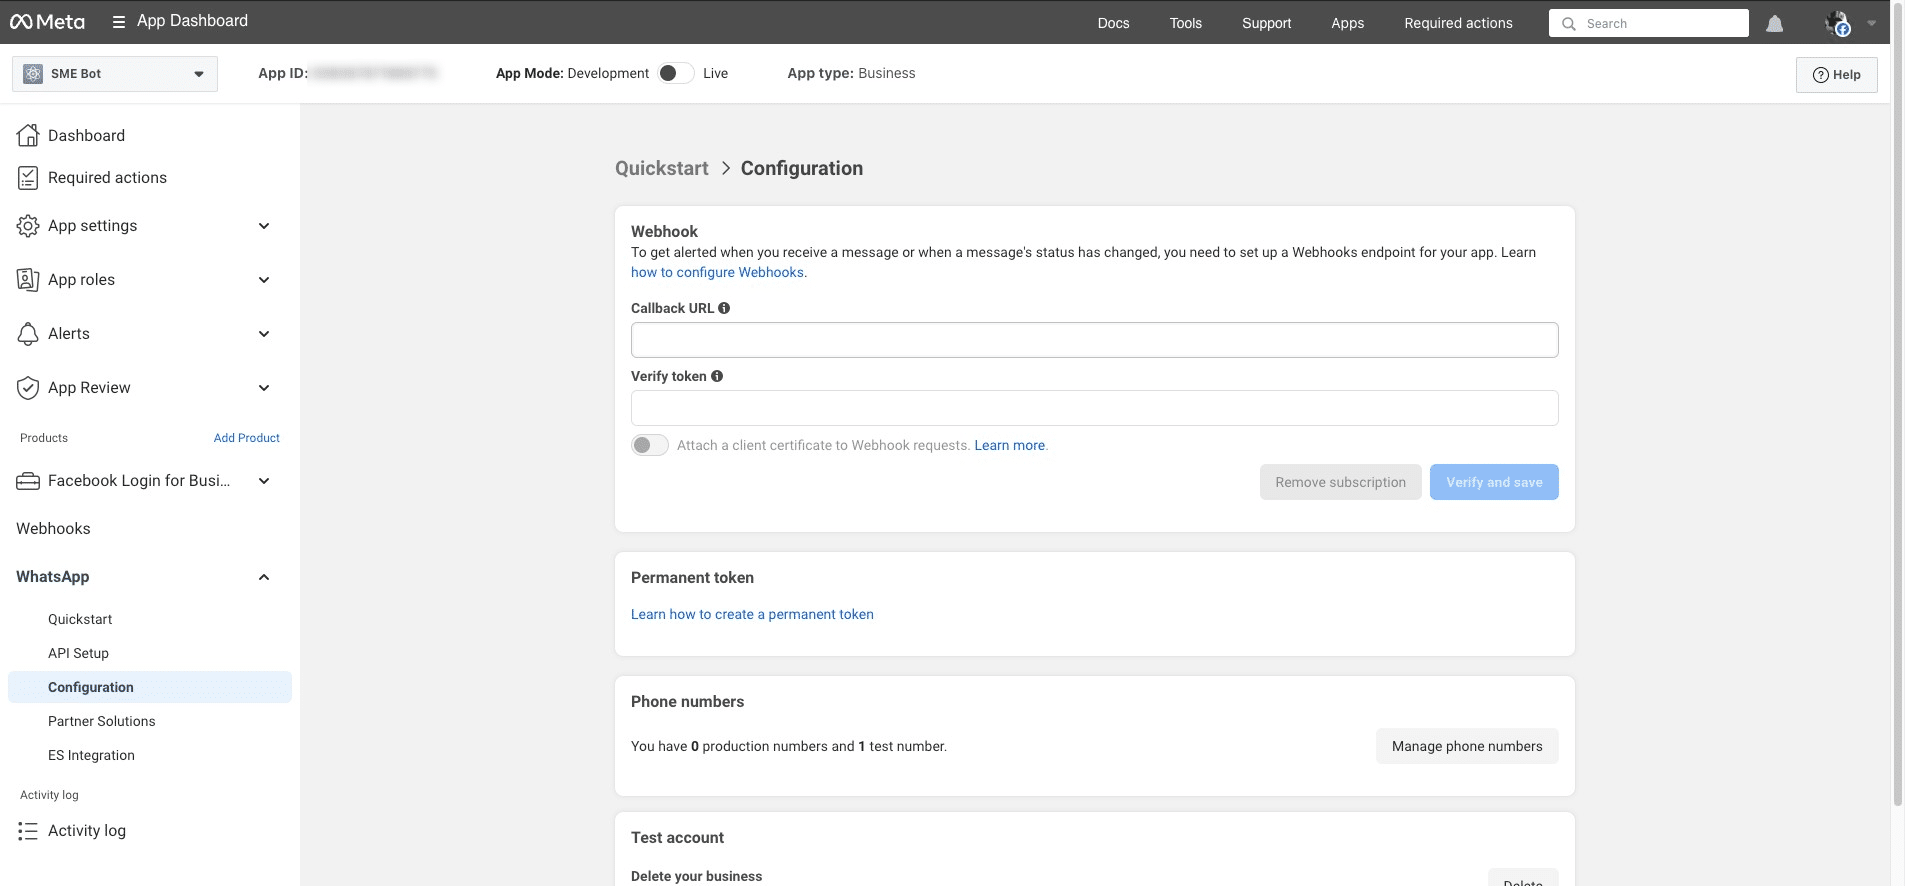
Click "Verify and save"
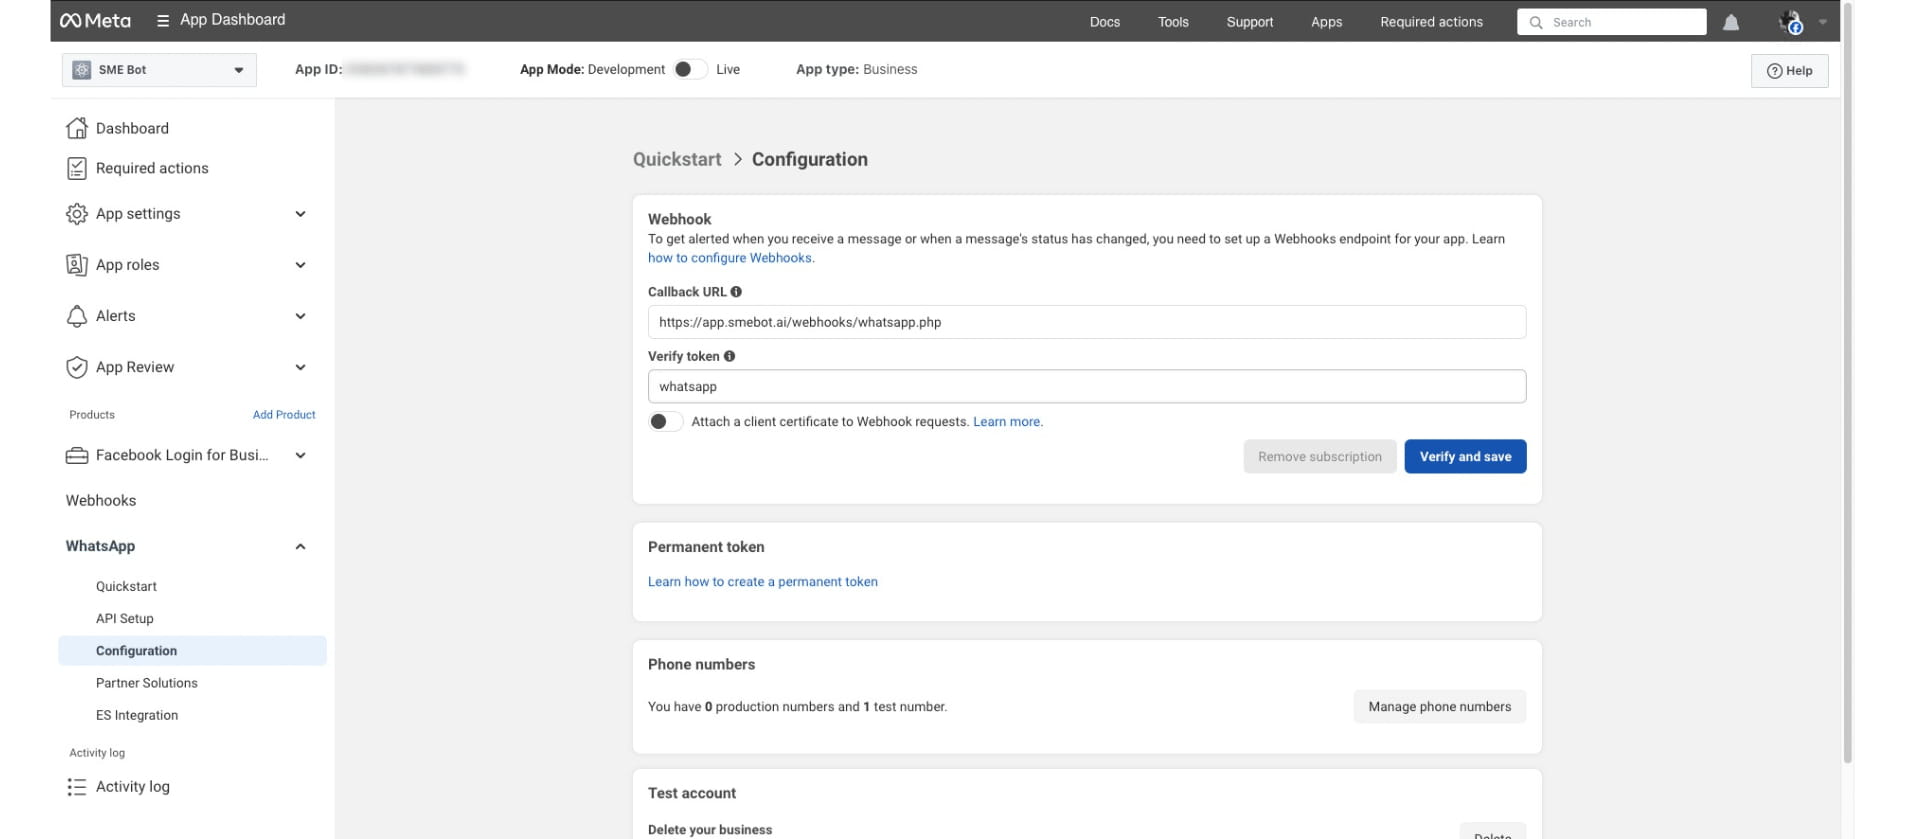
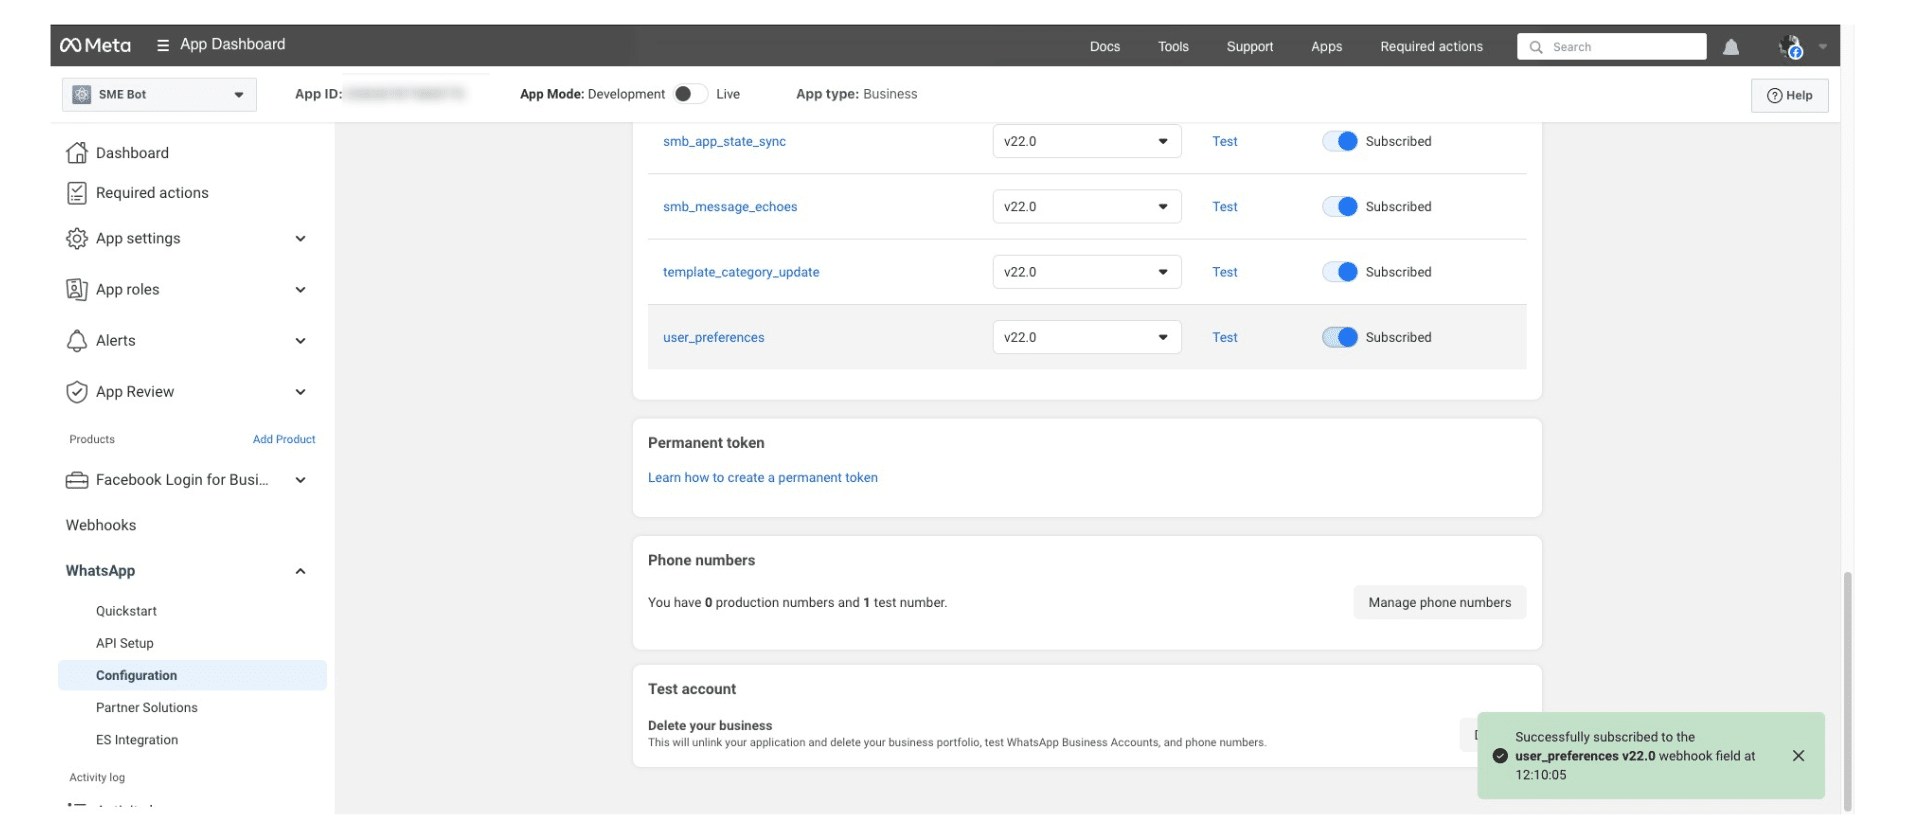
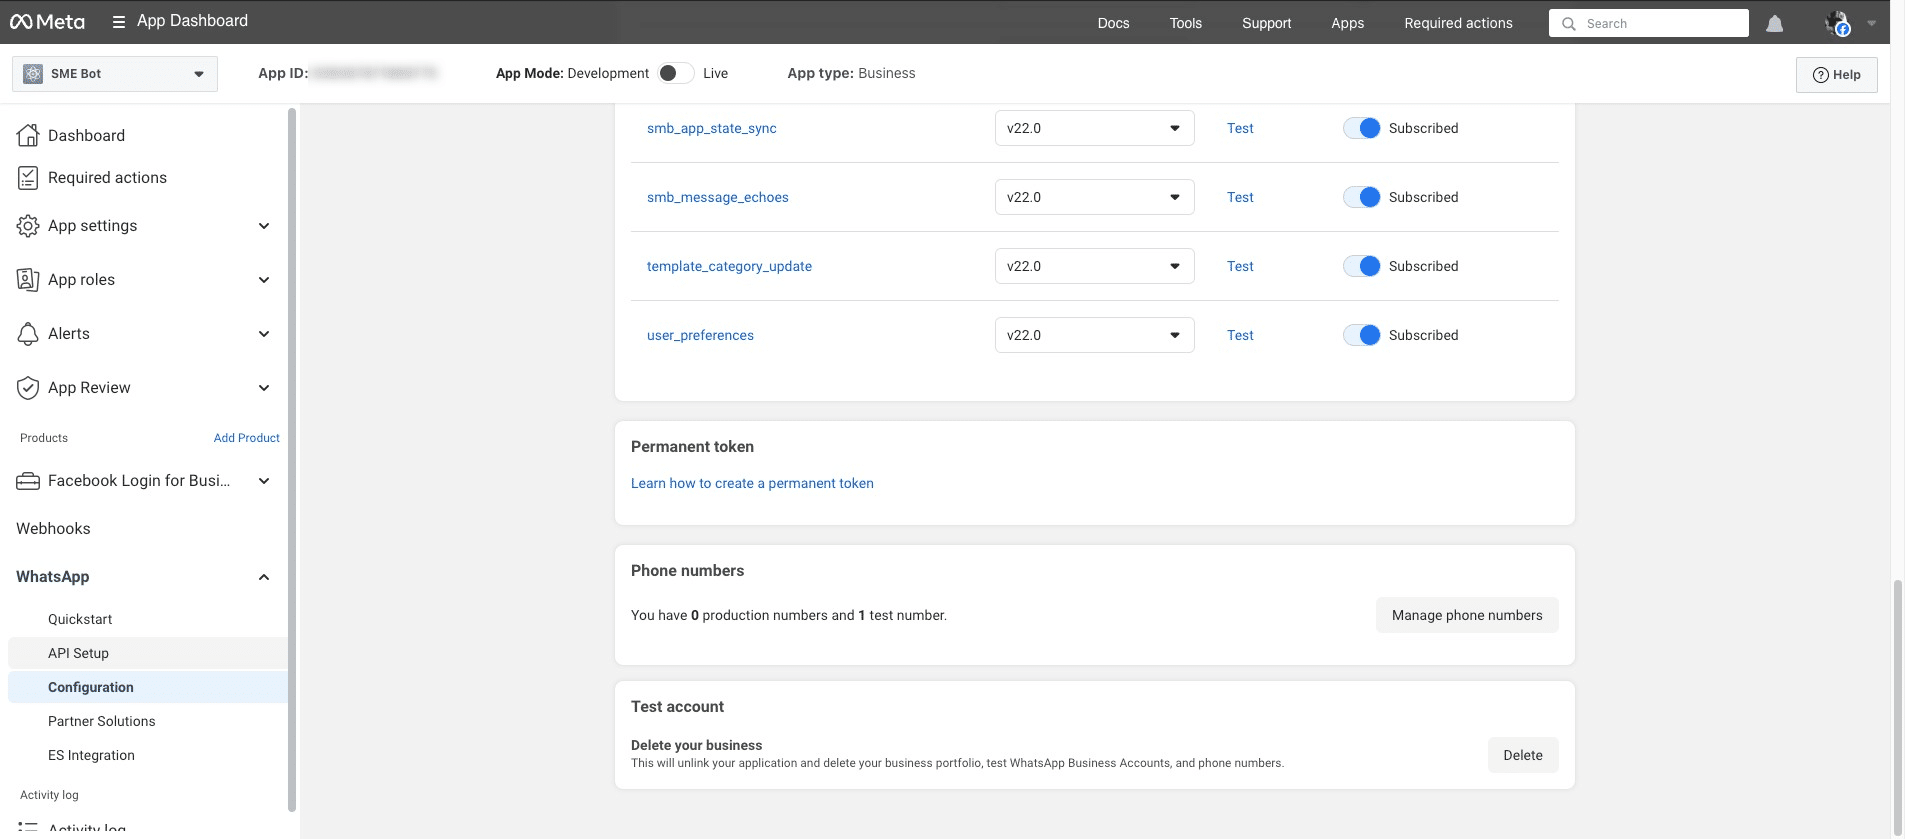
Subscribe to all Webhook Fields. Some fields may not be available for subscription.
You've successfully subscribed to the Webhook Fields. ✅
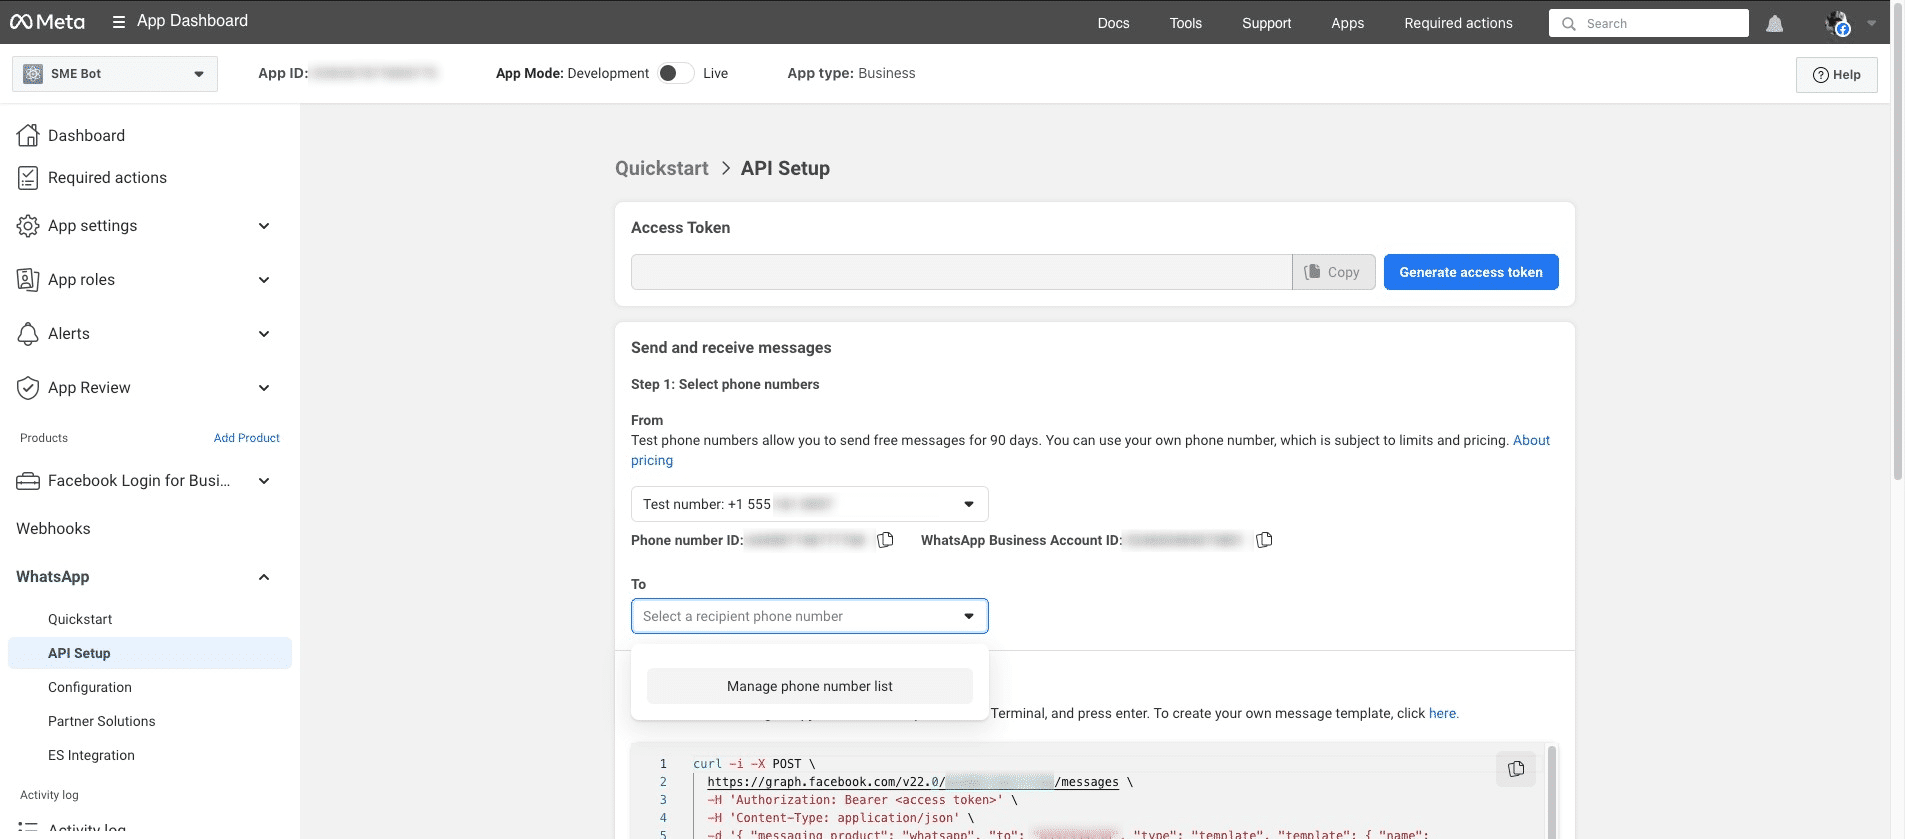
Under WhatsAp, click "API Setup" .
If you're using a test phone number, you must verify your personal WhatsApp number. Click "Select a recipient phone number", then click "Manage phone number list" to proceed.
Enter your country code and rovide the phone number for verification. Click "Next".
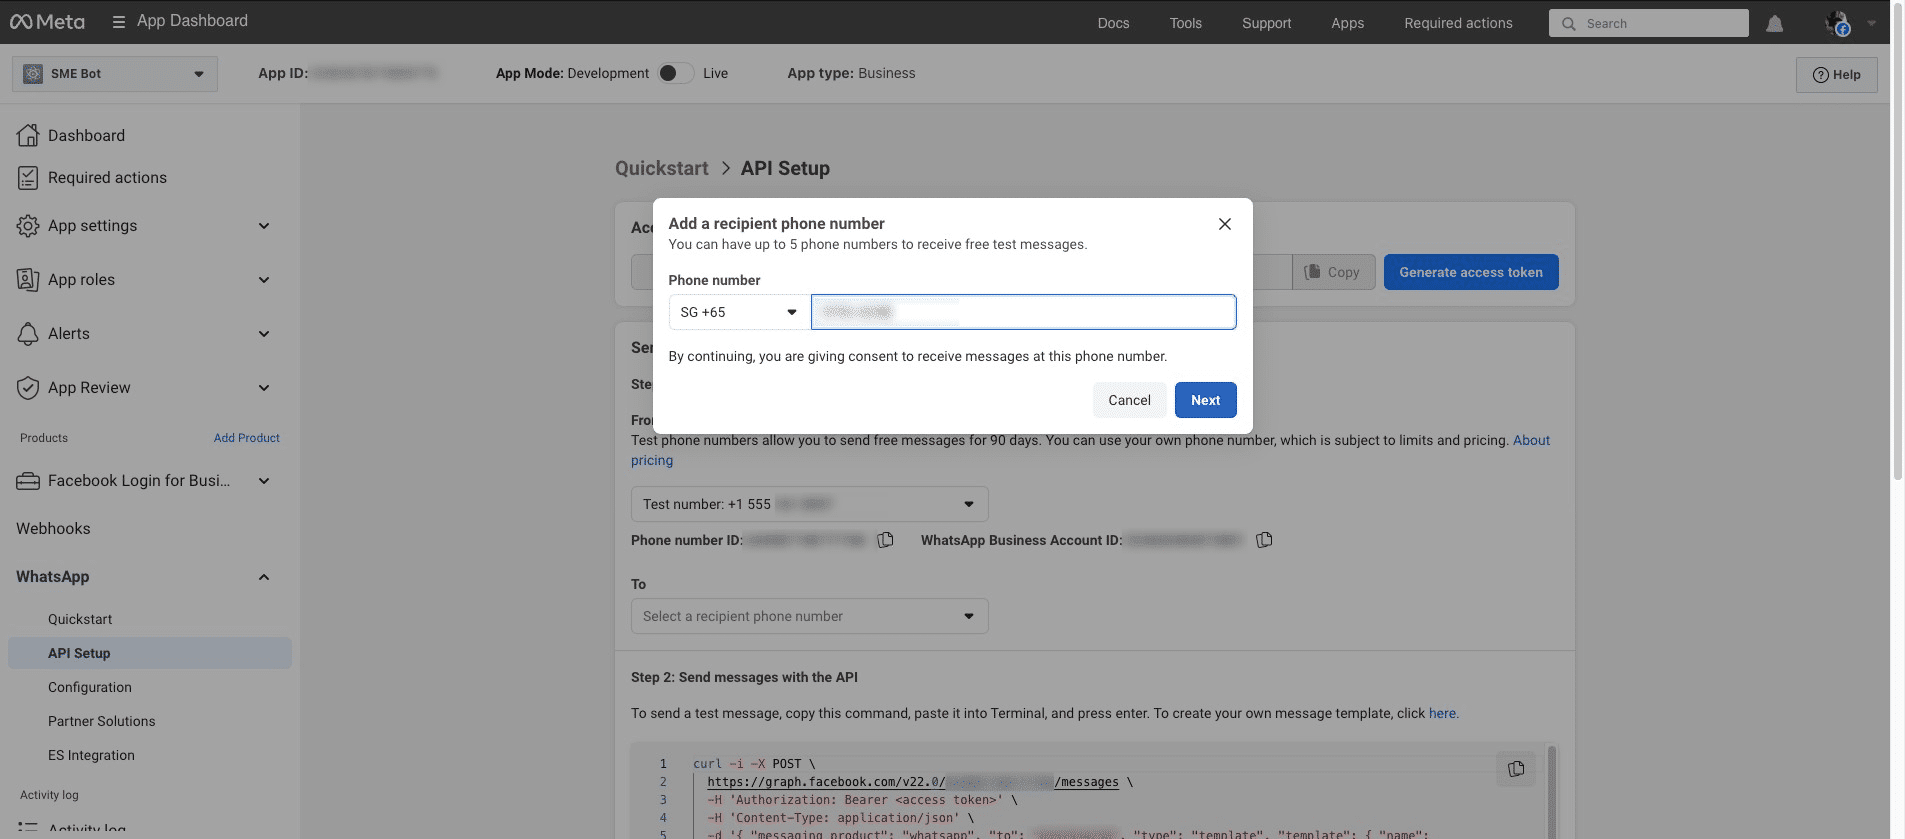
A verification code will be sent to the number you have provided. Enter the 5-digit code, click "Next" to complete the verification.

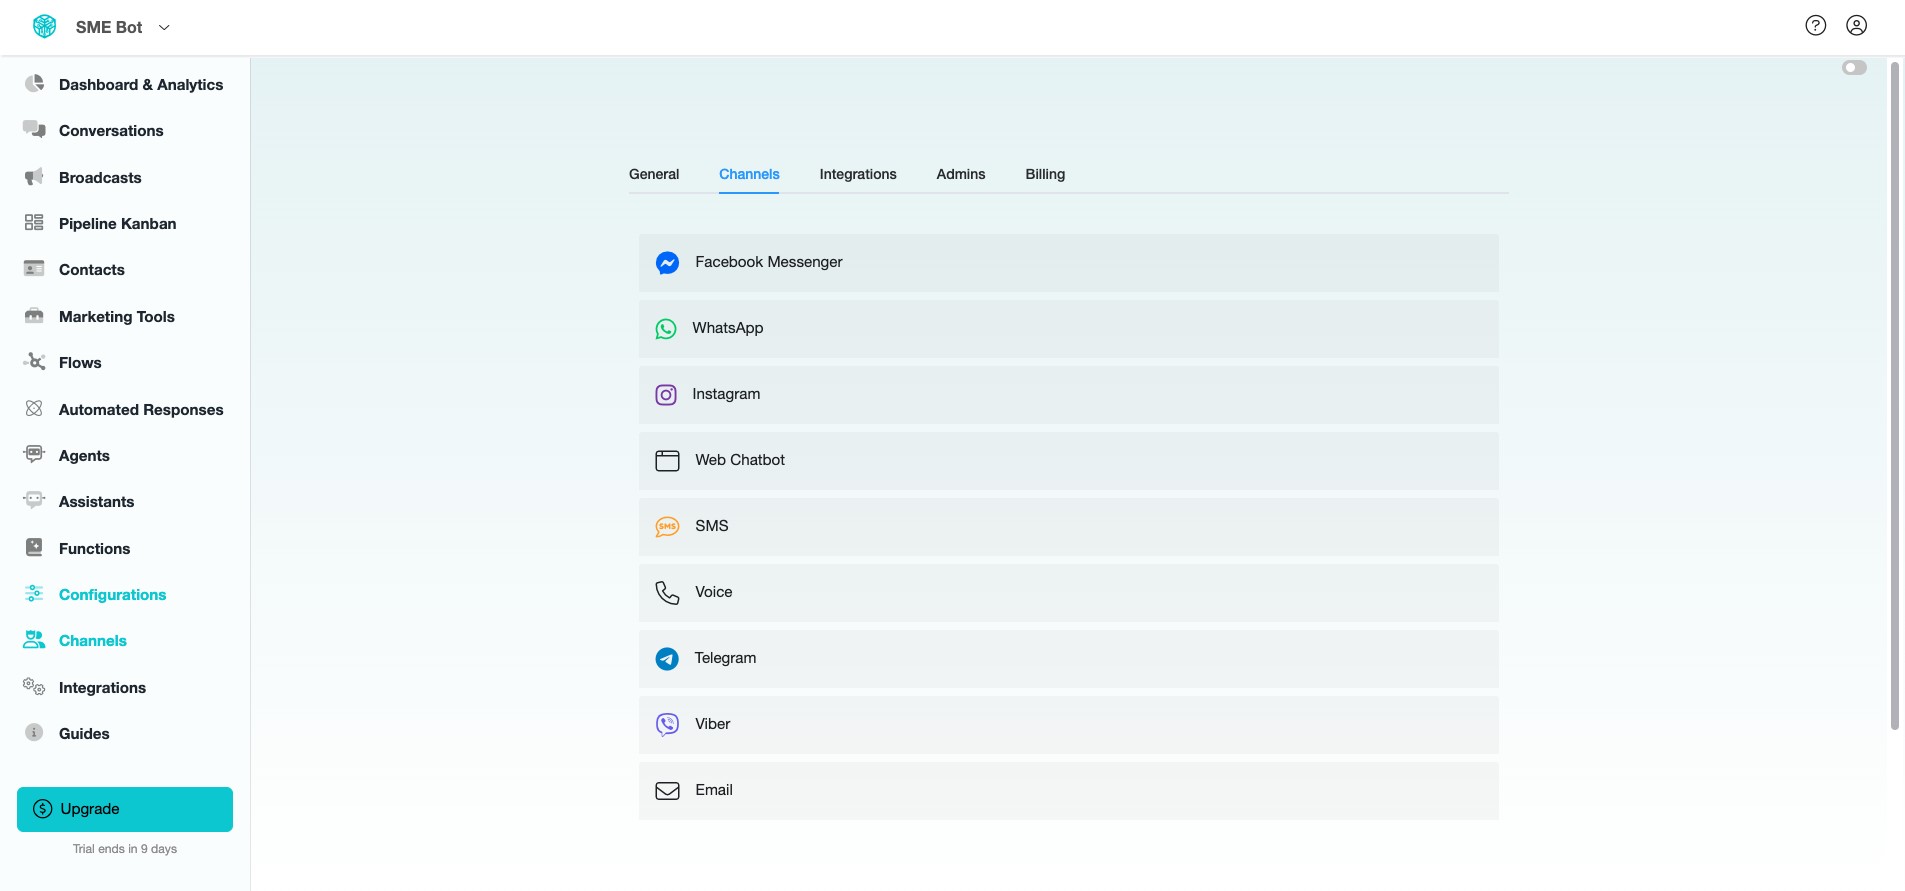
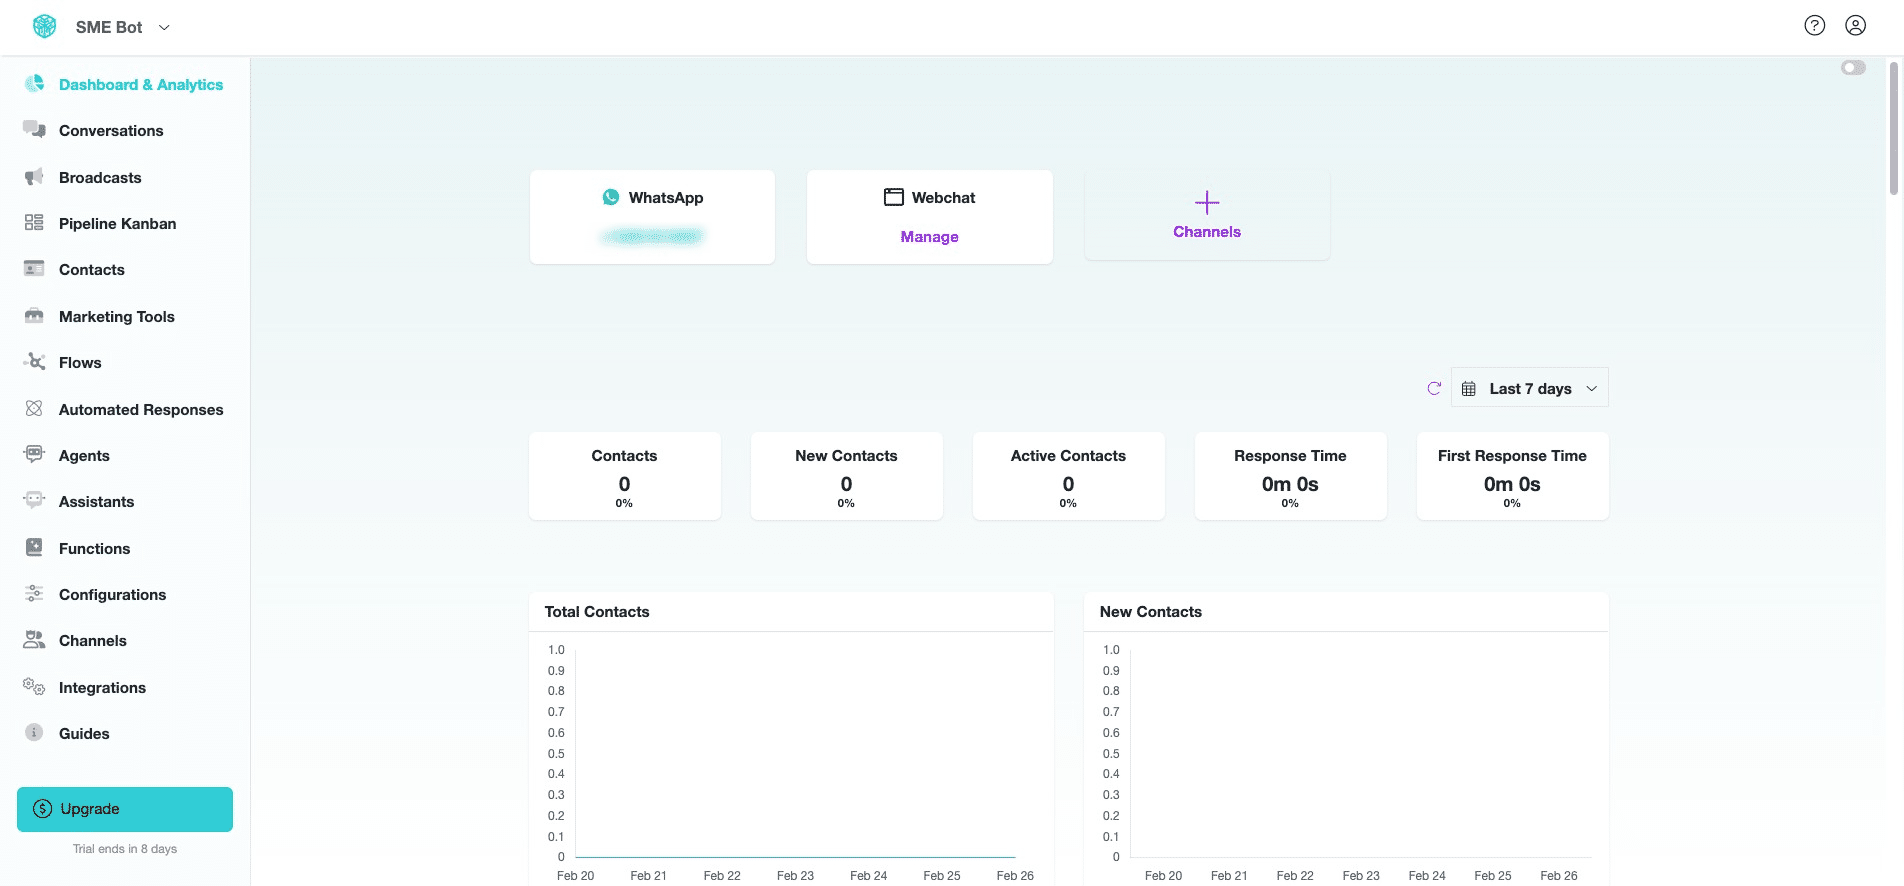
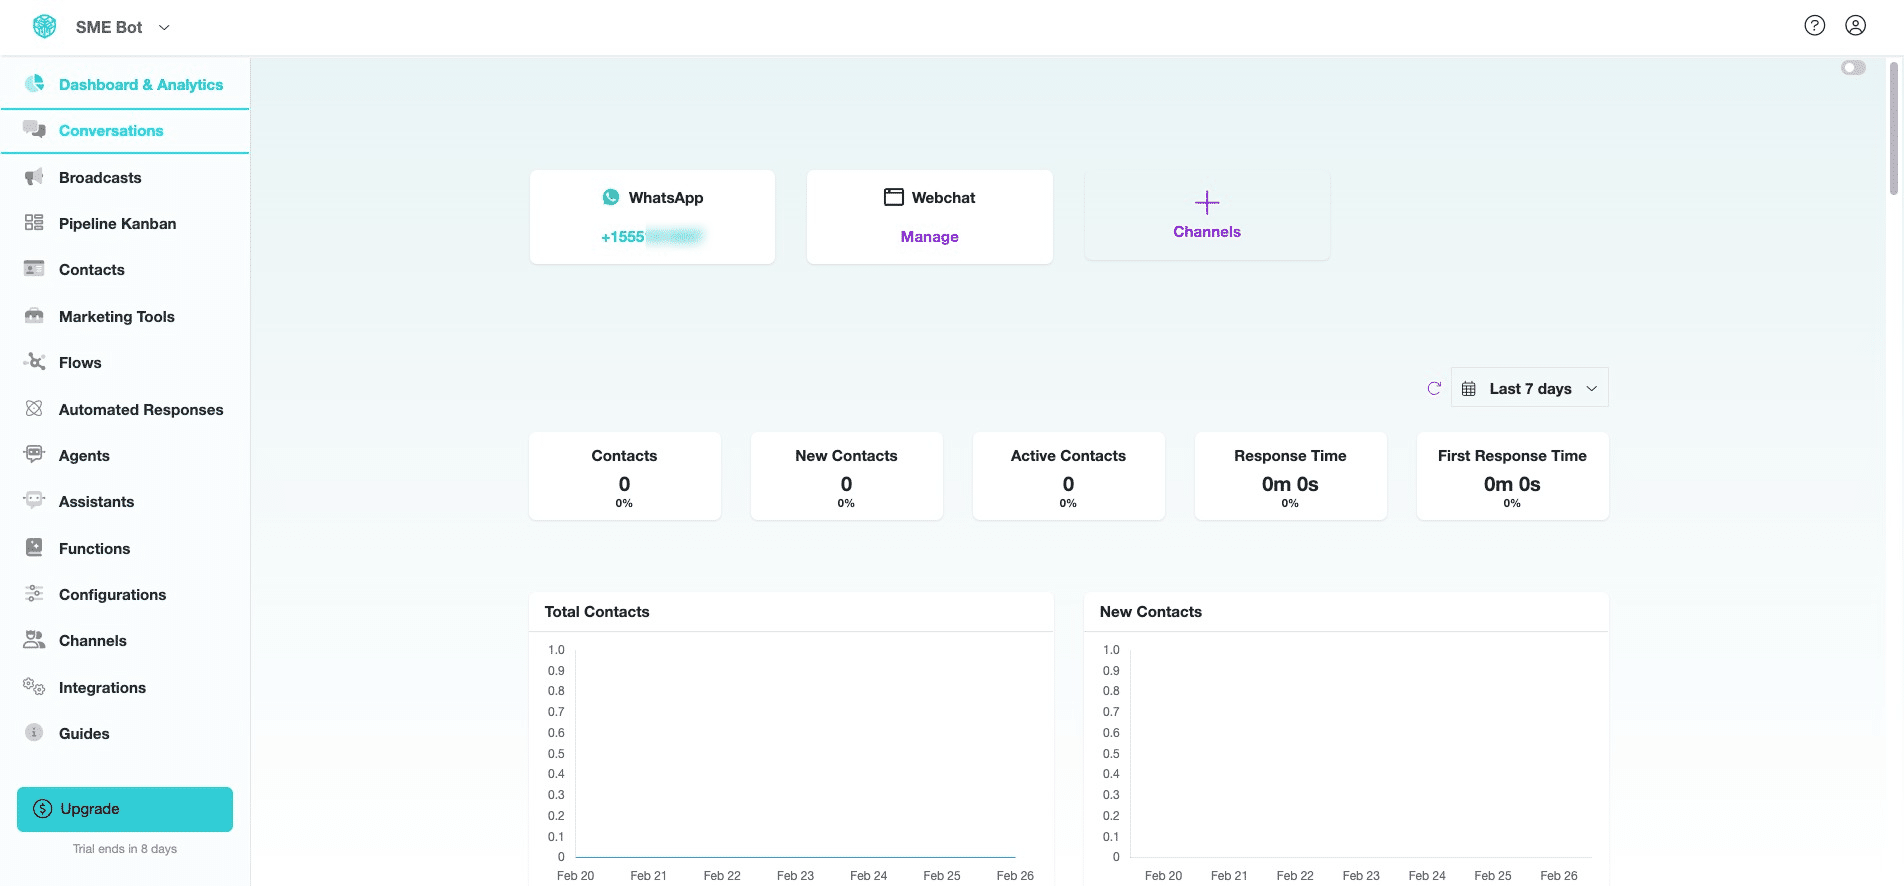
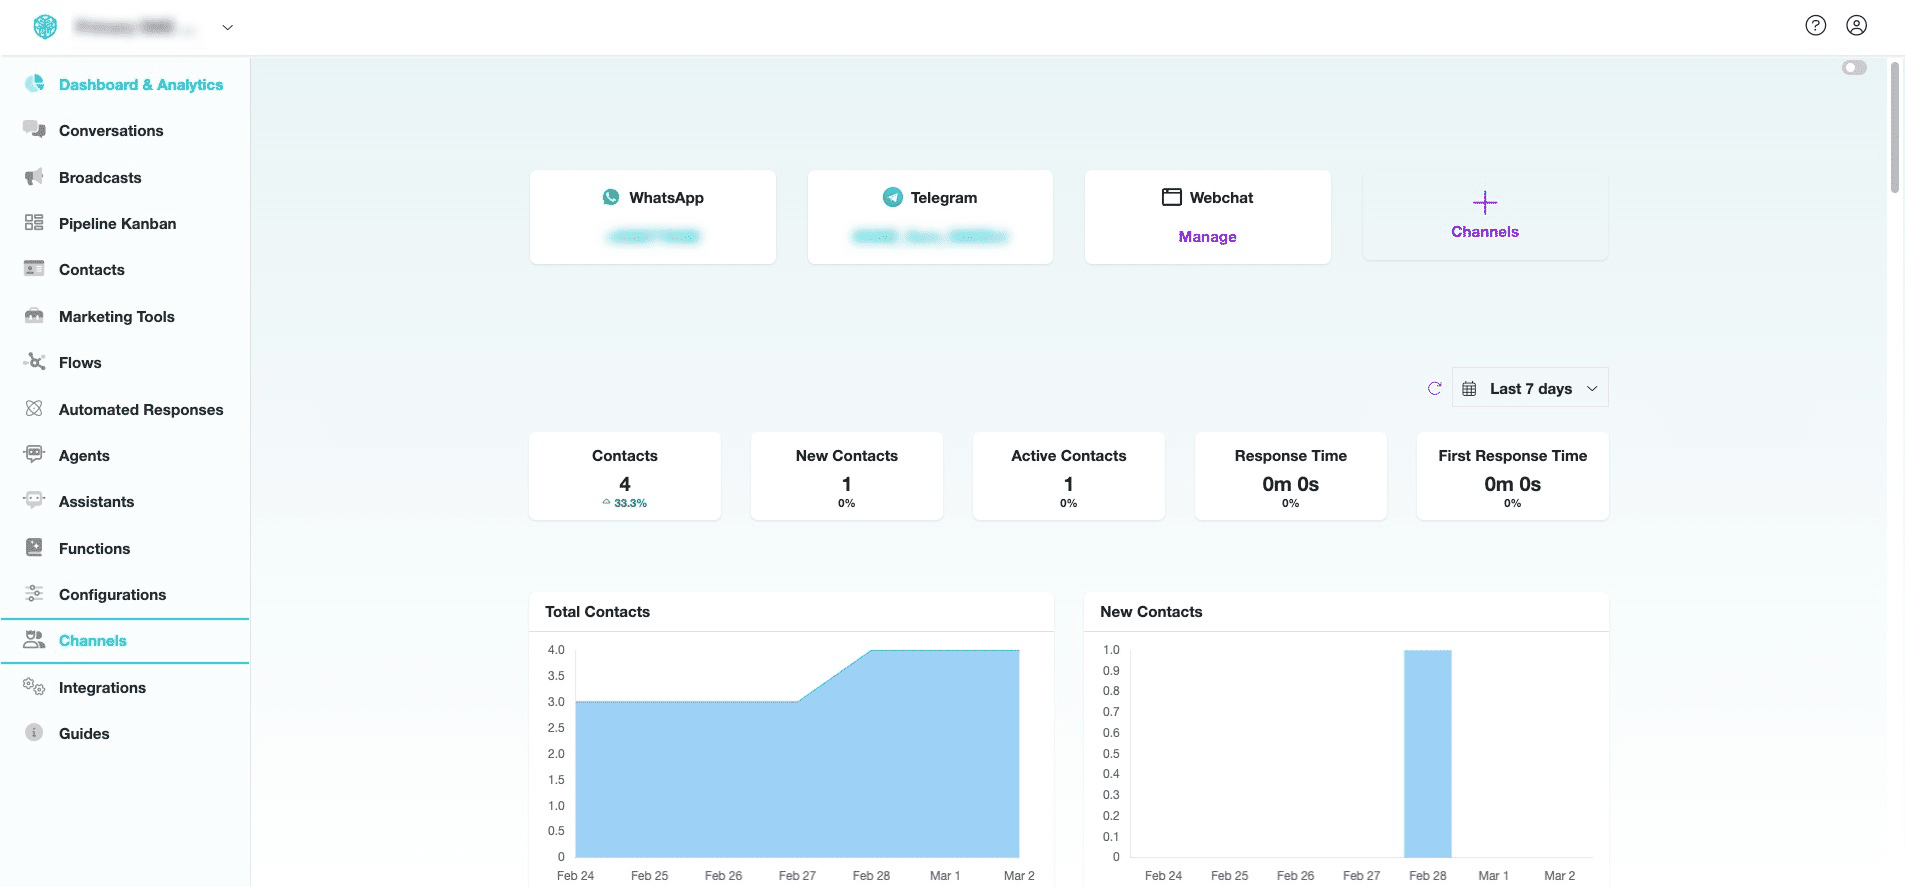
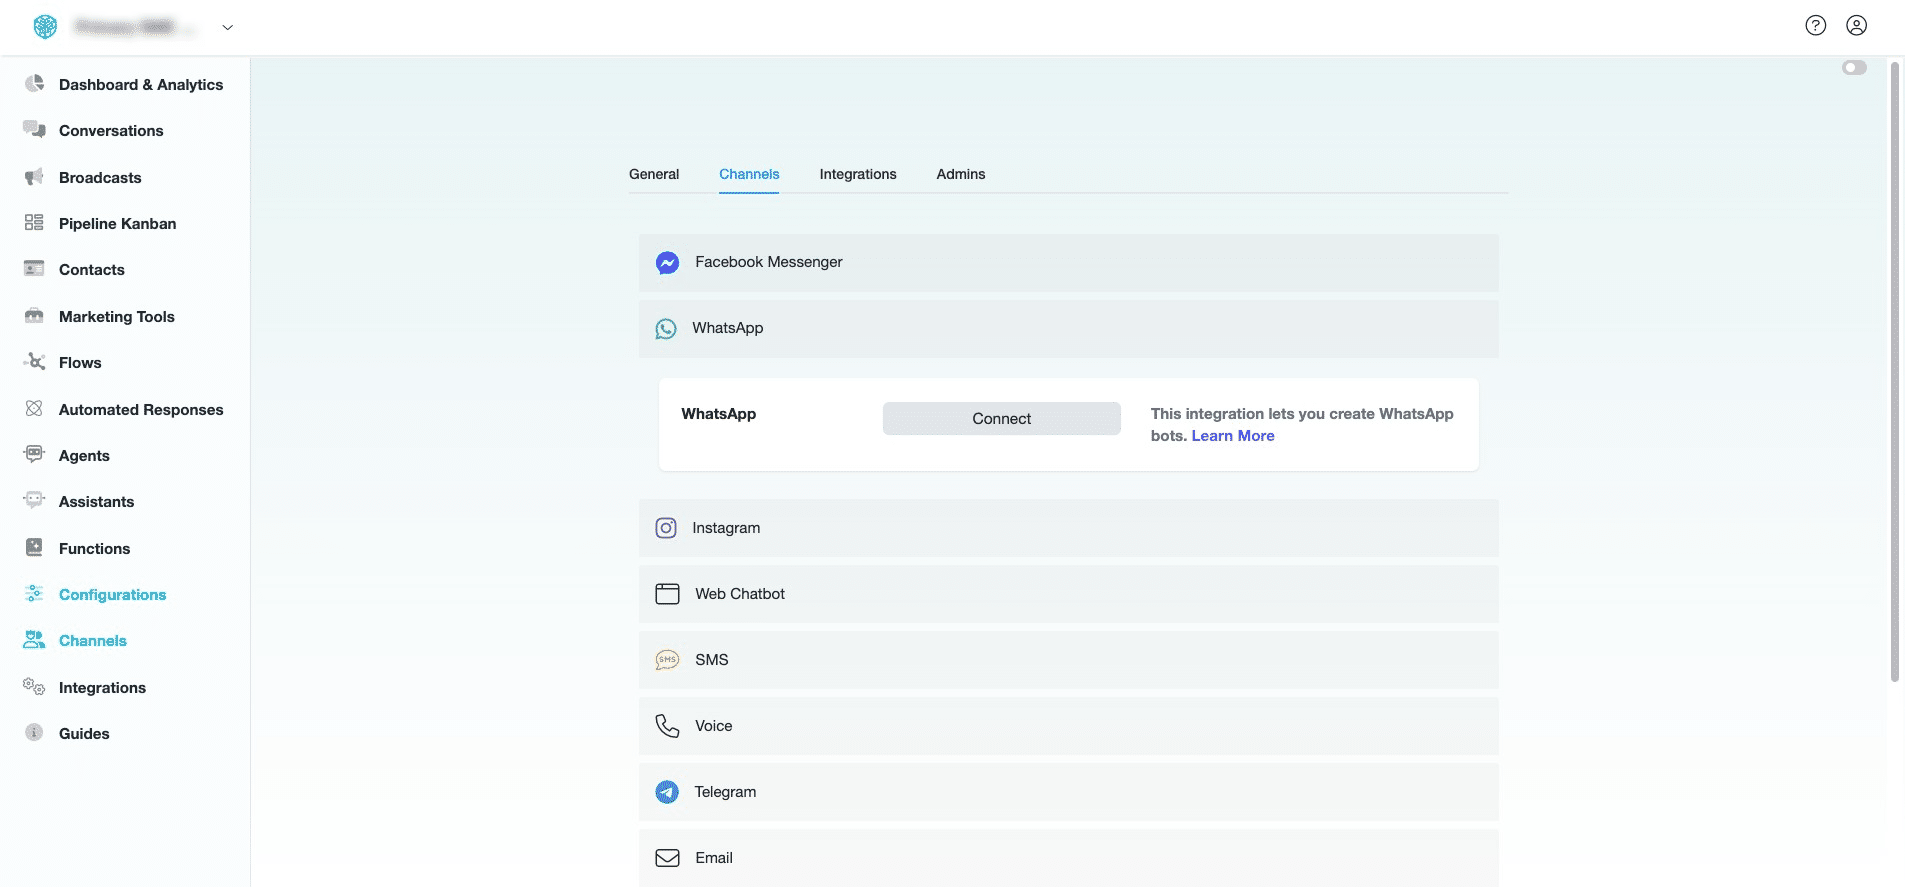
To start the process of creating your WhatsApp SME Bot, Navigate to your SME Bot, then click "Channels".
, then click "Channels".](https://assets.guidejar.com/uploads/7b36f163-21e4-4639-8aff-a61a5e2a3e9c/oP4PD8qOFVglaEHJwcYKbX5jyJh1/539bdf2e-efaf-4b15-bbb3-3574b90ece1a/1740459650432.jpeg)
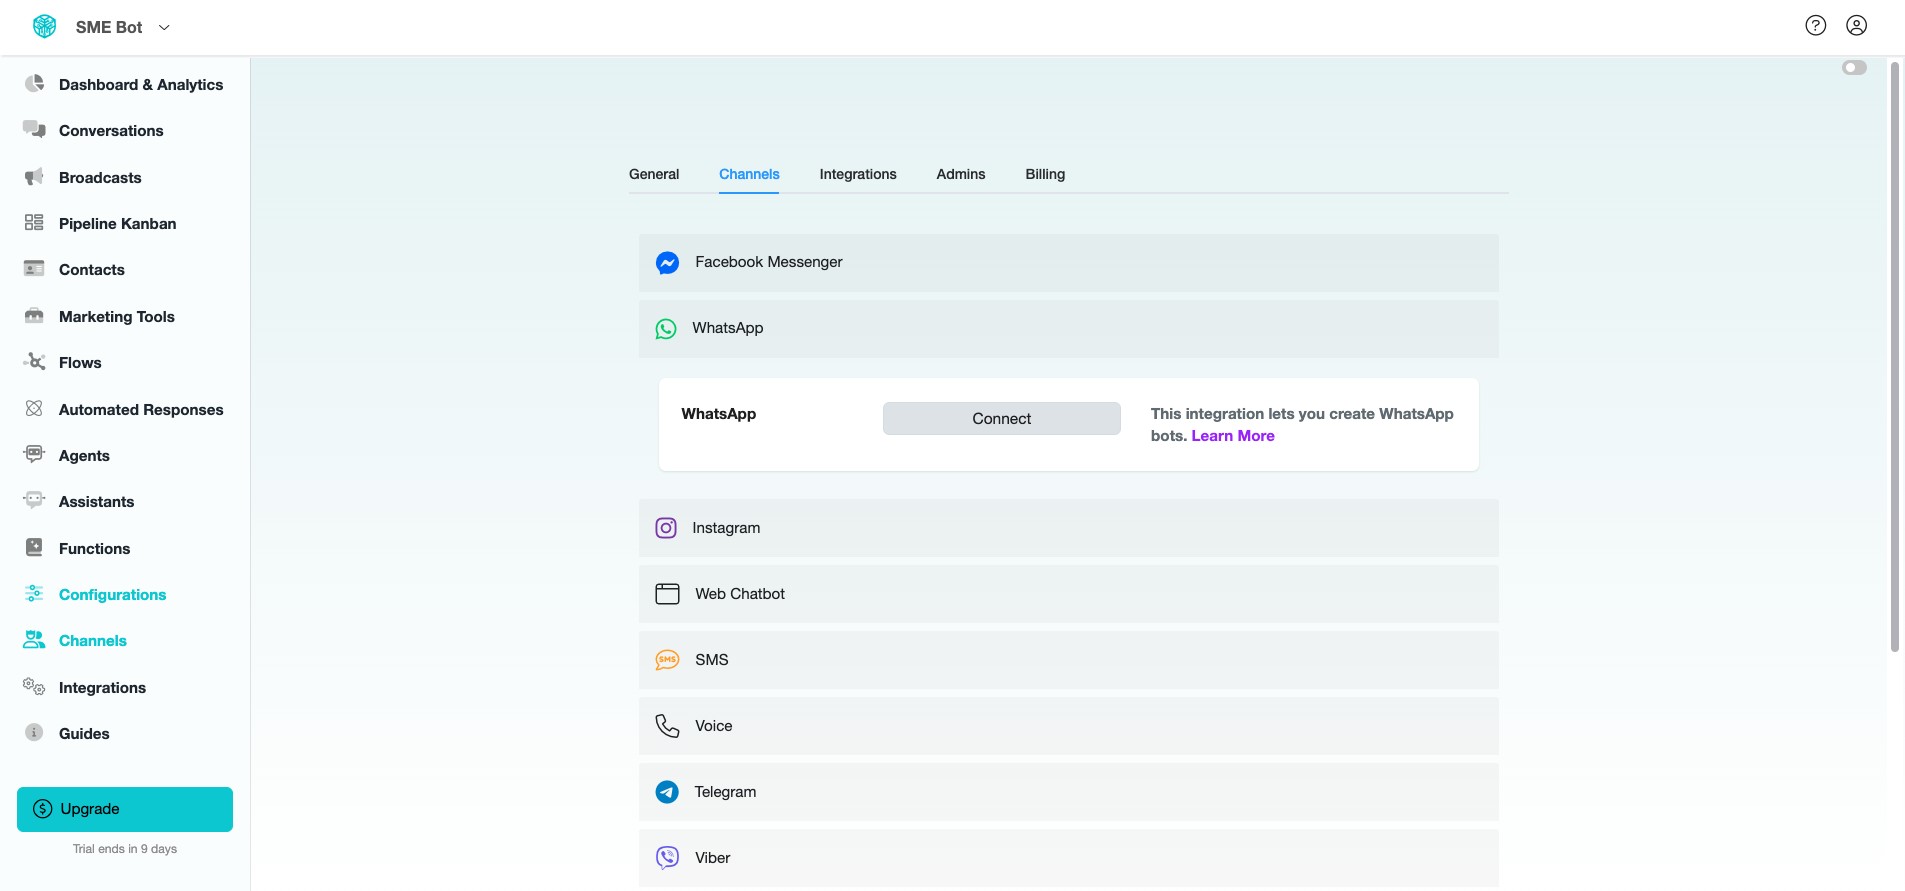
Click "WhatsApp"
Click "Connect"
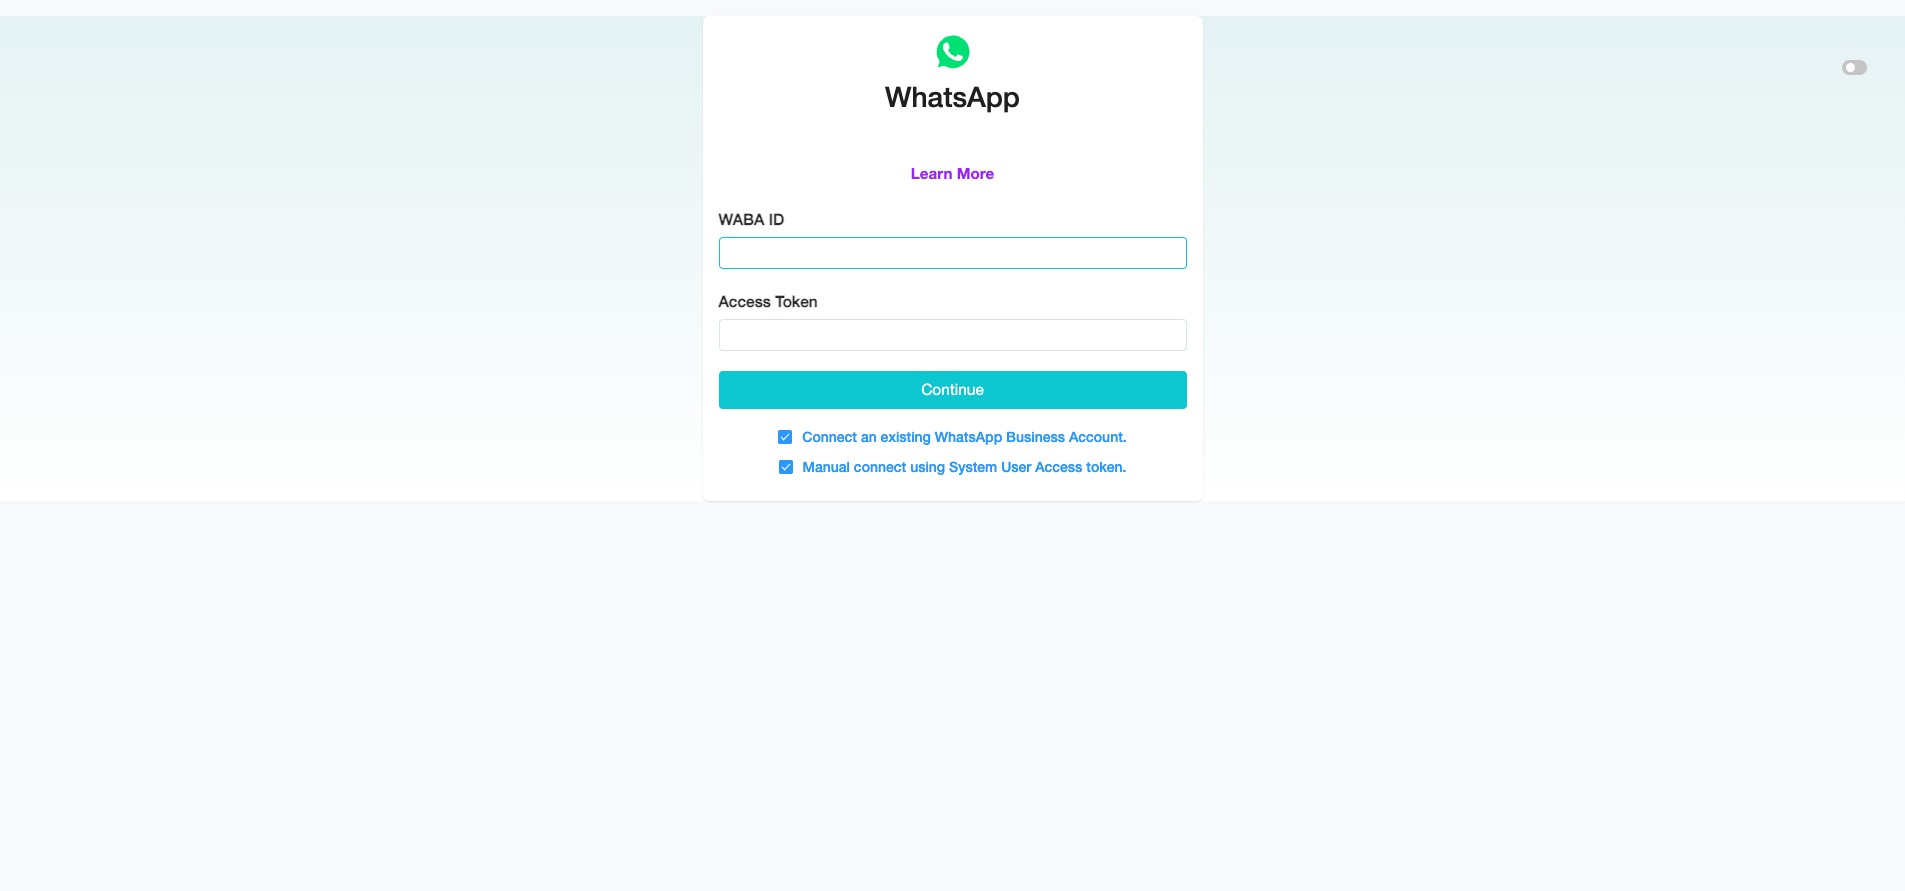
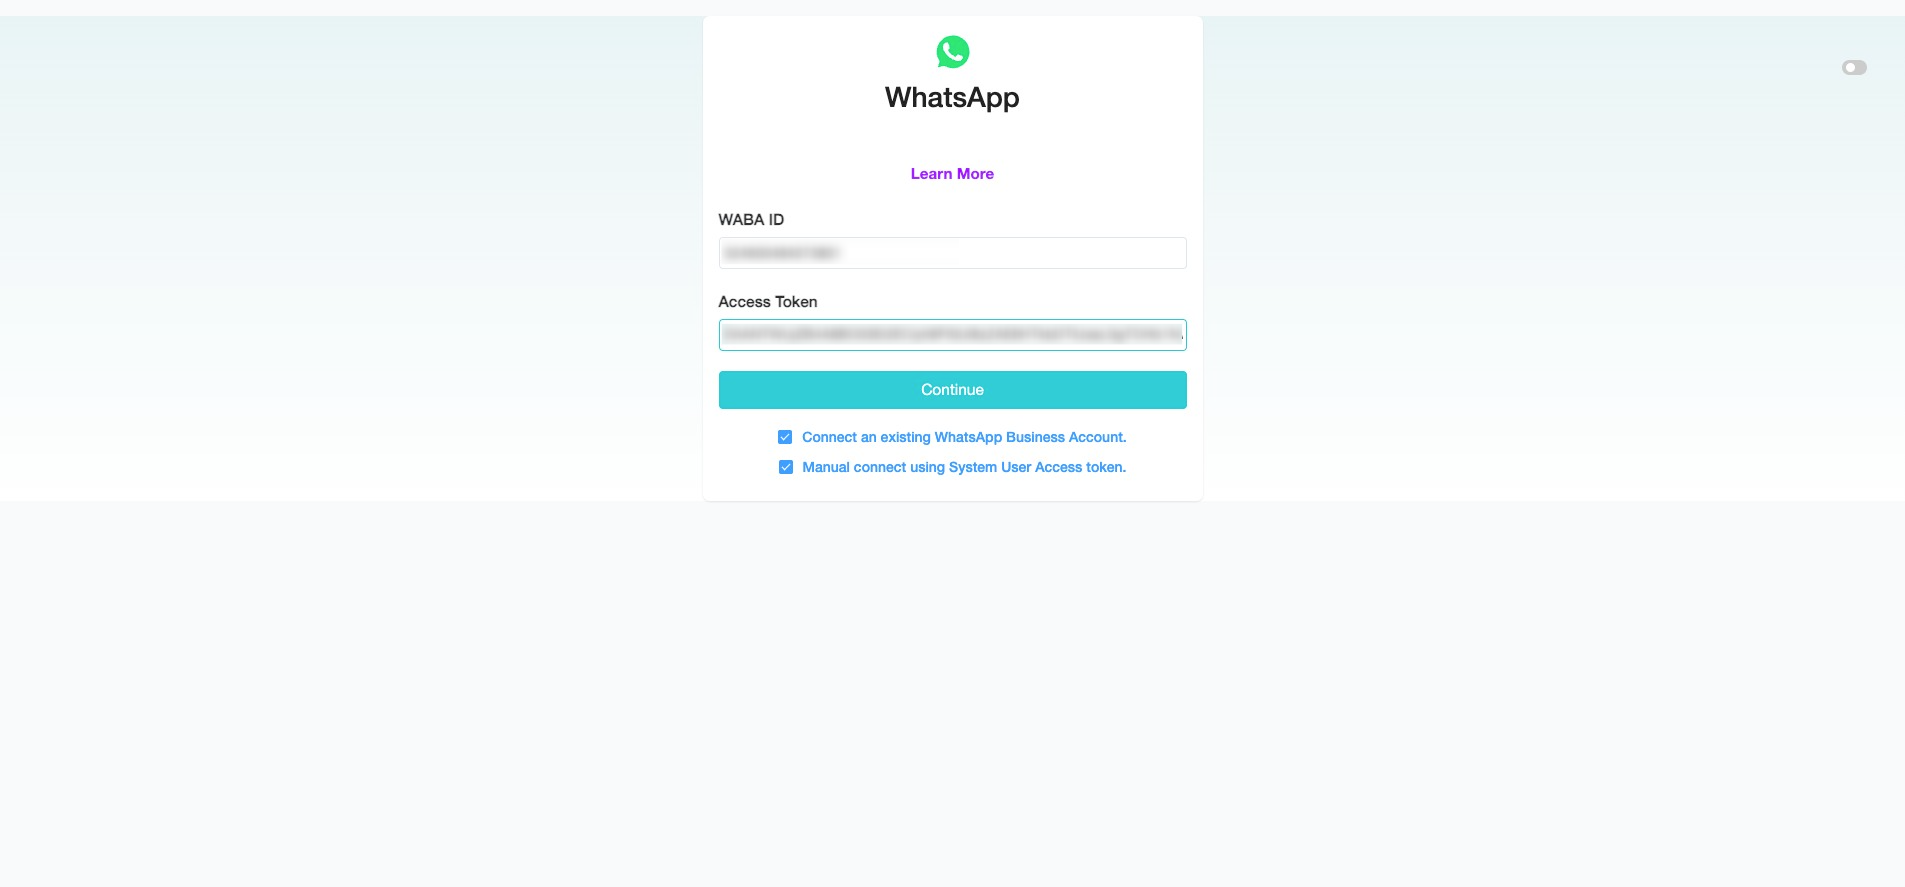
Select both "Connect an existing WhatsApp Business Account" and "Manual connect using System User Access token".
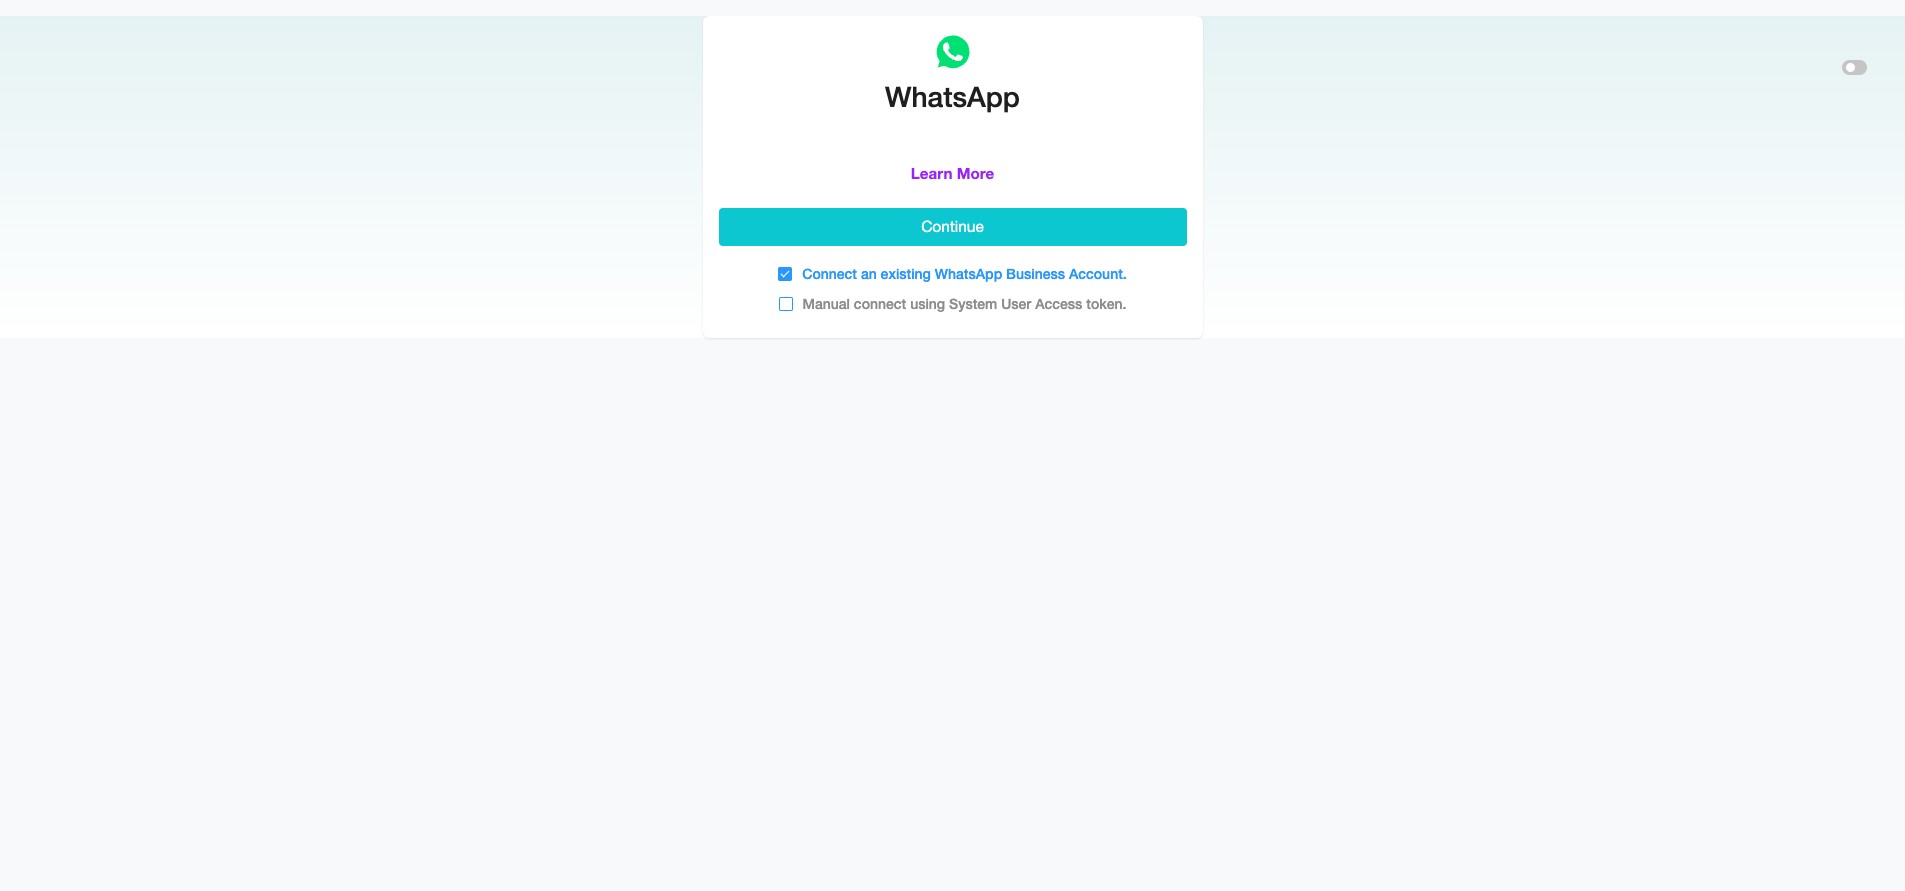
You will need to provide your WhatsApp Business Account (WABA) ID and Access Token (Permanent).
To get your WhatsApp Business Account (WABA) ID, go to Facebook Developers, copy the WABA ID, and paste it into your SME Bot.
, copy the WABA ID, and paste it into your SME Bot.](https://assets.guidejar.com/uploads/7b36f163-21e4-4639-8aff-a61a5e2a3e9c/oP4PD8qOFVglaEHJwcYKbX5jyJh1/1793d4e2-185a-4469-a532-615f44e26b1d/1740560002095.jpeg)
At Facebook Developers, click "Configuration" and scroll down to "Learn how to create a permanent token".
In the Facebook Business Management API article, it outlines the requirements to generate your Access Token.
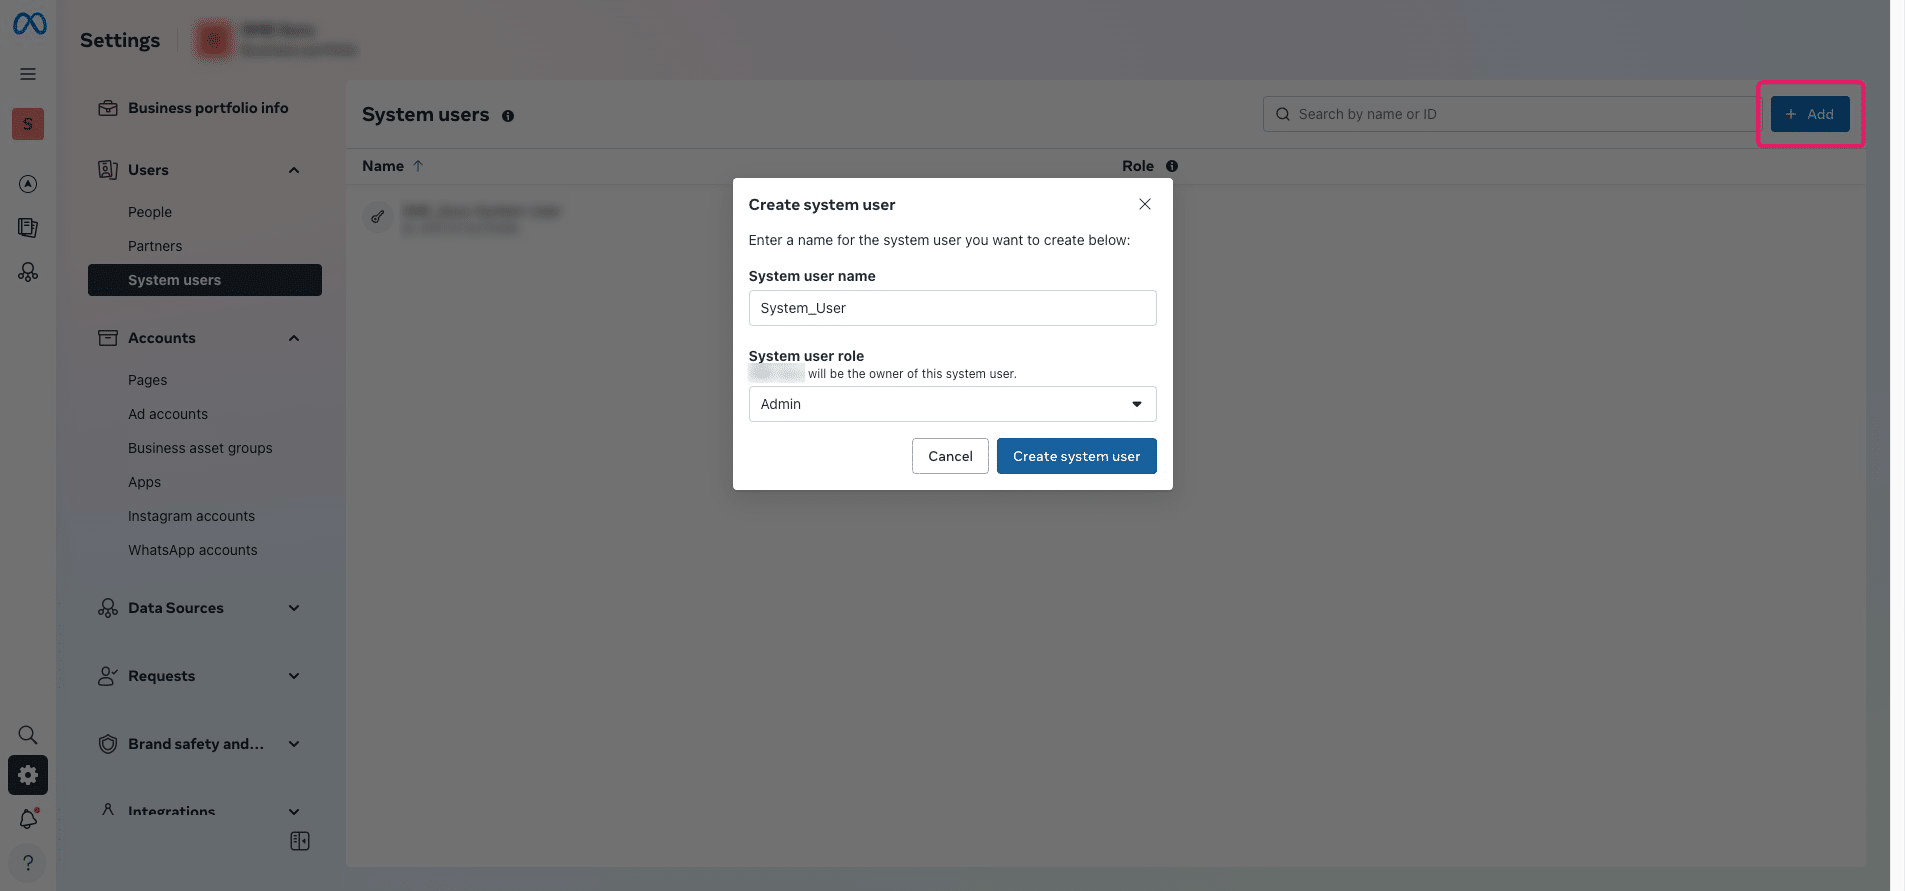
Scroll to "Generating System User Access Tokens" to understand the steps for obtaining your Access Token. The following steps will guide you in creating a System User in Meta Business Portfolio to generate an Access Token that never expires.

Navigate to Meta Business Portfolio, select or create the business portfolio you want to associate with WhatsApp. Once done, go to "Settings," then under "Users," click "System Users".
, select or create the business portfolio you want to associate with WhatsApp. Once done, go to "Settings," then under "Users," click "System Users".](https://assets.guidejar.com/uploads/7b36f163-21e4-4639-8aff-a61a5e2a3e9c/oP4PD8qOFVglaEHJwcYKbX5jyJh1/75e7f5ff-6210-4085-b80f-0dd1d9d0d560/1740468104049.jpeg)
Click "Add," provide the System User Name, and select the System User Role as "Admin." Then, click "Create System User" to complete the process.
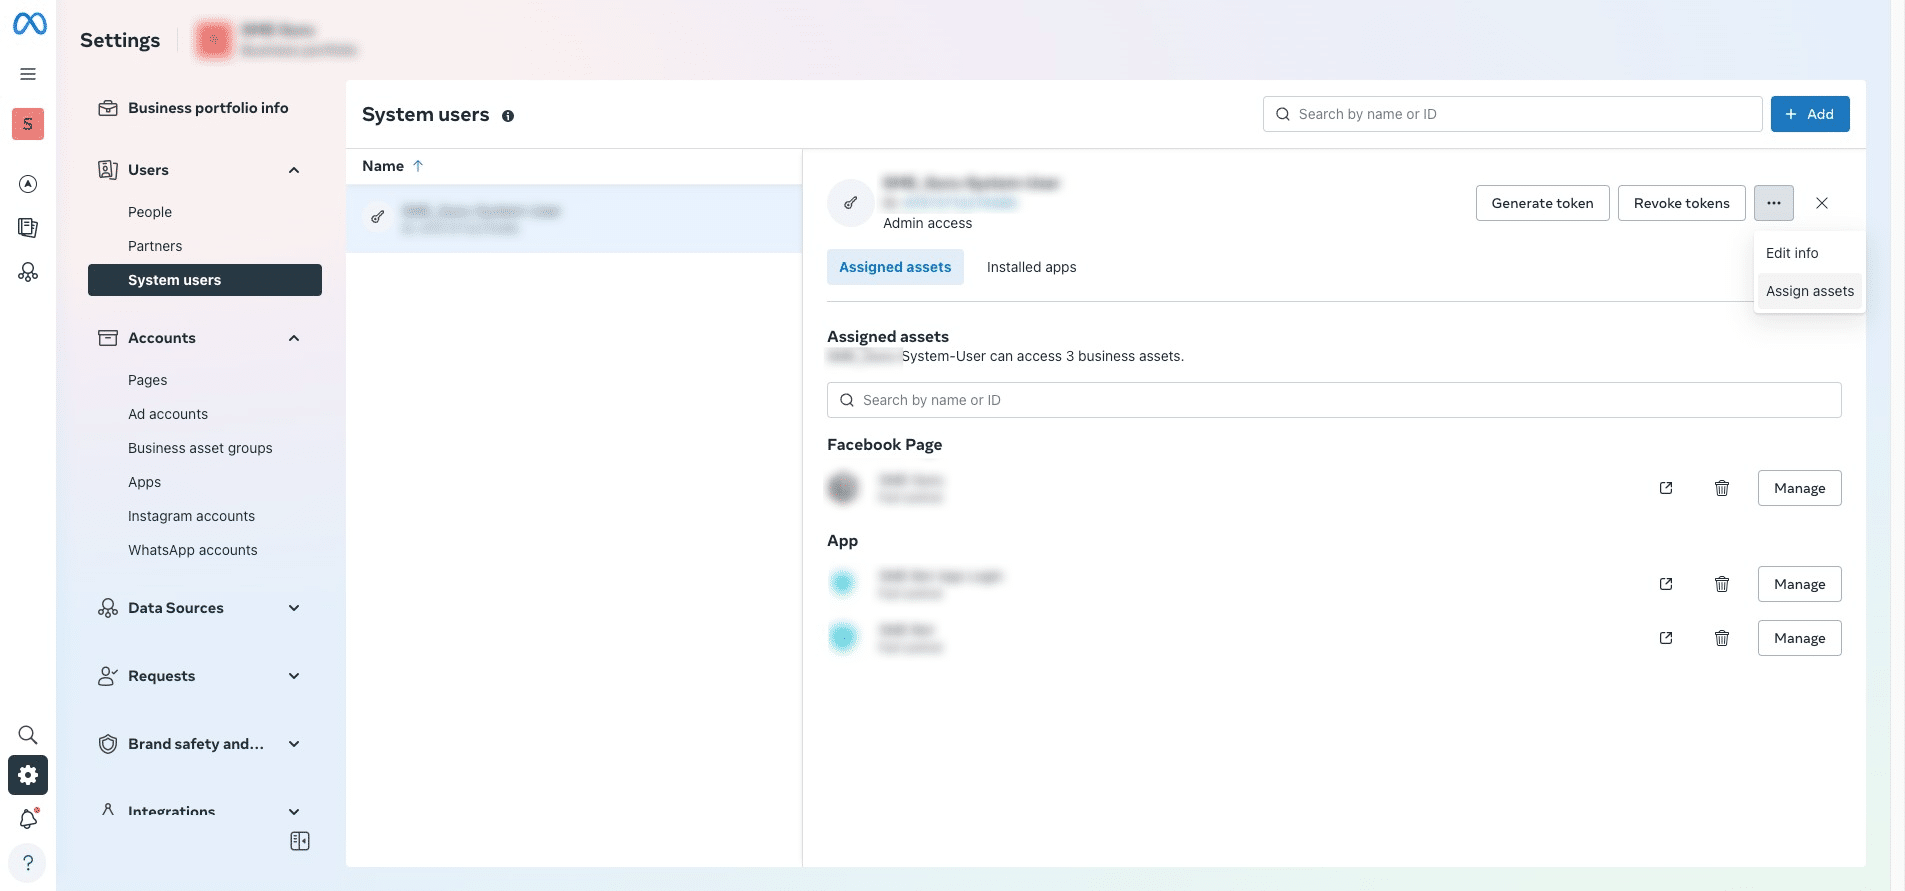
Click the three dots (...) and select "Assign Assets".
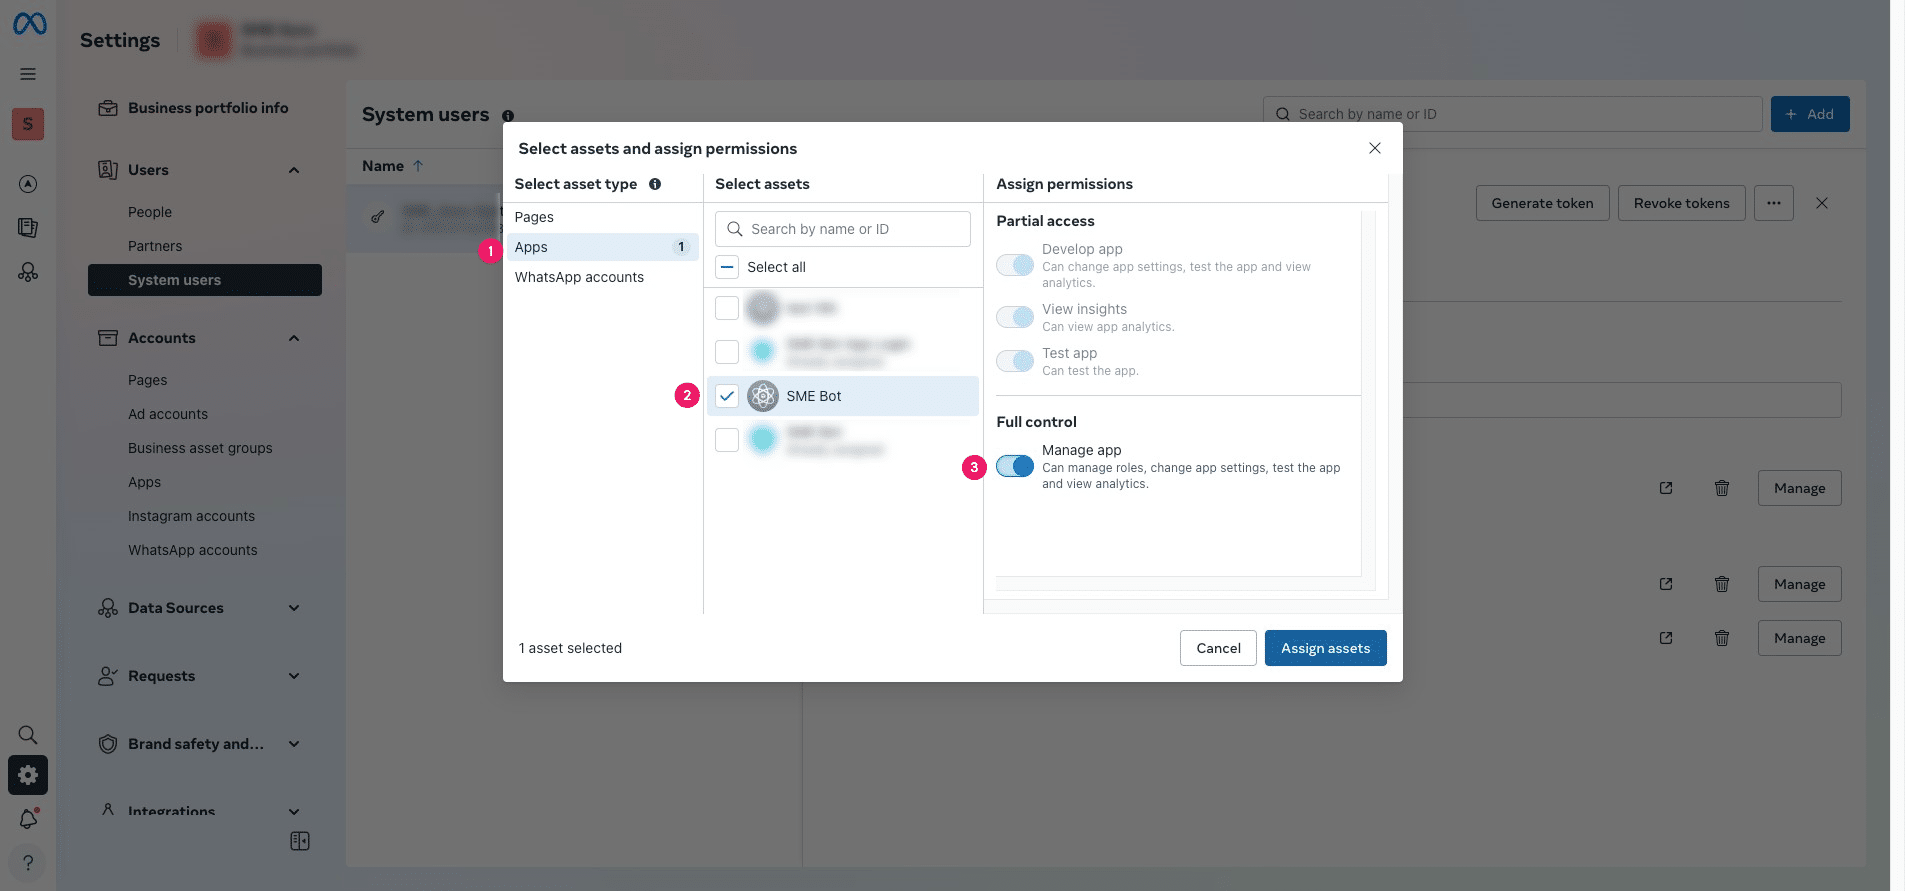
Click "Apps," select "Assets," and grant Full Control. Then, click "Assign Assets" to complete the selection.
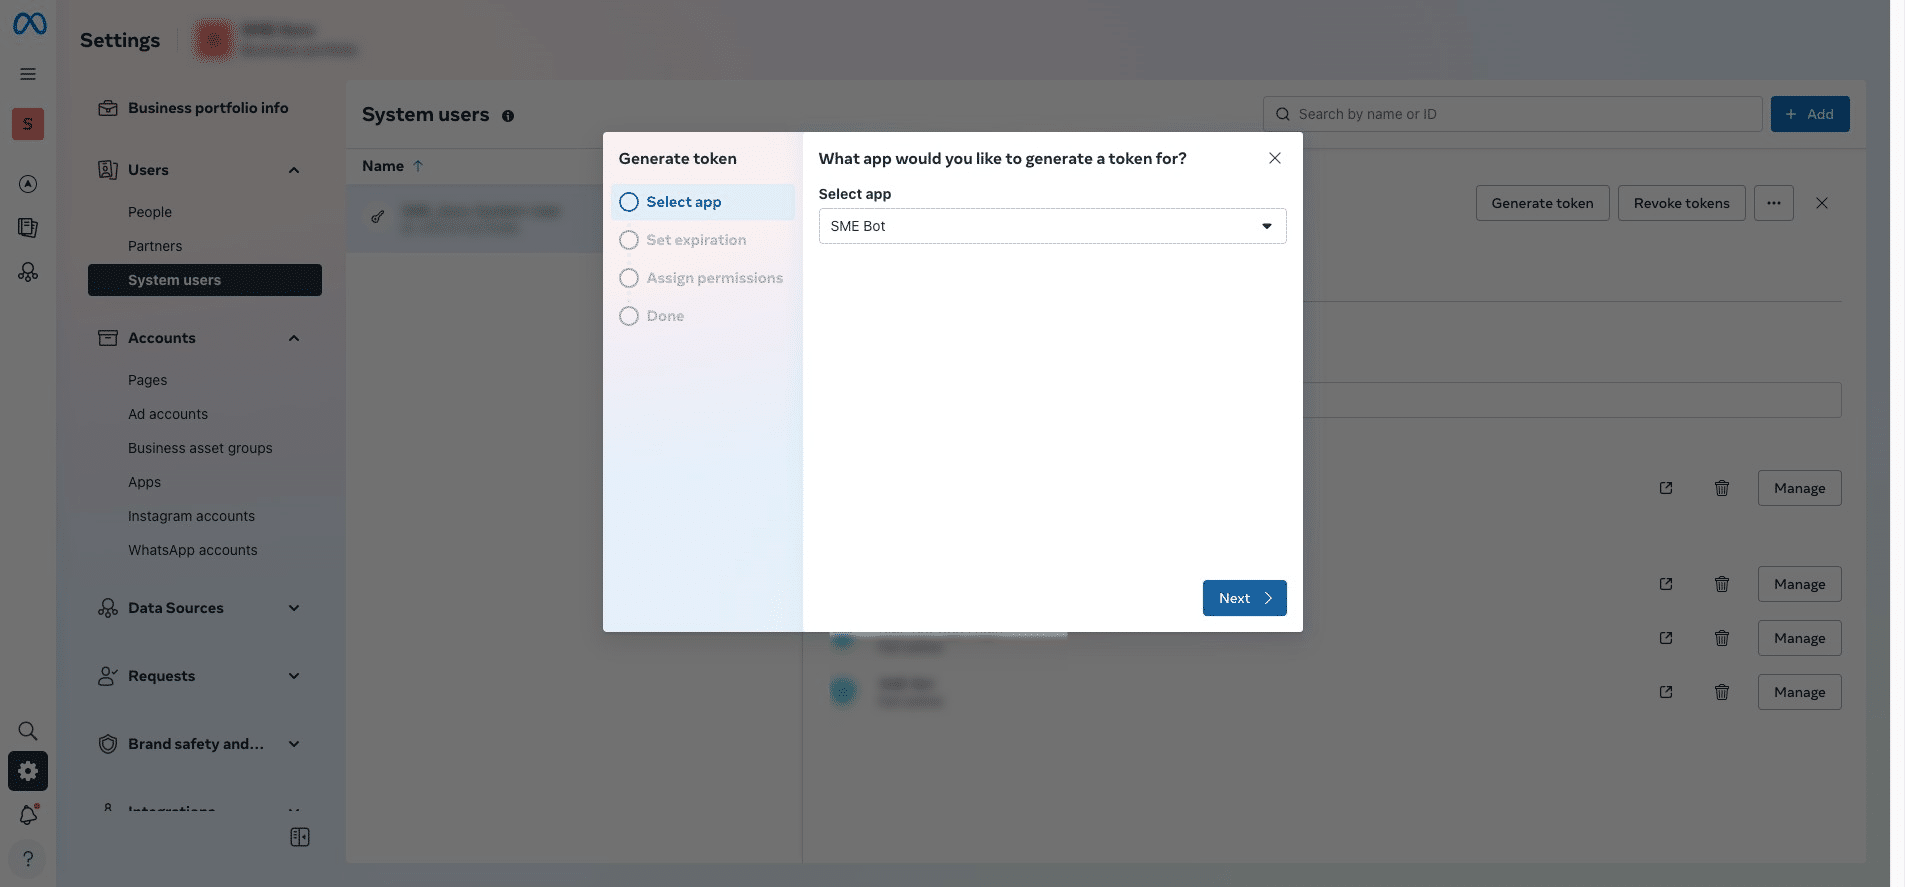
Click "Generate Token"
To generate the Access Token, select the app you created earlier, then click "Next".
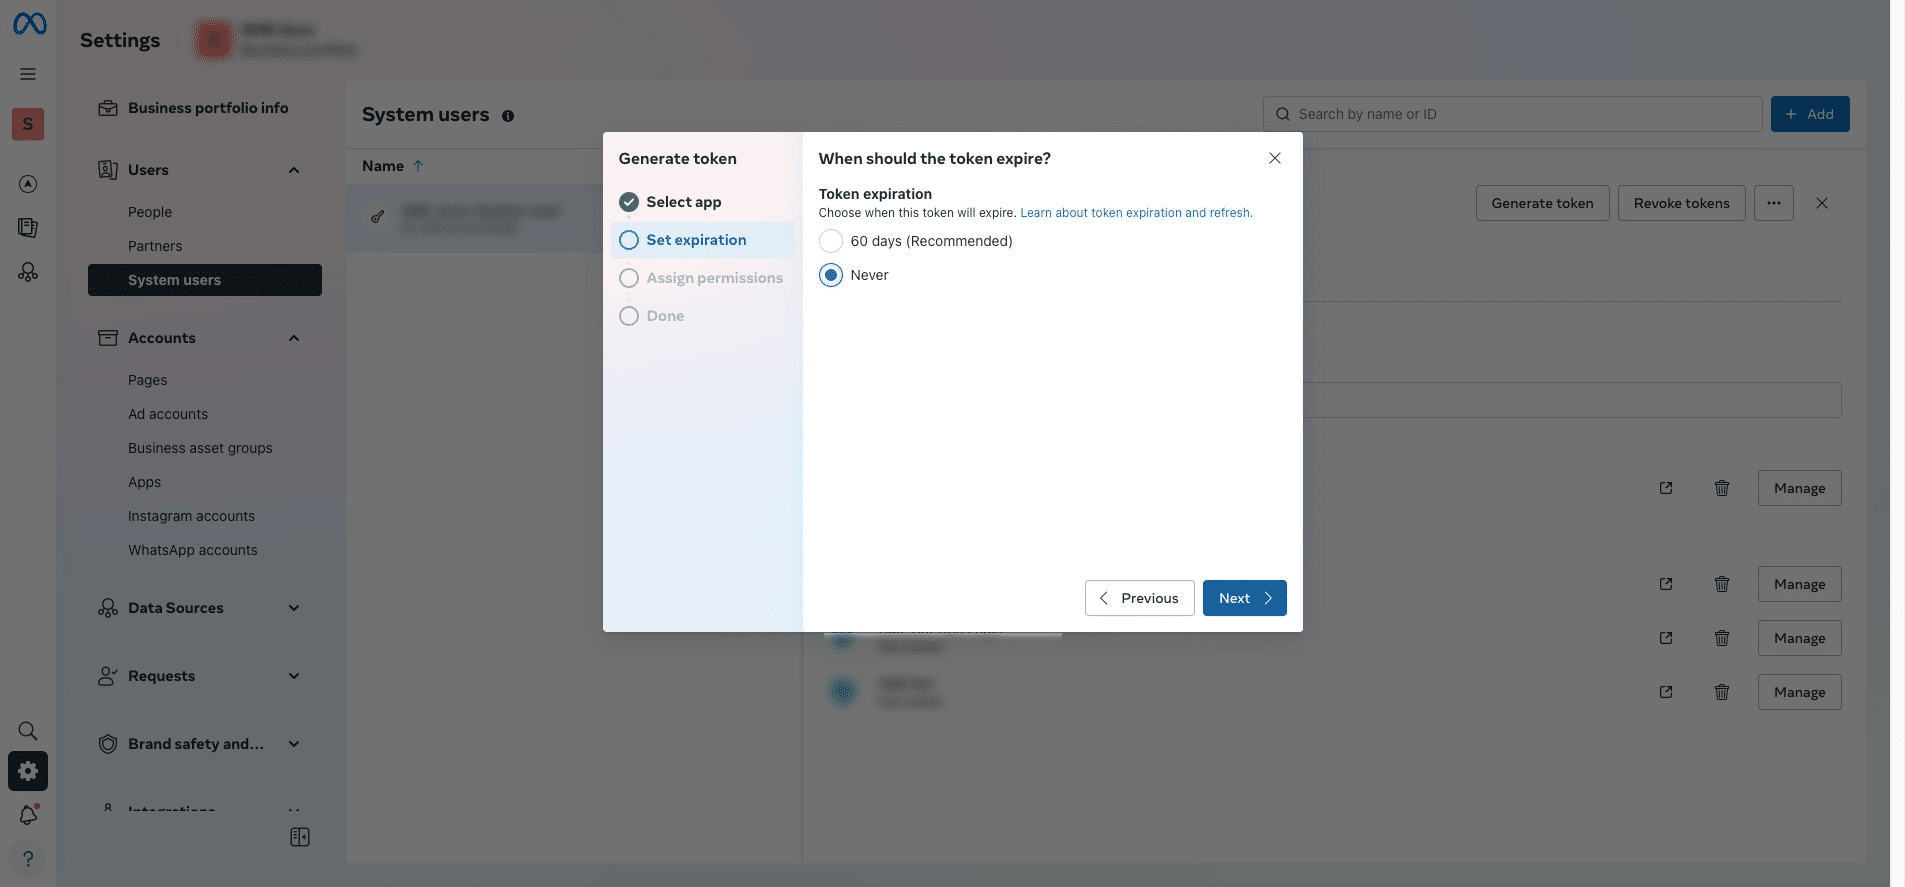
Select Token Expiration as "Never," then click "Next."
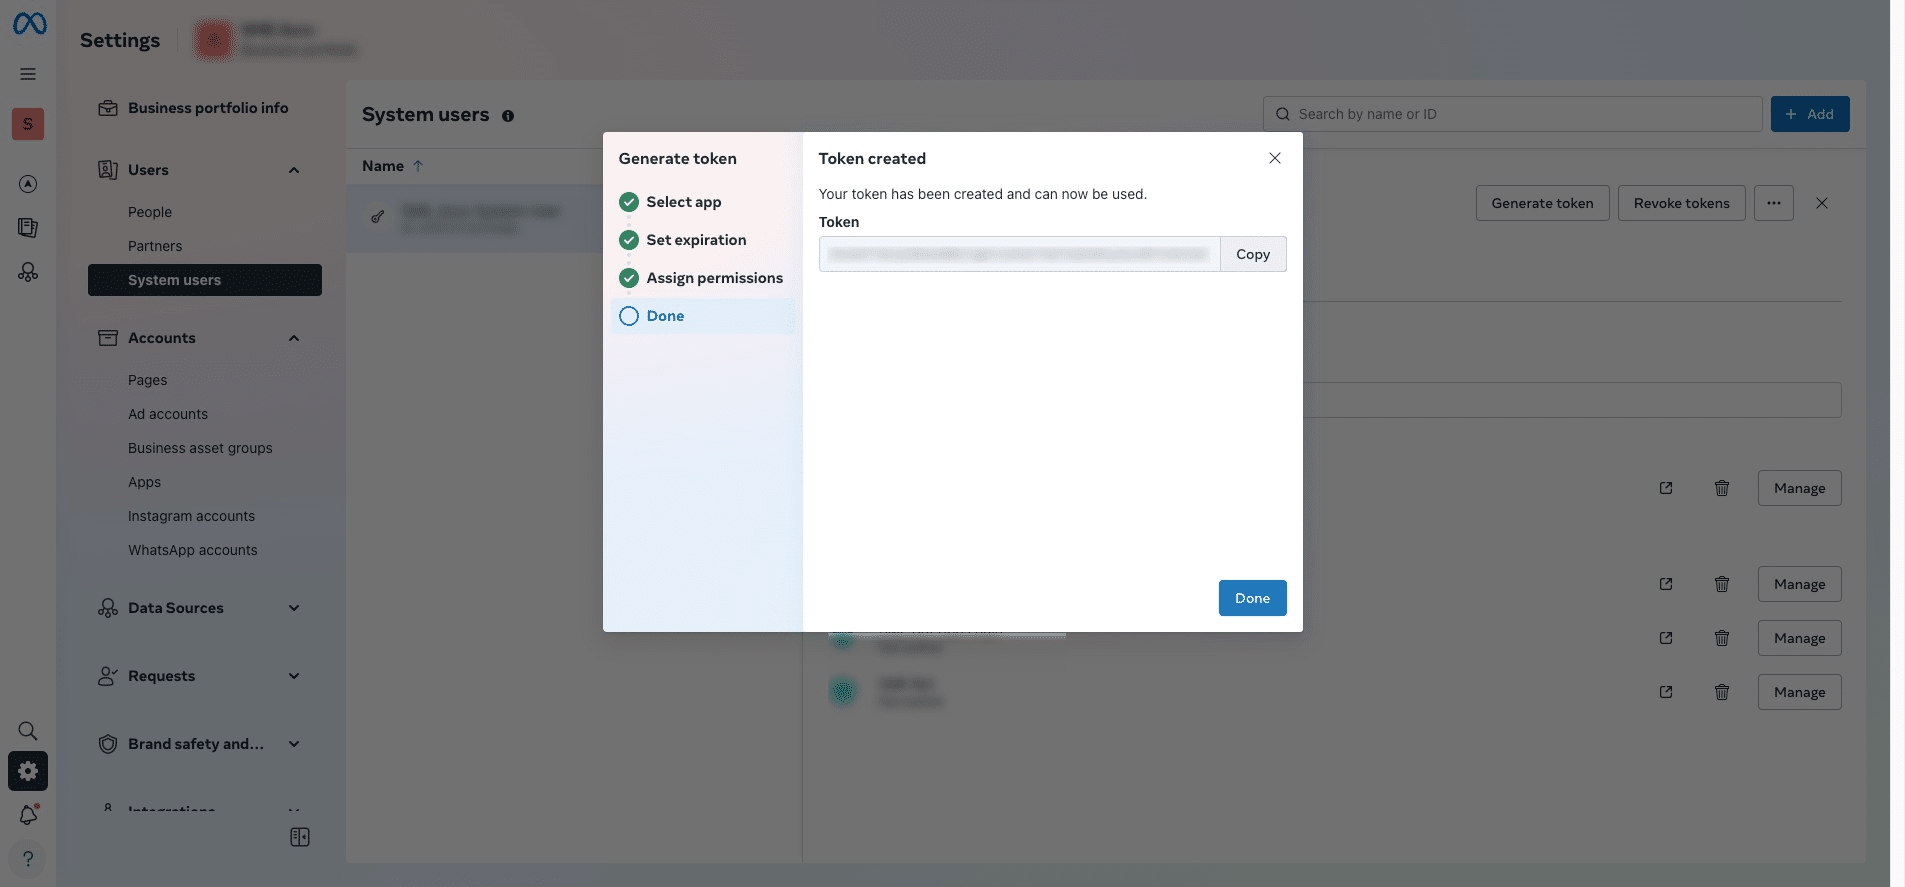
Assign and grant these permissions: "business_management", "whatsapp_business_messaging", and "whatsapp_business_management". Then click "Generate token".

Copy the generated Access Token Code and paste it into your SME Bot.
Once you have entered both the WABA ID and Access Token in your SME Bot account, click "Continue".
At the Select Phone Number, click "Connect".

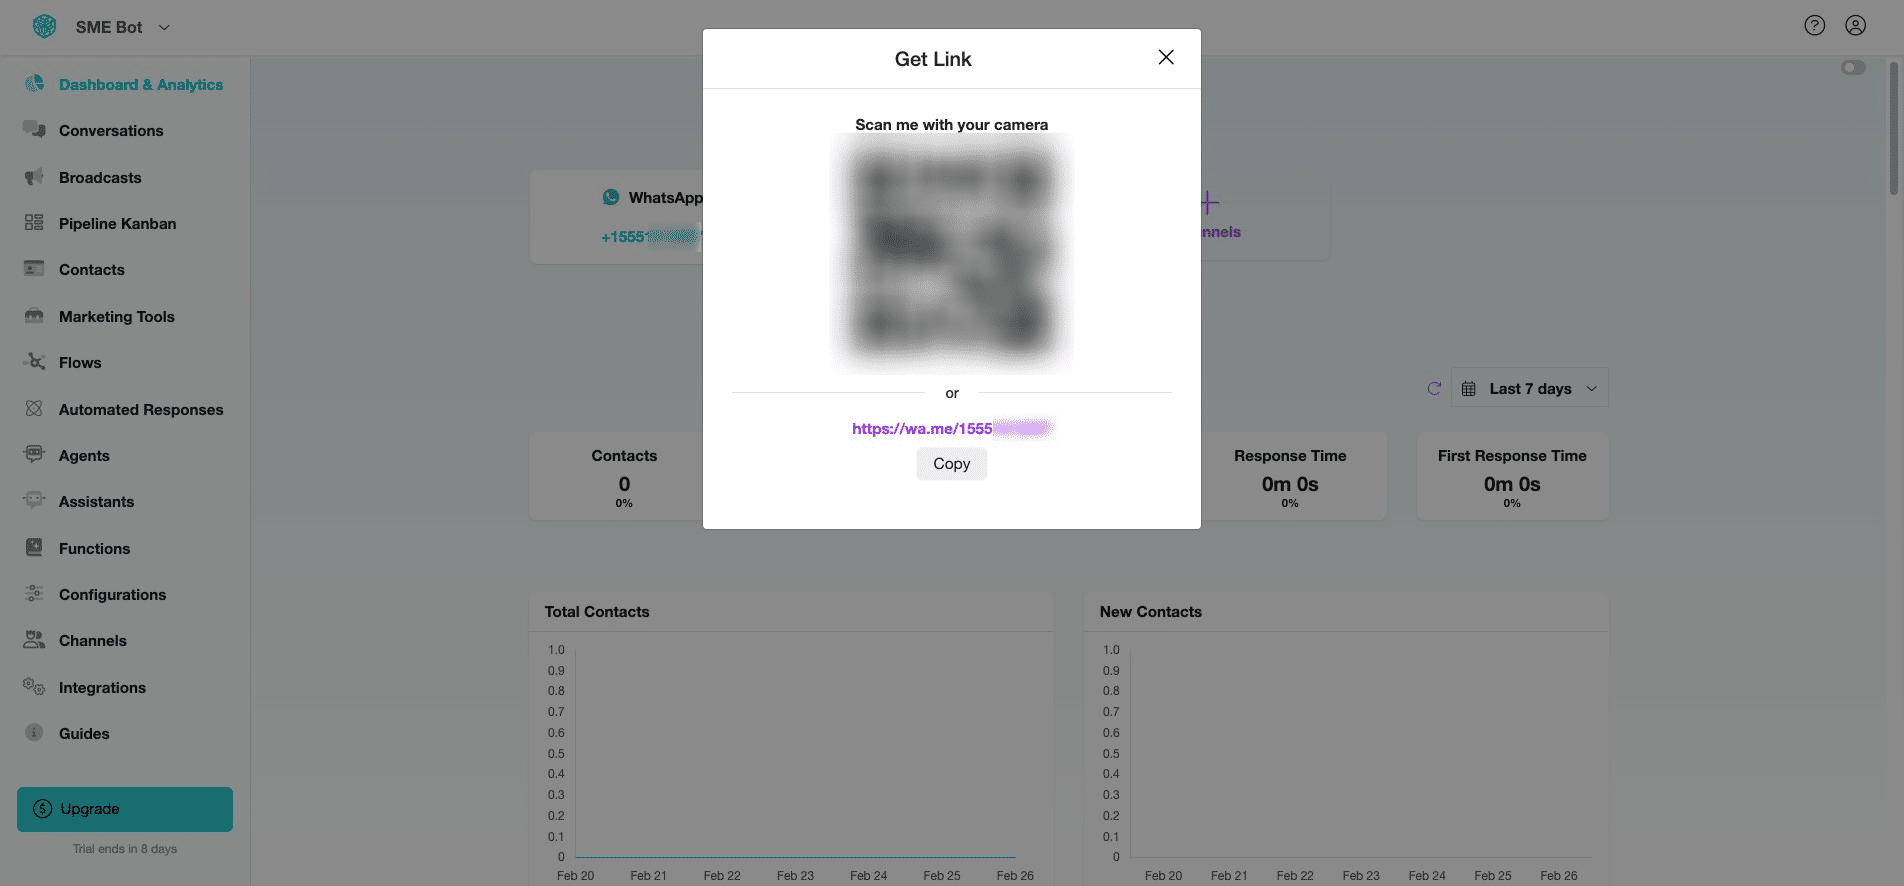
You've successfully connected your SME Bot to the Facebook Test Number. Click on the WhatsApp number to generate a link or QR Code for testing.
A pop-up will appear, allowing you to copy the link or scan the QR Code to initiate a chat with the WhatsApp number.
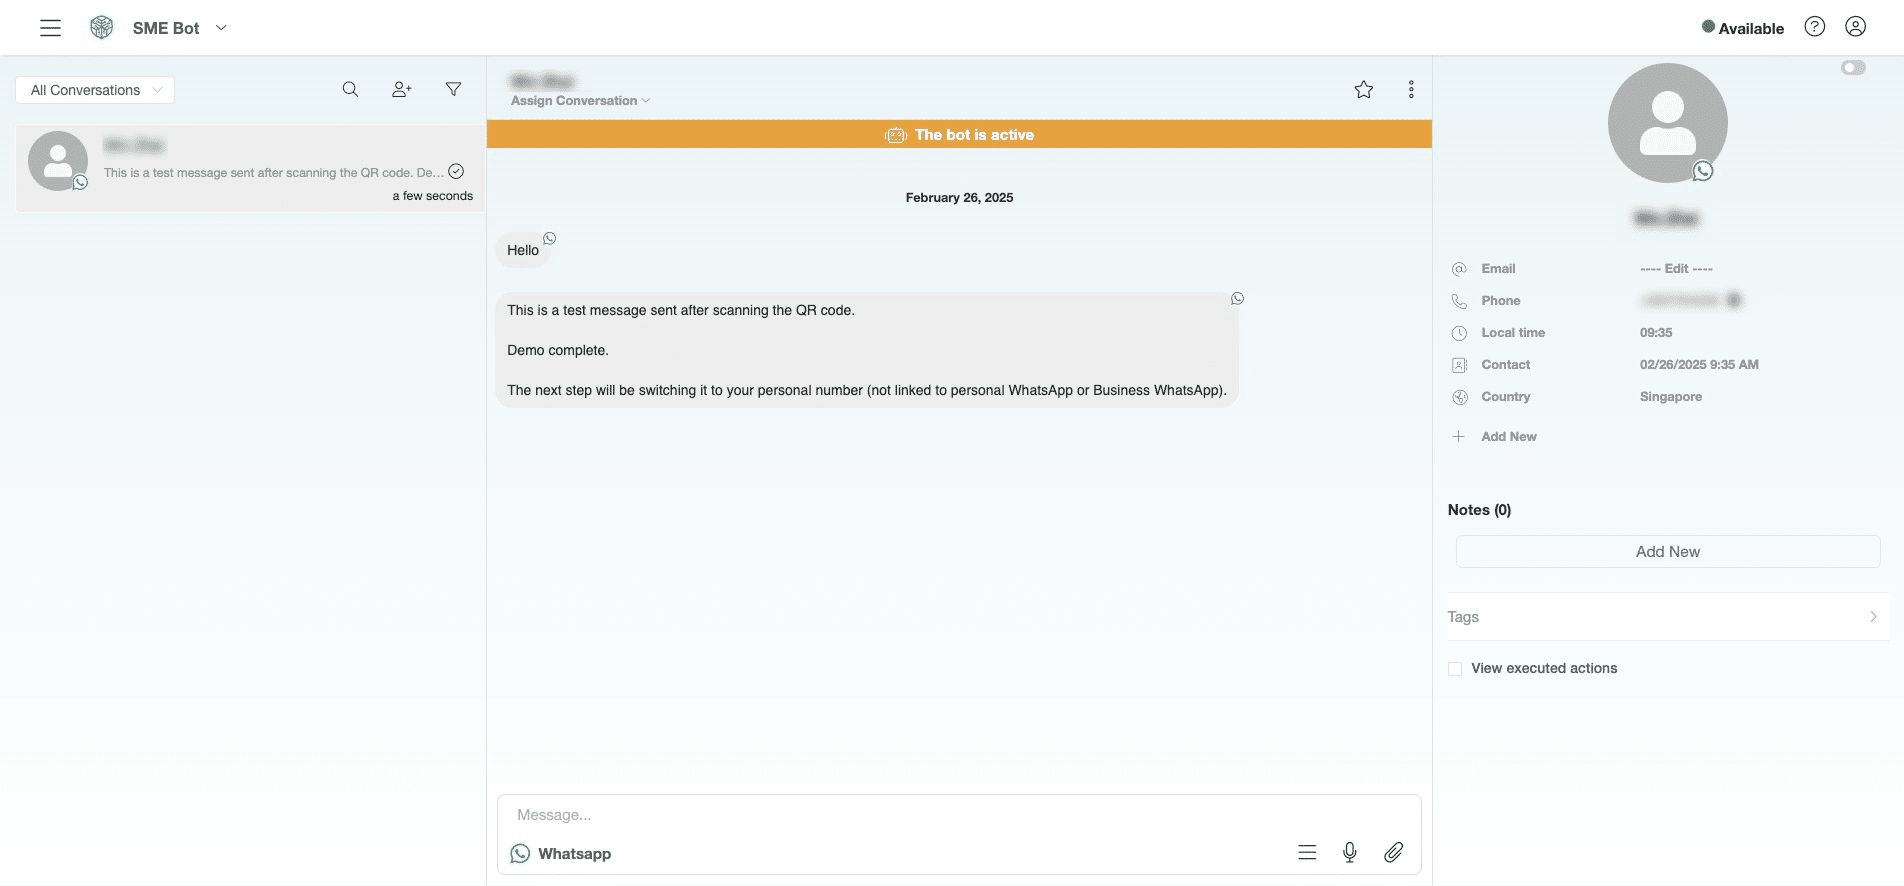
Click "Conversations" to view the chat.
Successfully received a chat message from user. Please note that no flow or AI has been created or connected yet, so the AI is not replying in this guide.
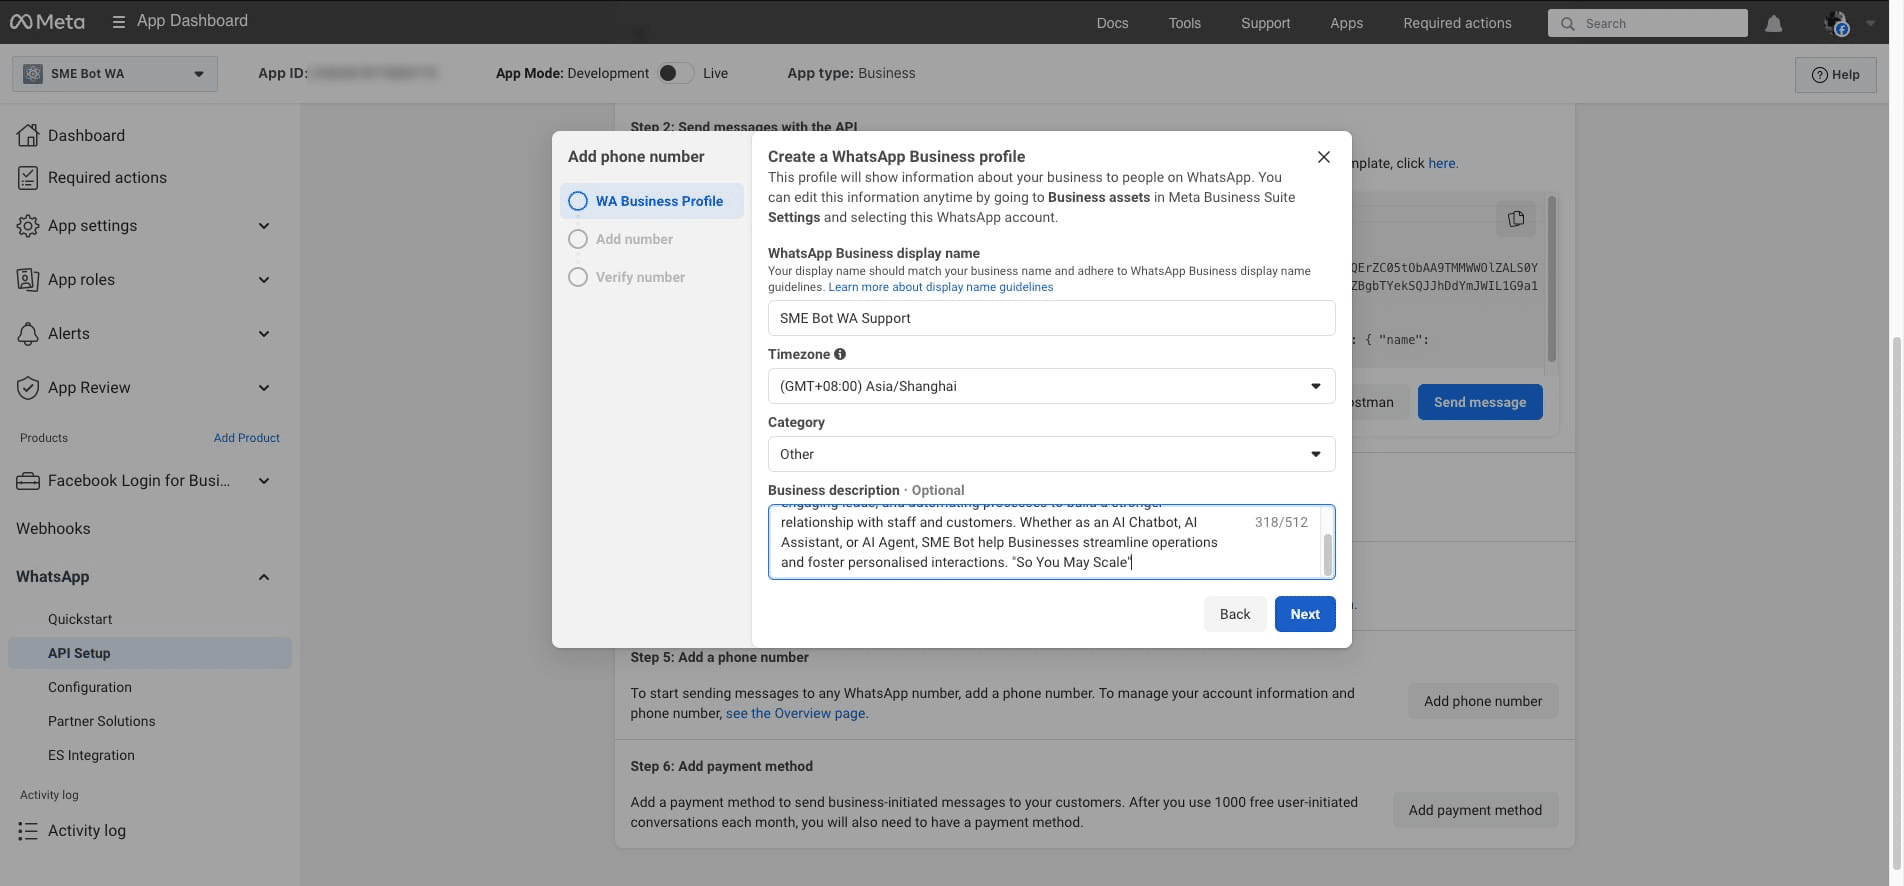
Next, switch to a personal number. Go to Facebook Developers. Under WhatsApp API Setup, click "Add phone number" and a pop-up will appear, allowing you to create your WhatsApp Business Profile.
. Under WhatsApp API Setup, click "Add phone number" and a pop-up will appear, allowing you to create your WhatsApp Business Profile.](https://assets.guidejar.com/uploads/7b36f163-21e4-4639-8aff-a61a5e2a3e9c/oP4PD8qOFVglaEHJwcYKbX5jyJh1/6aa2fea2-2704-45e6-ab57-83a32d474c7c/1740559561786.jpeg)
Provide your WhatsApp Business Display Name, preferred Timezone, Business Category, and Business Description, then click "Next."
To add a phone number for WhatsApp, select the country code, enter the phone number, choose the verification method, and then click "Next" to verify the number you provided.
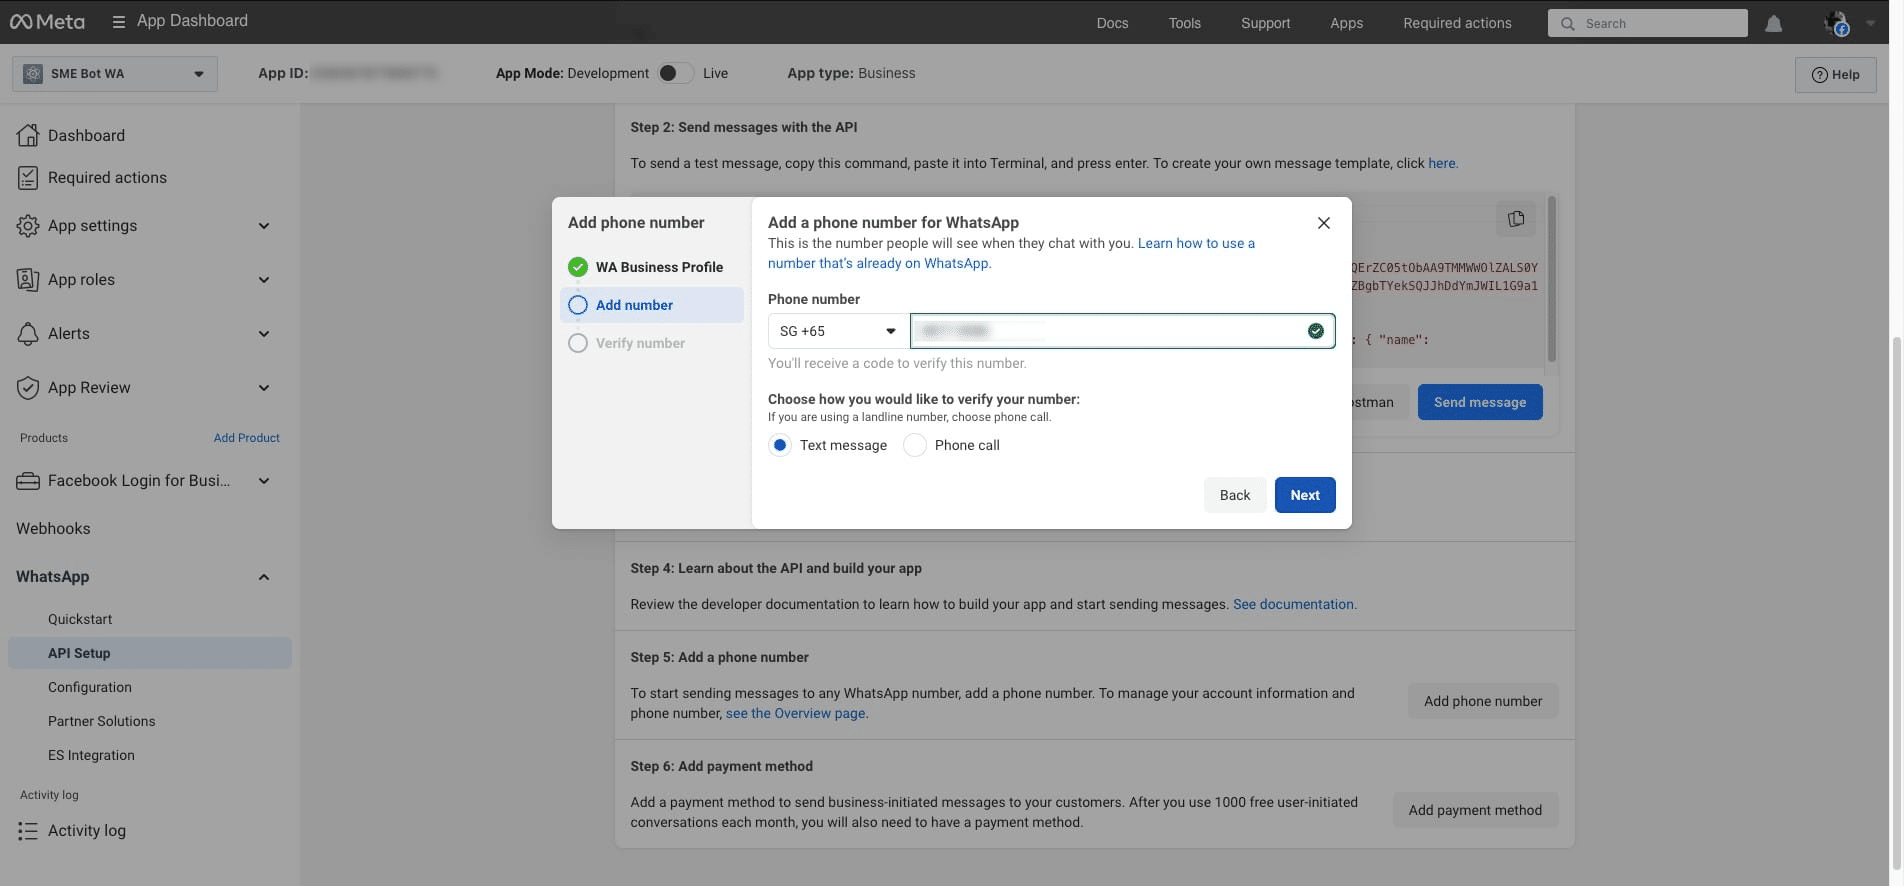
Using Text Message Verification, you will receive a code via text on your phone. Enter the code and click "Next" to proceed.
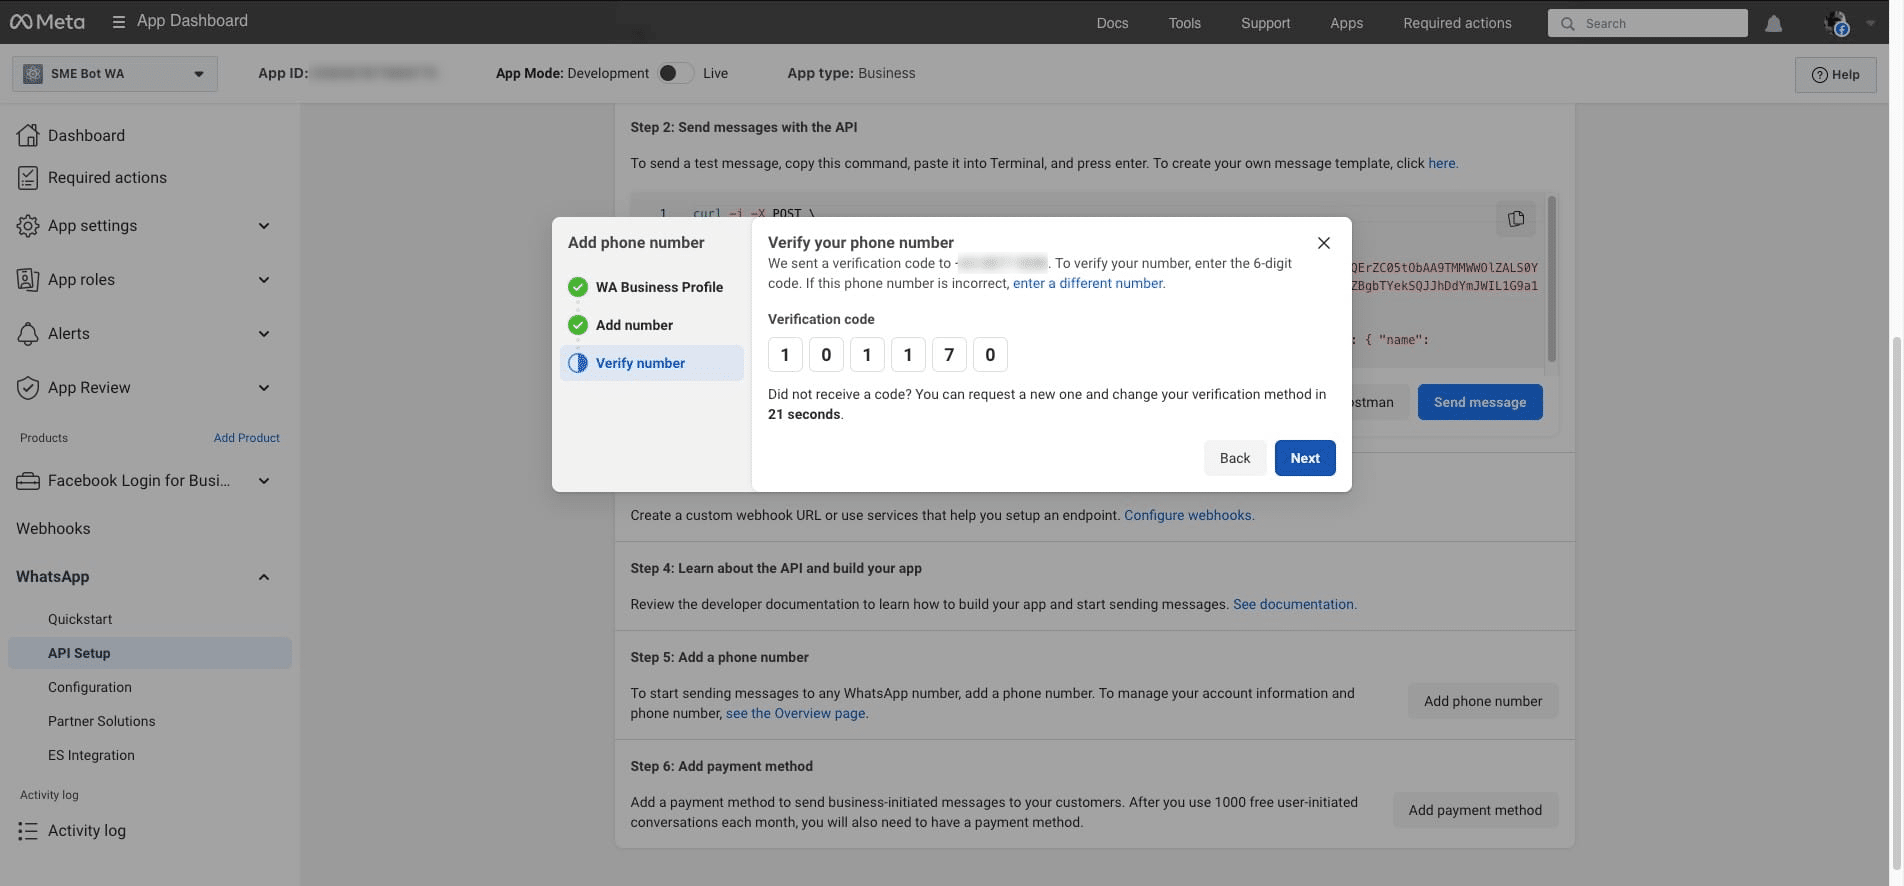
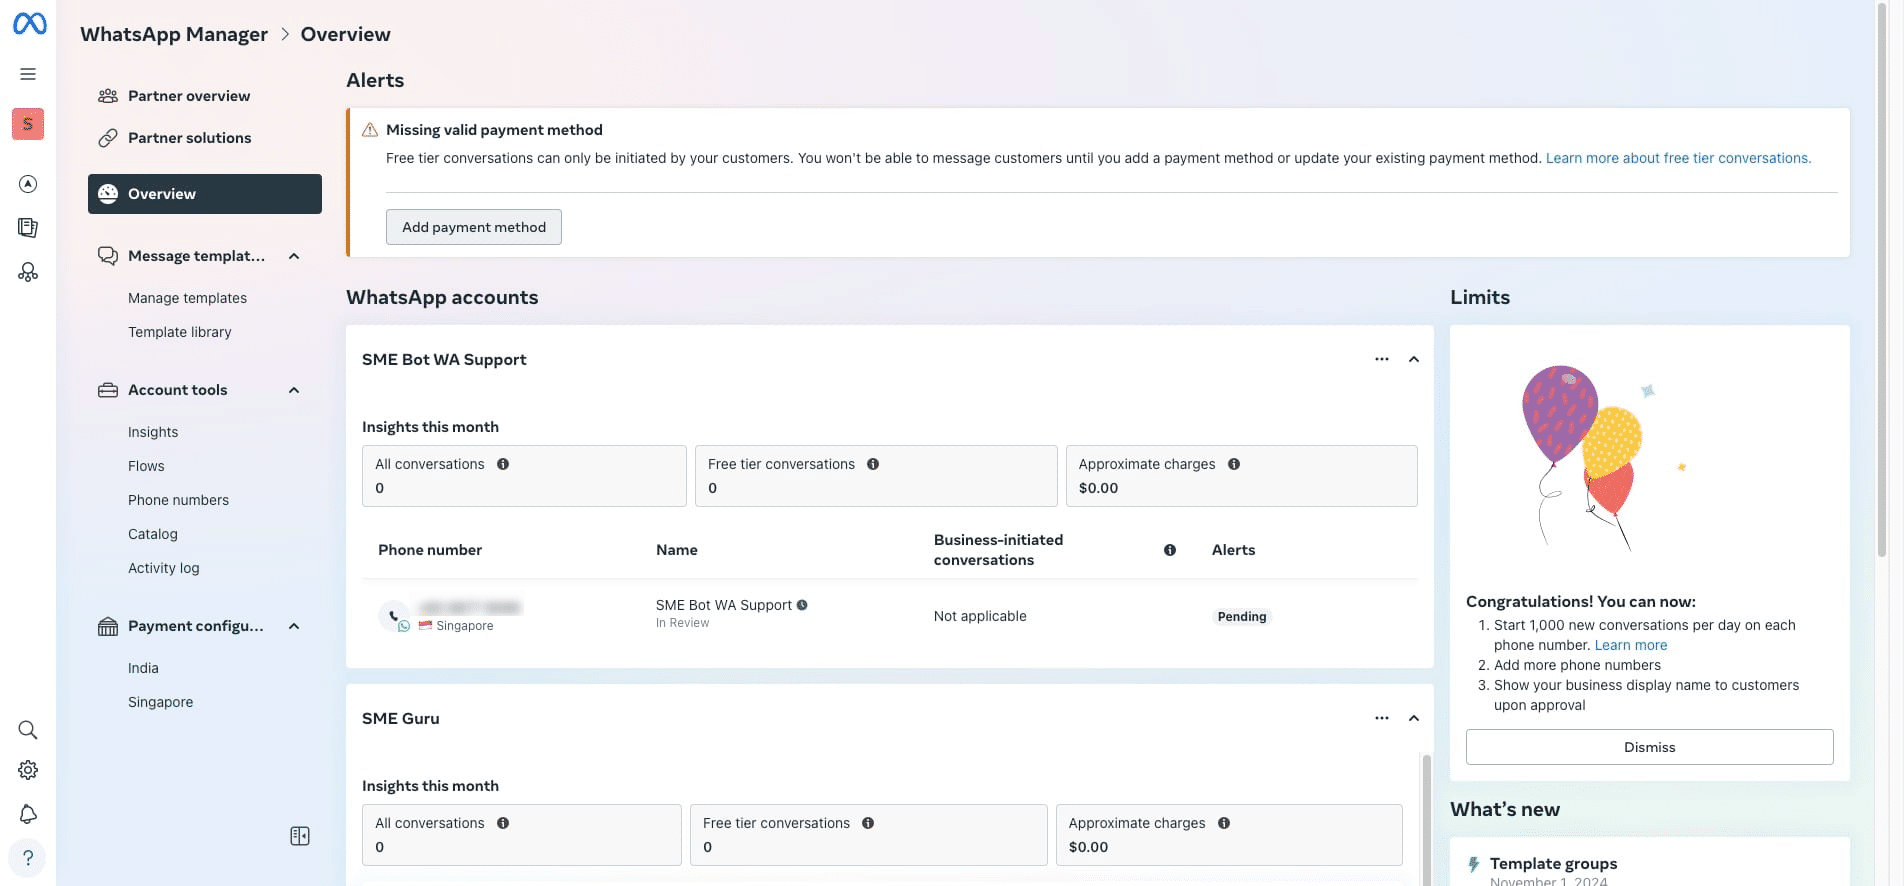
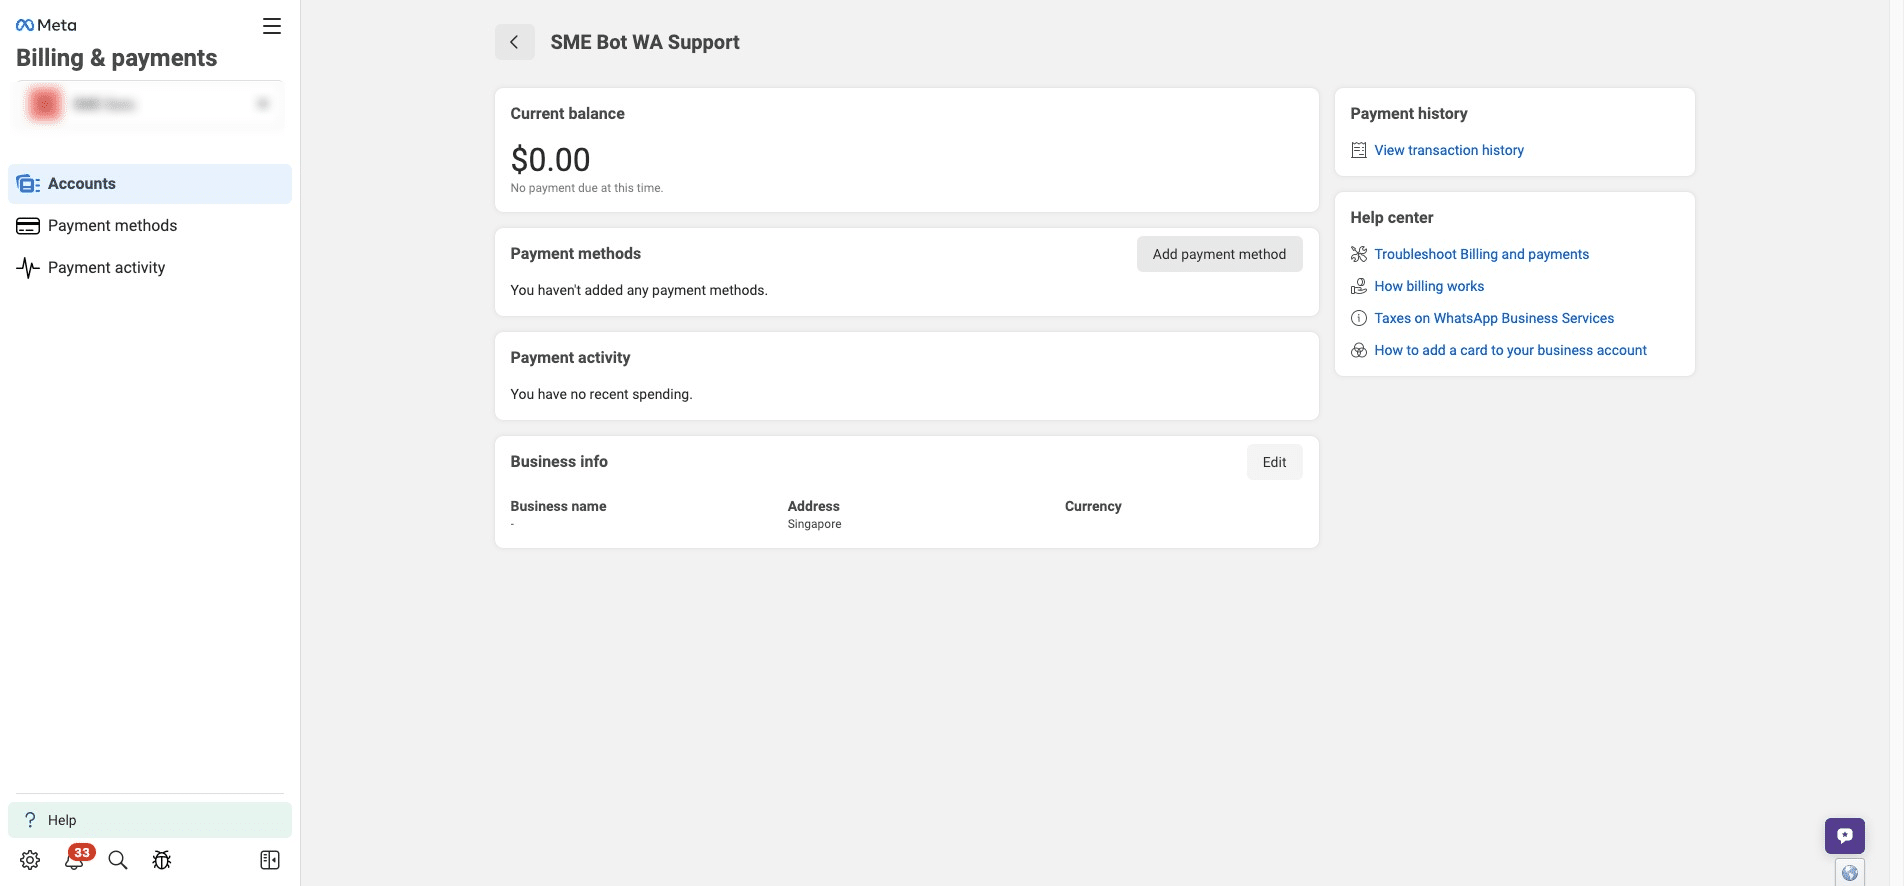
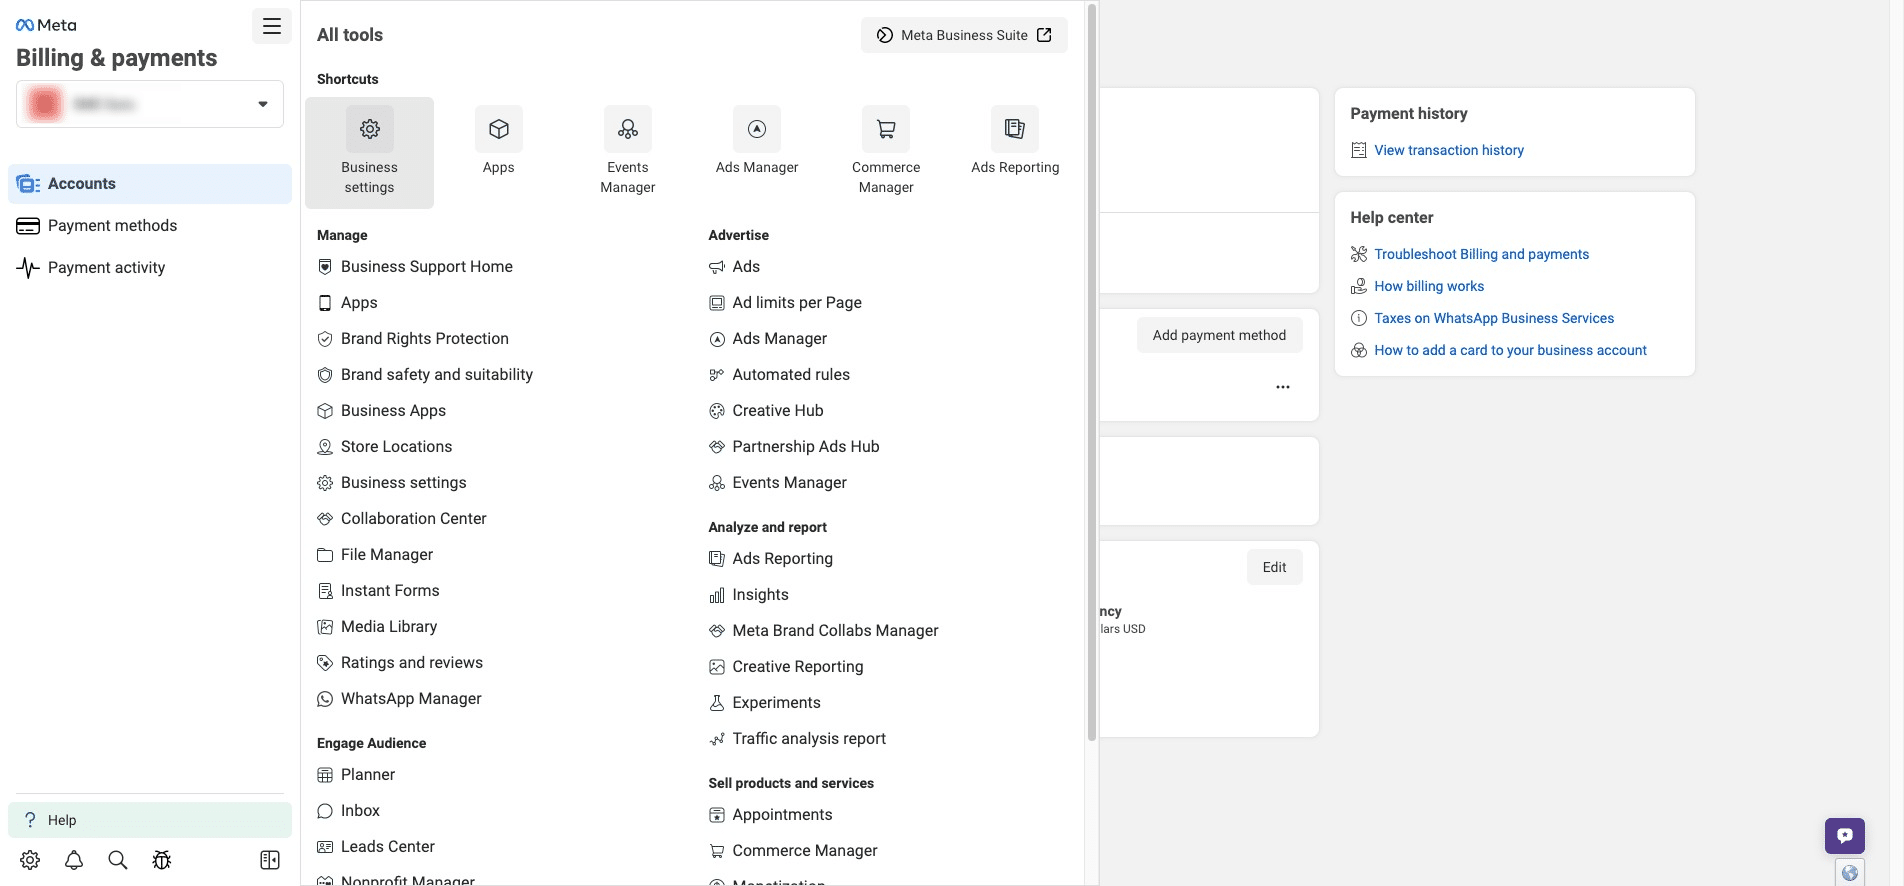
Click "Go to WhatsApp Manager", and it will take you to the Meta Business Portfolio to add a valid payment method.
 to add a valid payment method.](https://assets.guidejar.com/uploads/7b36f163-21e4-4639-8aff-a61a5e2a3e9c/oP4PD8qOFVglaEHJwcYKbX5jyJh1/66ef7f21-dae2-441e-b341-71718fd35fc8/1740559876026.jpeg)
Click "Add payment method"
Click "Payment Settings"
Click "Add payment method"
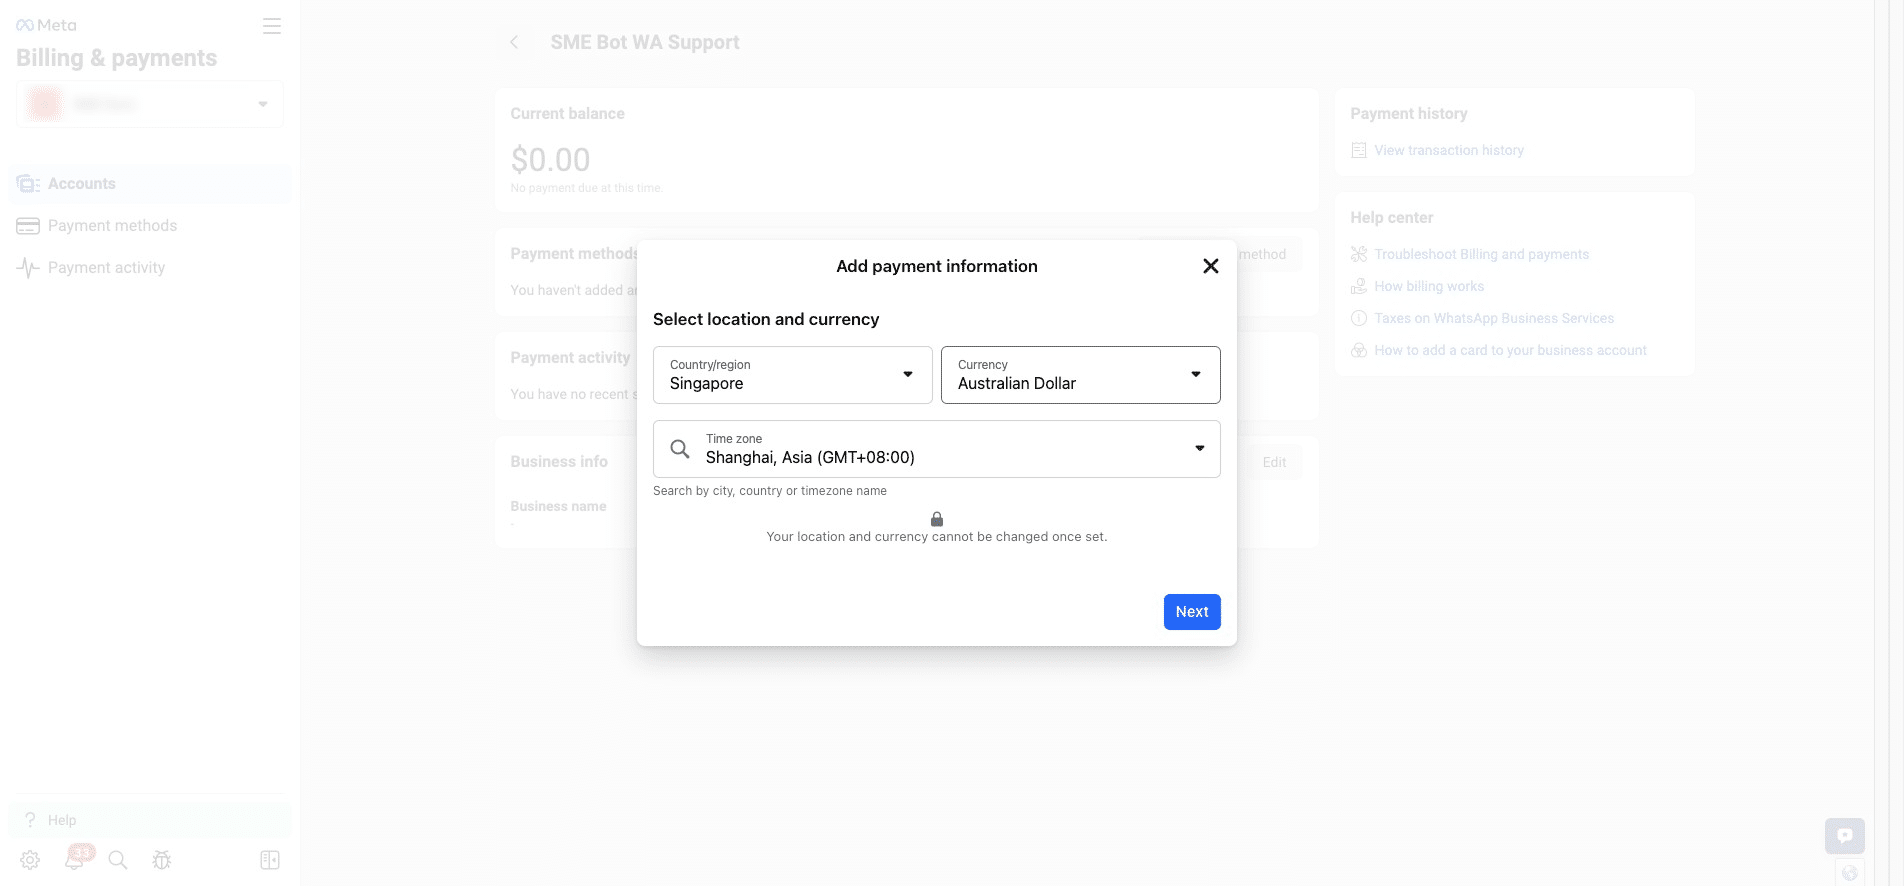
A pop-up will appear for you to select your location, preferred currency, and timezone. Click "Next".
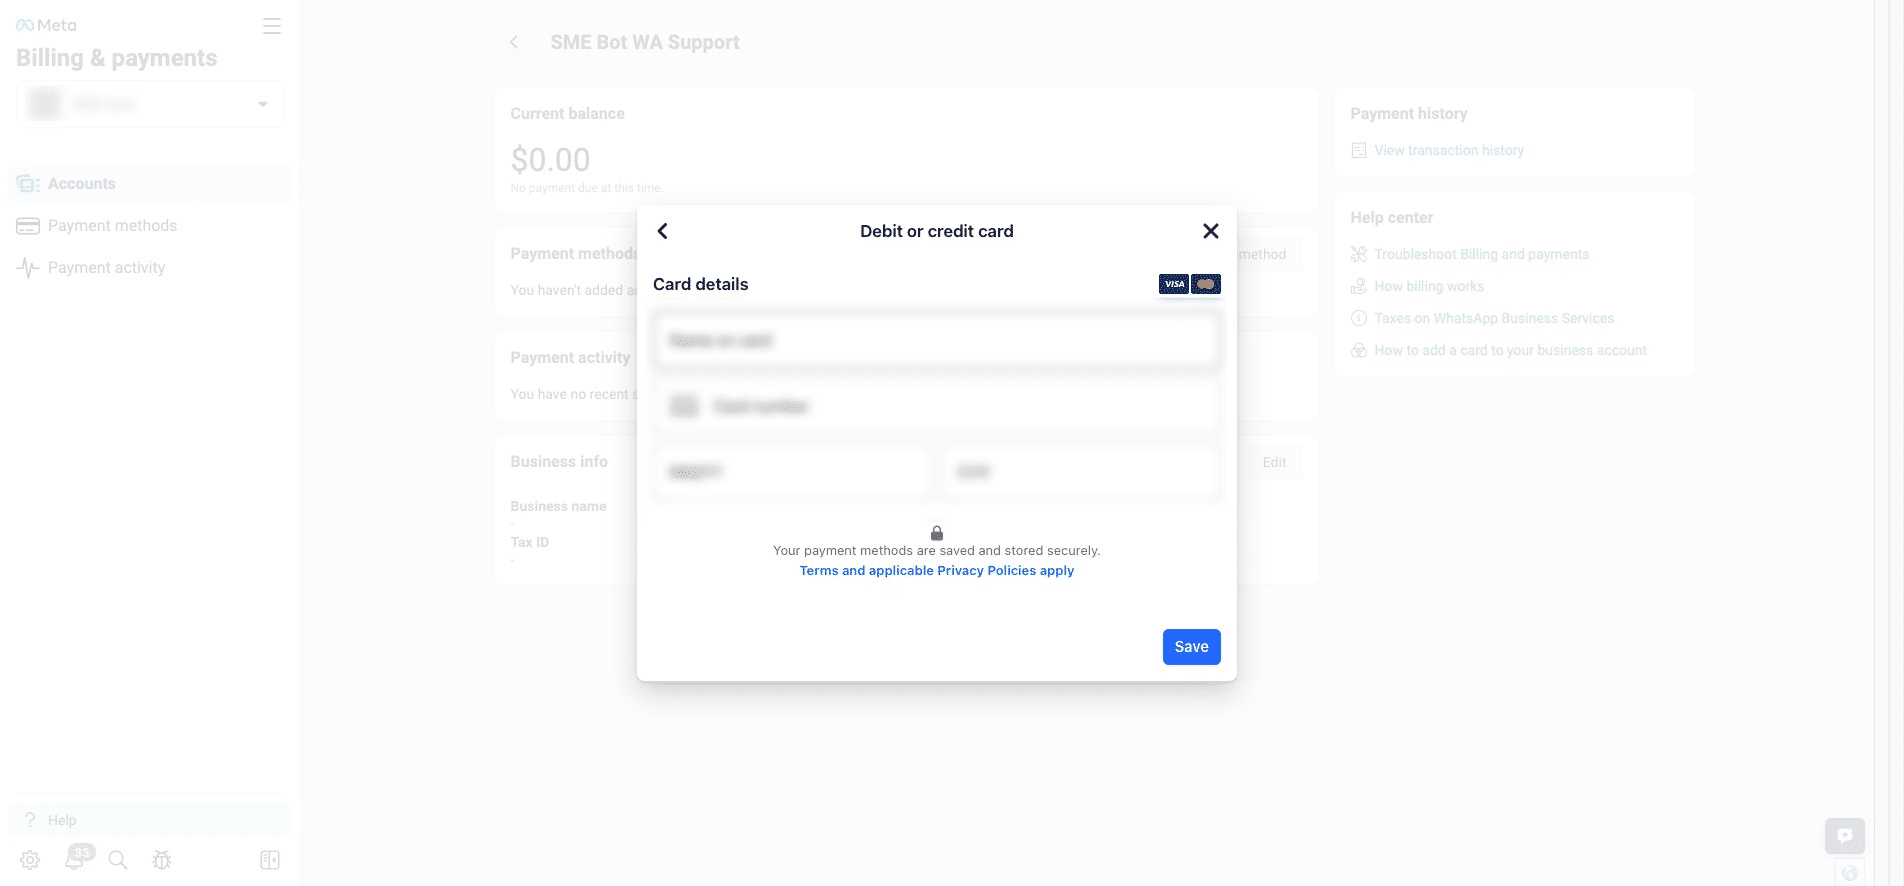
Click "Next" to enter your Debit or Credit Card Details.
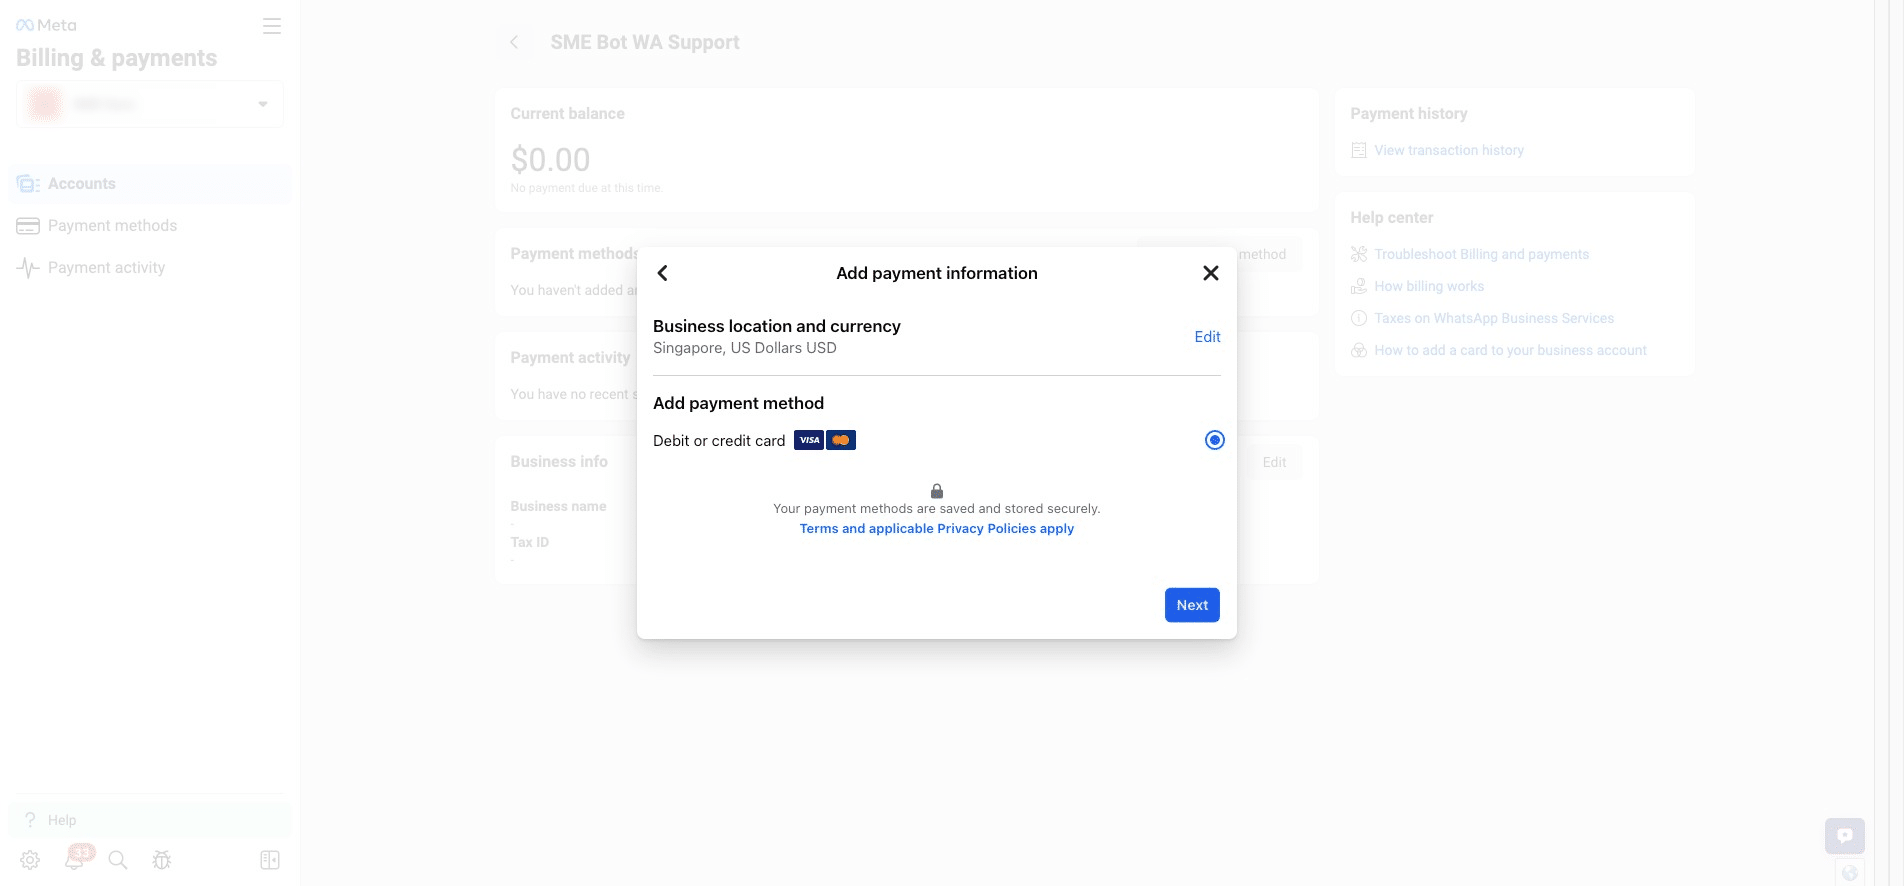
Enter your Debit or Credit Card Details, then click "Save".
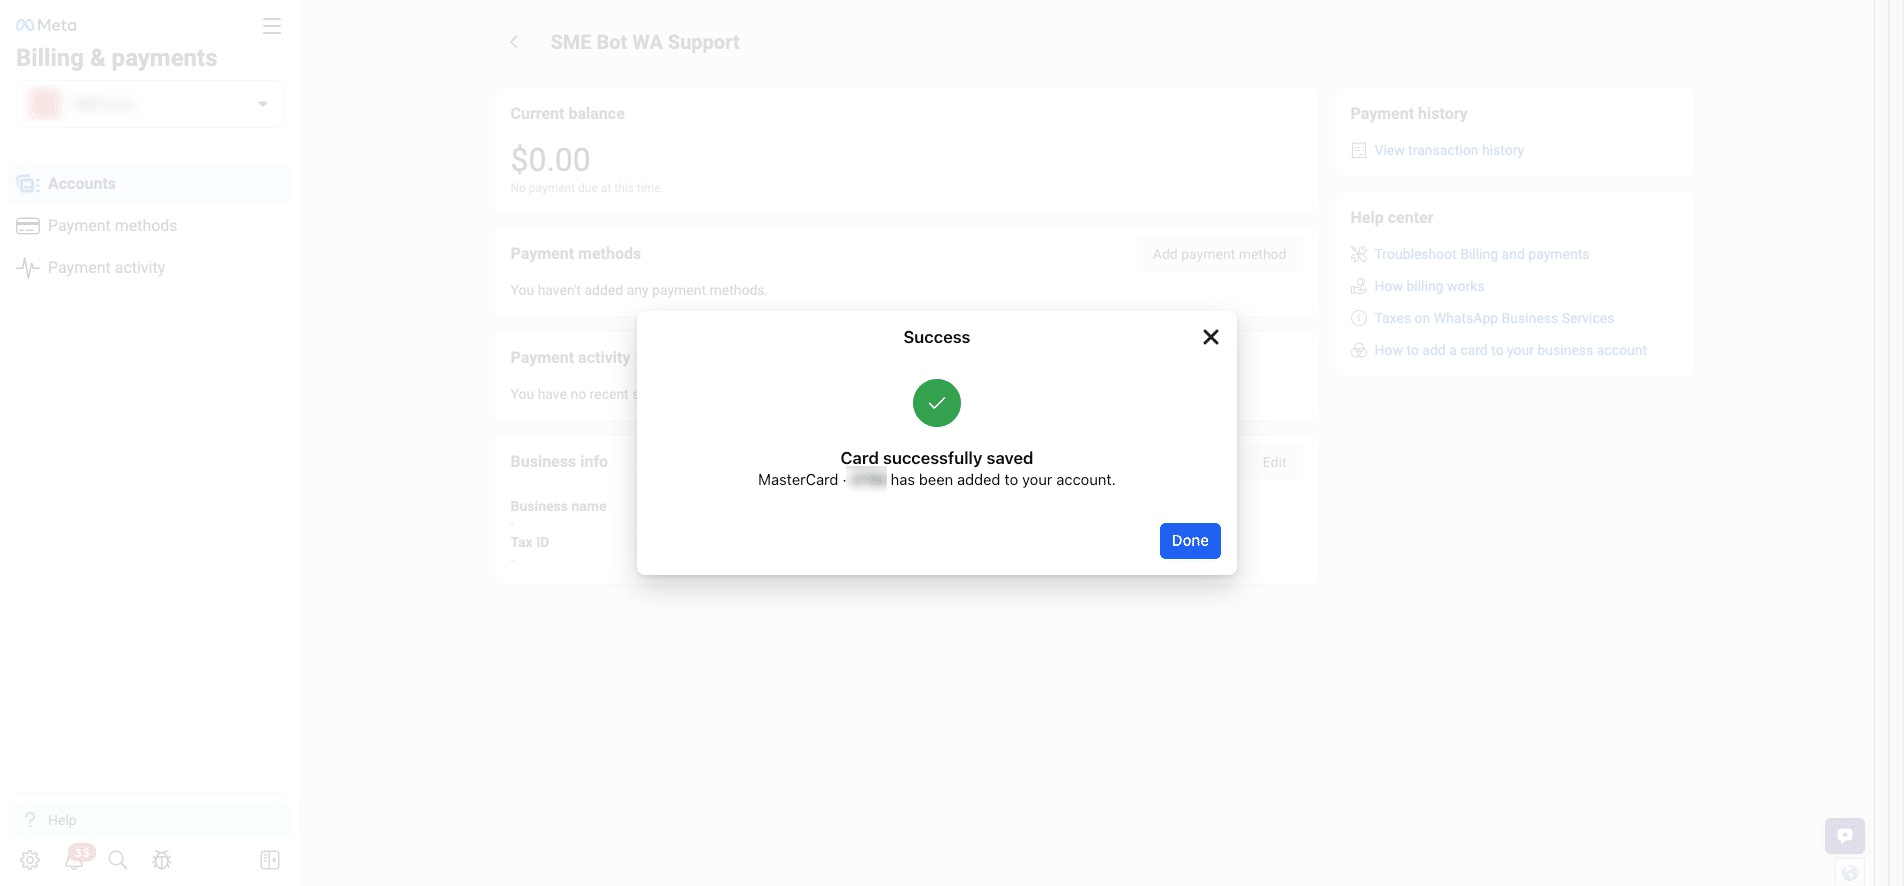
Your card has been successfully saved. Click "Done" to finish.
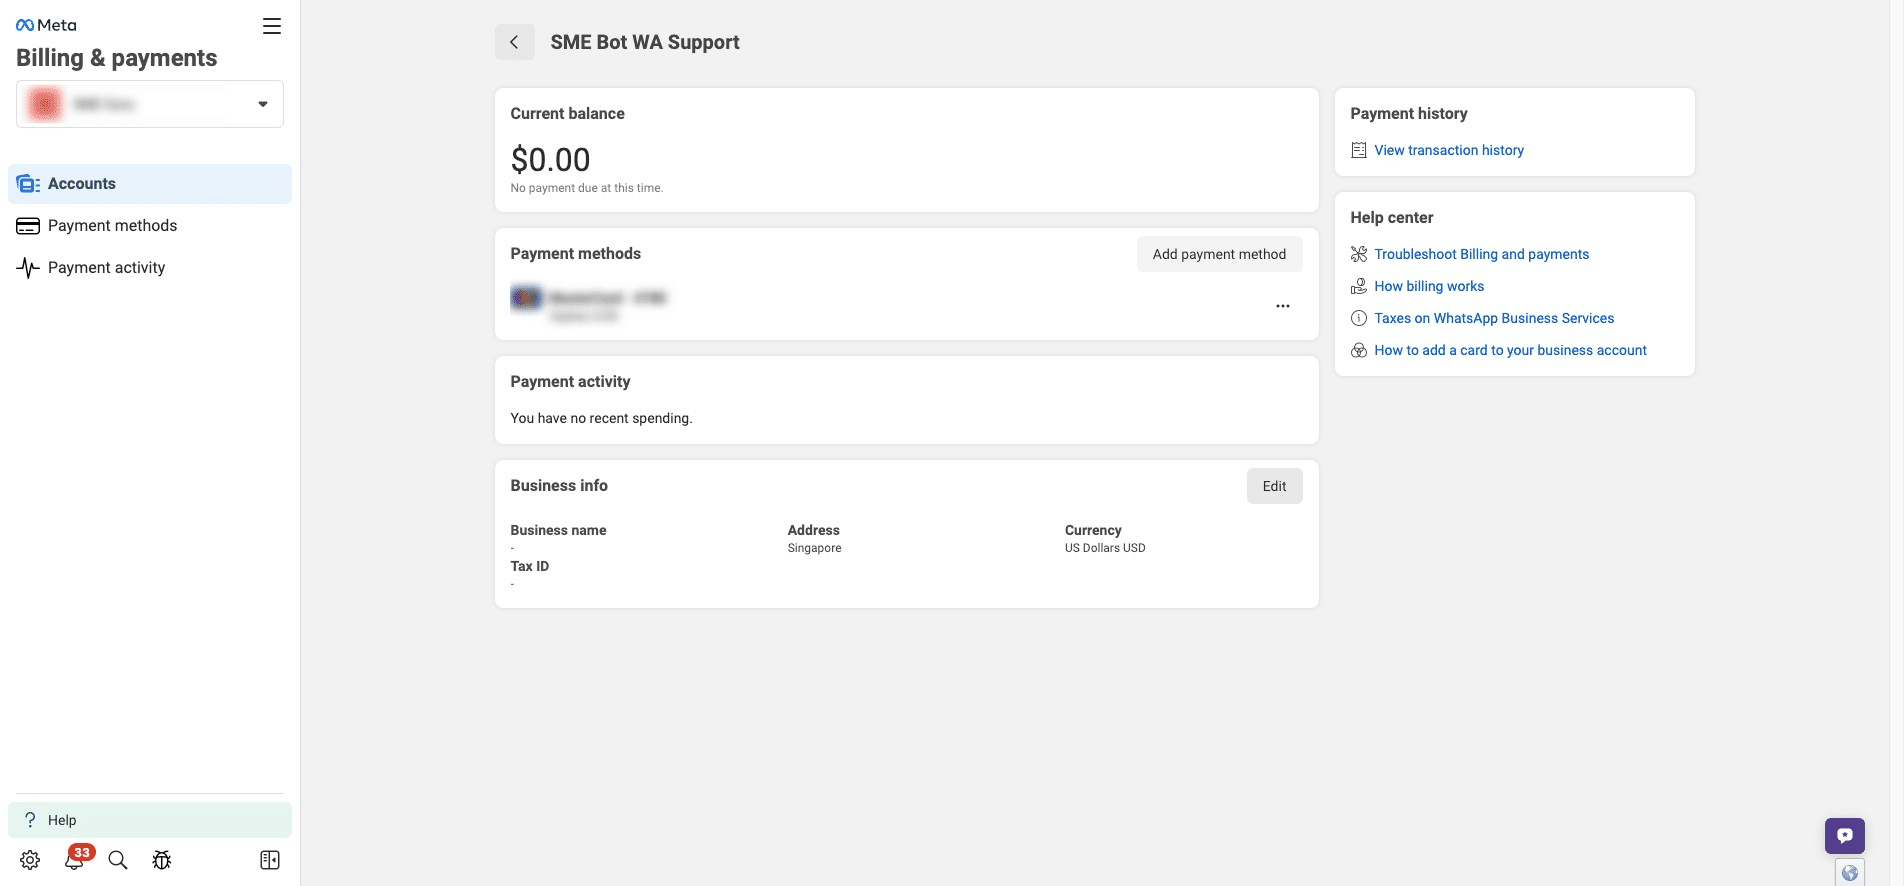
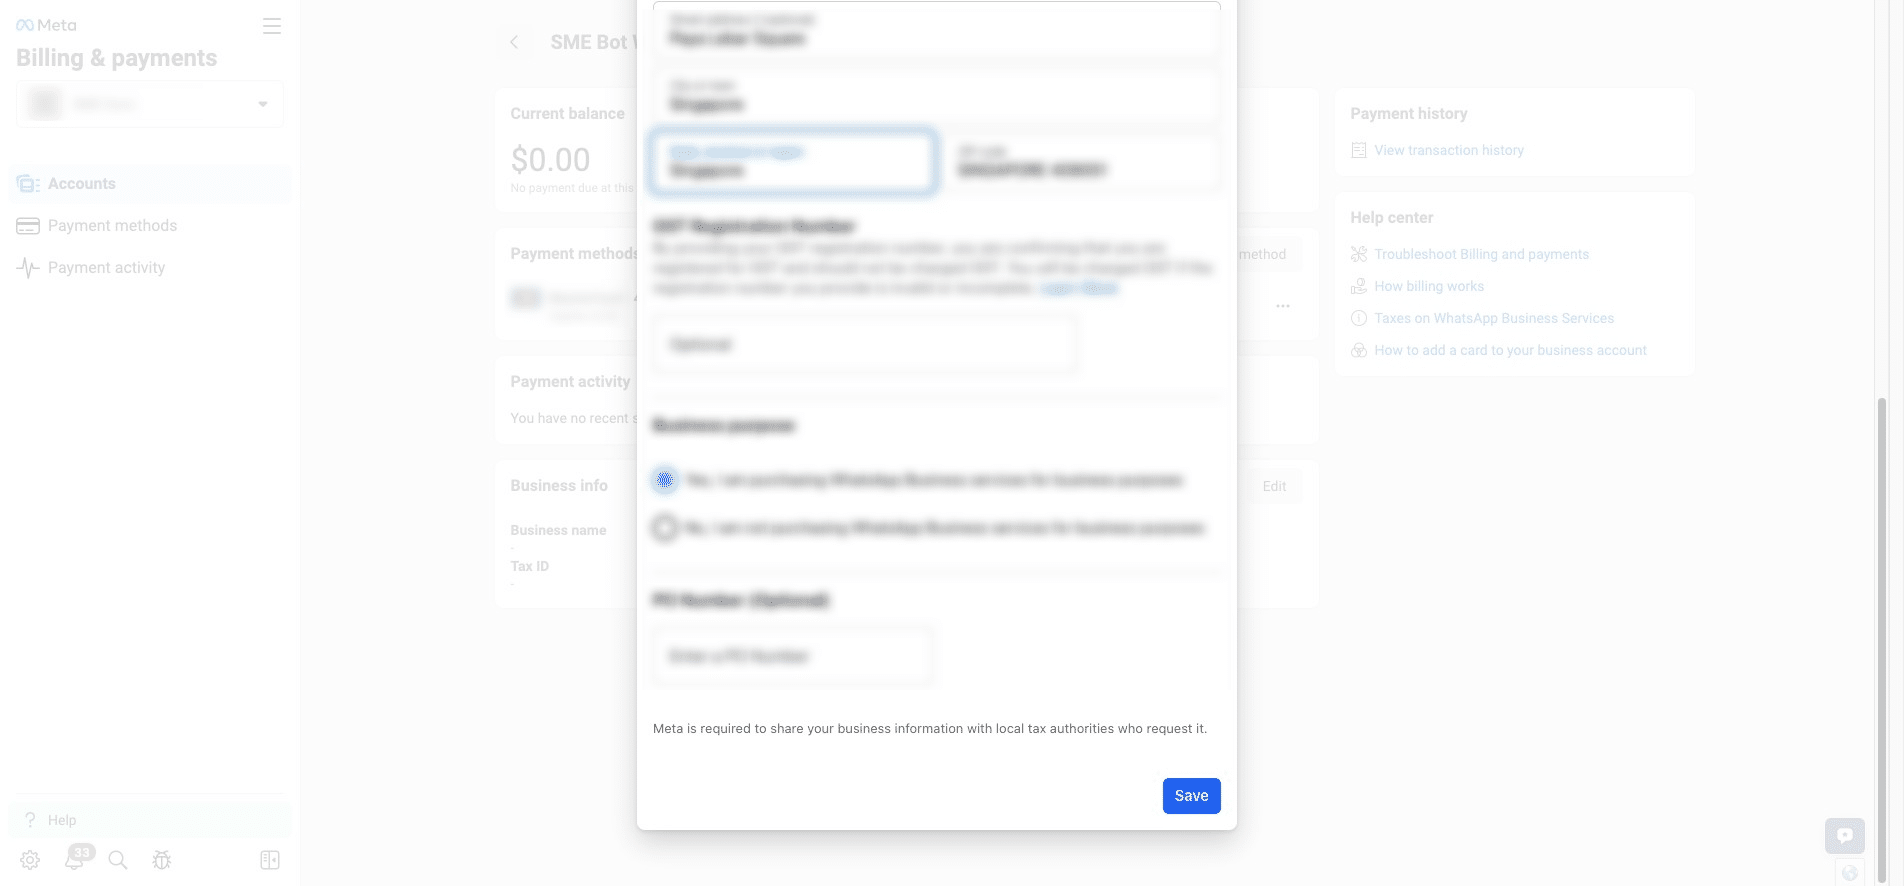
To update your Business Info, click "Edit".
Once the Business Info is updated, click "Save".
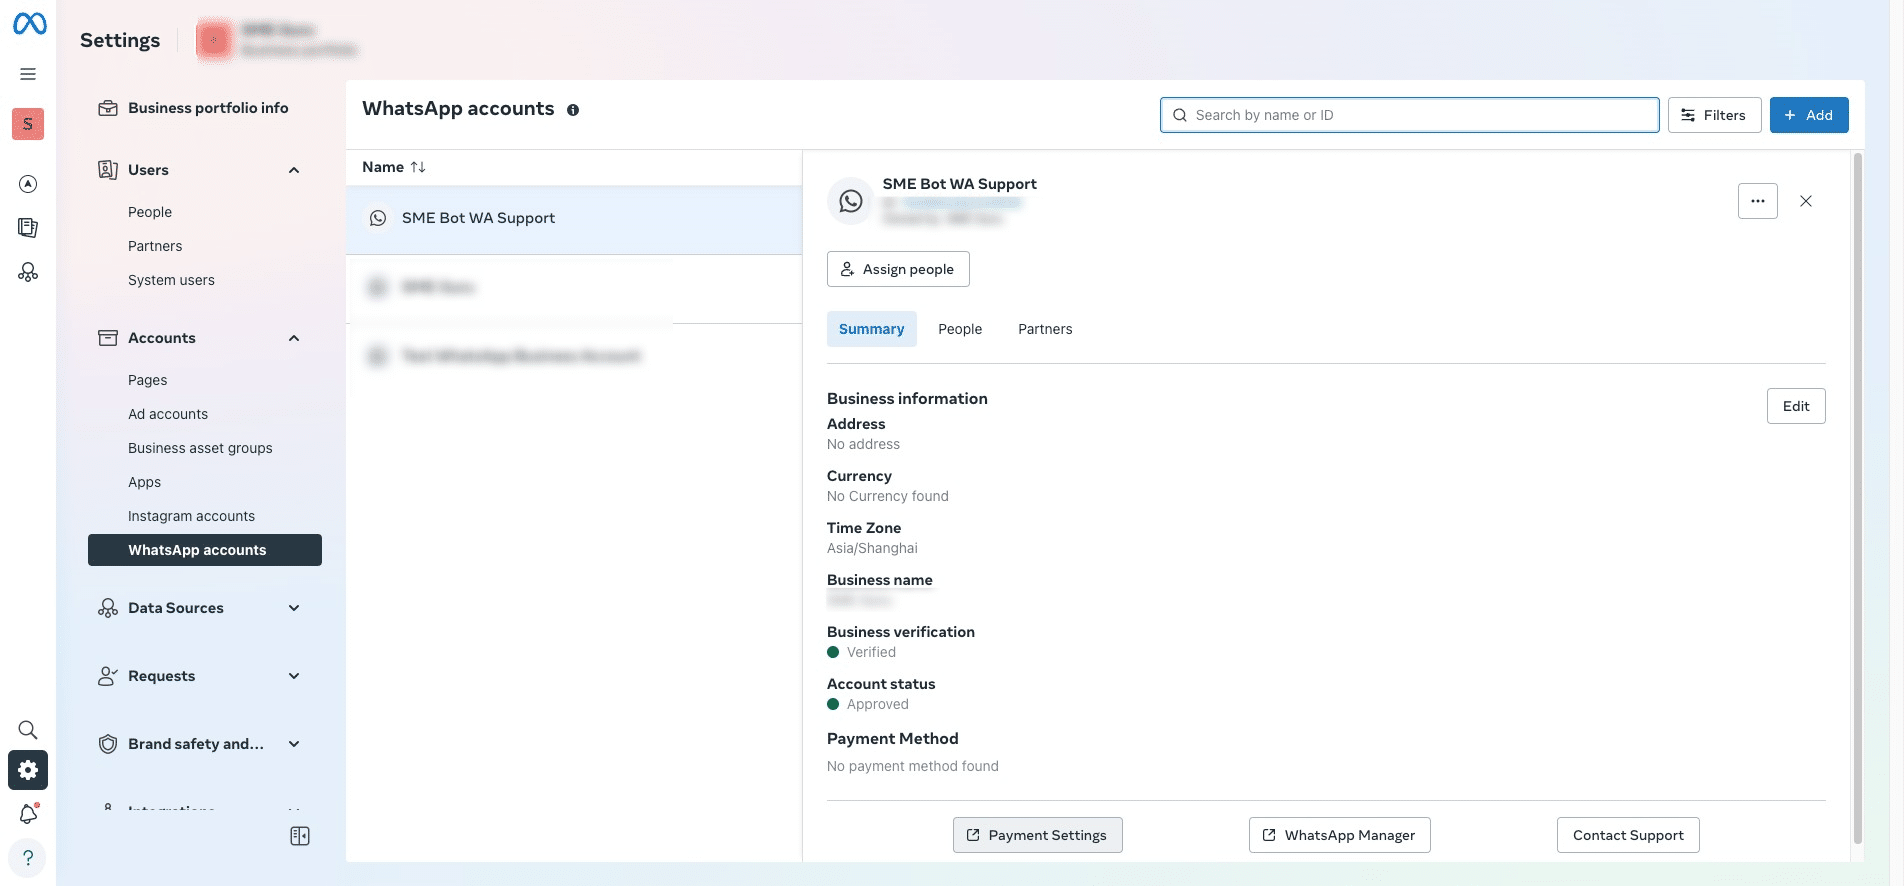
Click here to navigate to WhatsApp Account to assign your System User to this WhatsApp number.
 to assign your System User to this WhatsApp number.](https://assets.guidejar.com/uploads/7b36f163-21e4-4639-8aff-a61a5e2a3e9c/oP4PD8qOFVglaEHJwcYKbX5jyJh1/69613951-9806-4a2d-b4bf-2ed9c04ed8d9/1740583589238.jpeg)
Click "Business Settings"
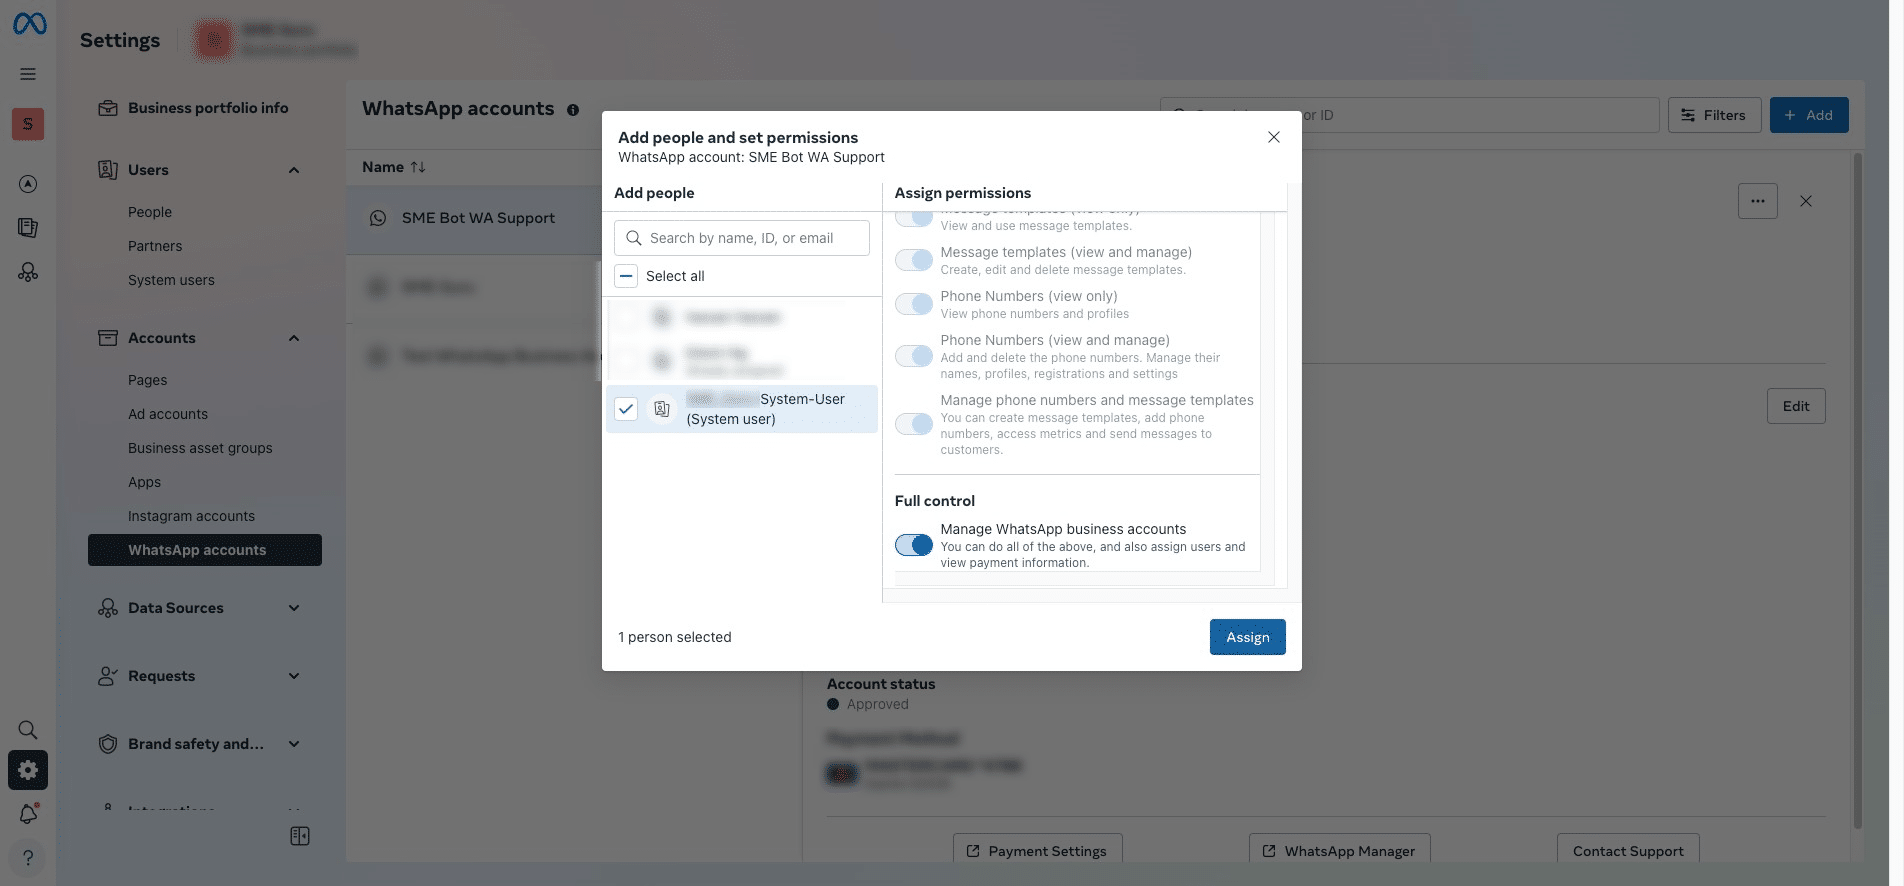
Under Accounts, click "WhatsApp Accounts". Select the WhatsApp Account, and click "Assign People".

Select the System User, provide Full Control, and then click "Assign".
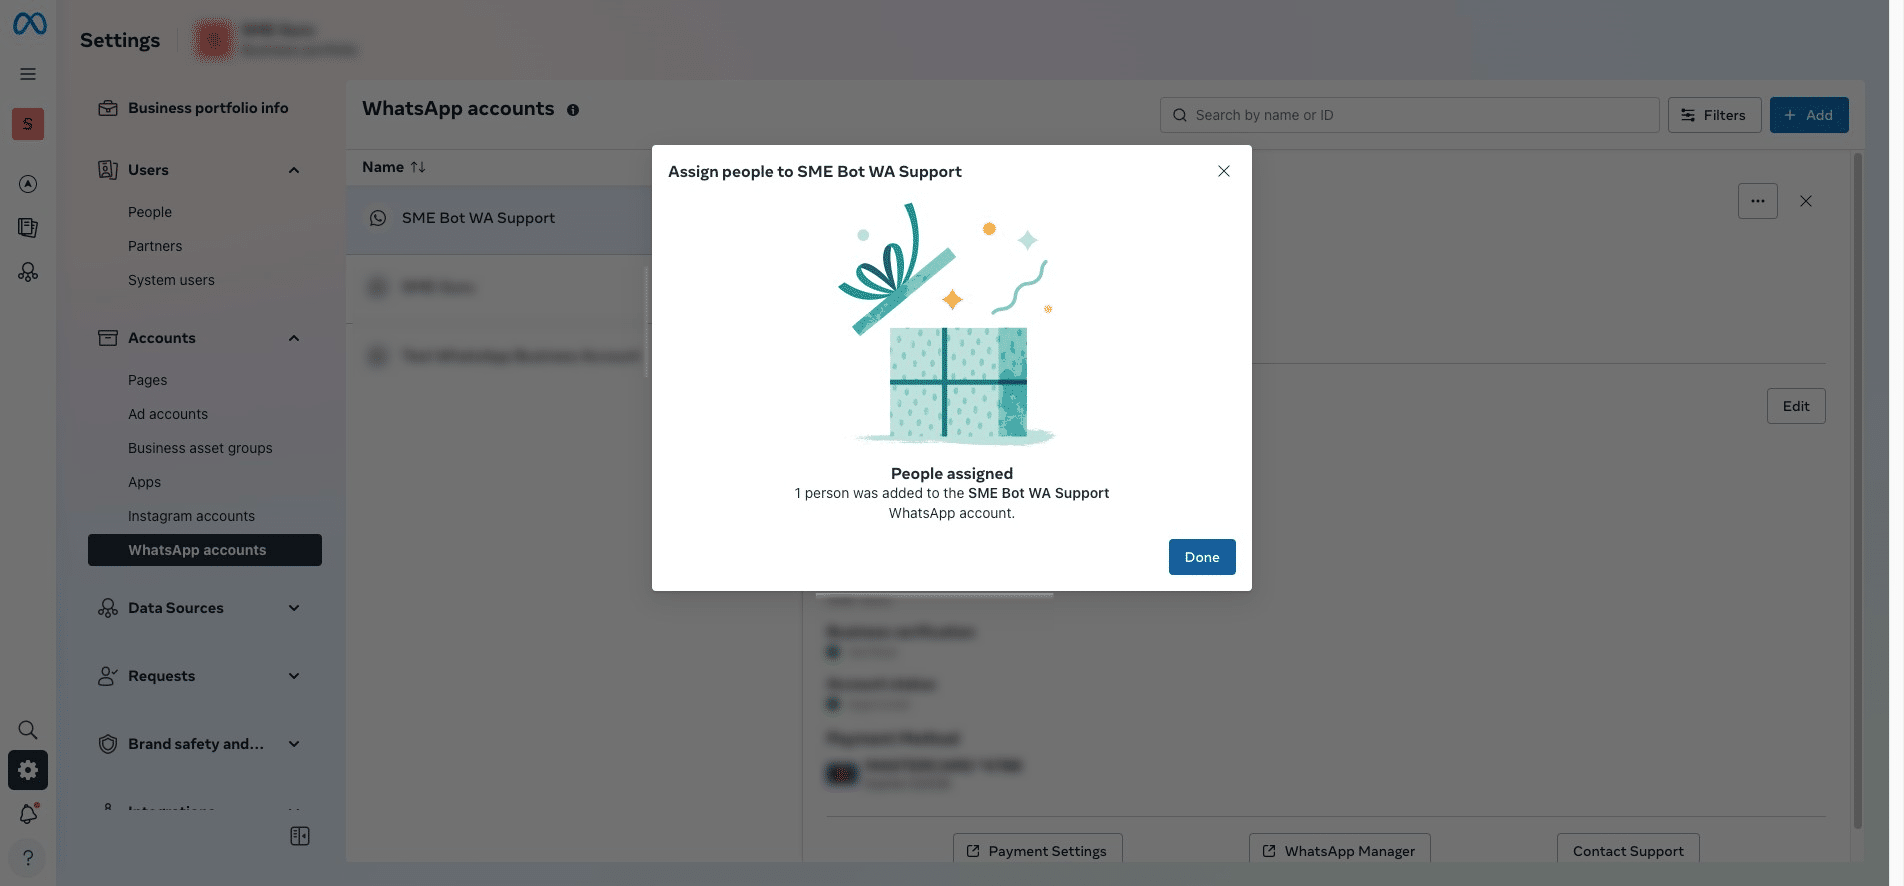
You have successfully assigned the System User to this WhatsApp account. Click "Done" to complete the process.
The next steps involve changing the status of the added number from "Pending" to "Connected." Please ensure that your Postman Account and Postman Desktop Agent are set up, and the Postman icon is running in your toolbar.
Go to Facebook Developers, under WhatsApp click "API Setup", then click "Run in Postman".
, under WhatsApp click "API Setup", then click "Run in Postman".](https://assets.guidejar.com/uploads/7b36f163-21e4-4639-8aff-a61a5e2a3e9c/oP4PD8qOFVglaEHJwcYKbX5jyJh1/c59bc549-1620-444a-9f42-eb37317ccf11/1740856215750.jpeg)
You will be redirected to Postman to set up a Fork Collection. If you haven't done so already, set up Postman Account and install the Postman Desktop Agent, then repeat the previous step.
 and install the [**Postman Desktop Agent**](https://learning.postman.com/docs/getting-started/basics/about-postman-agent/#select-a-postman-agent-for-requests), then repeat the previous step.](https://assets.guidejar.com/uploads/7b36f163-21e4-4639-8aff-a61a5e2a3e9c/oP4PD8qOFVglaEHJwcYKbX5jyJh1/e1c7679b-f2b9-49c8-b04a-4077f70b88c5/1740856254190.jpeg)
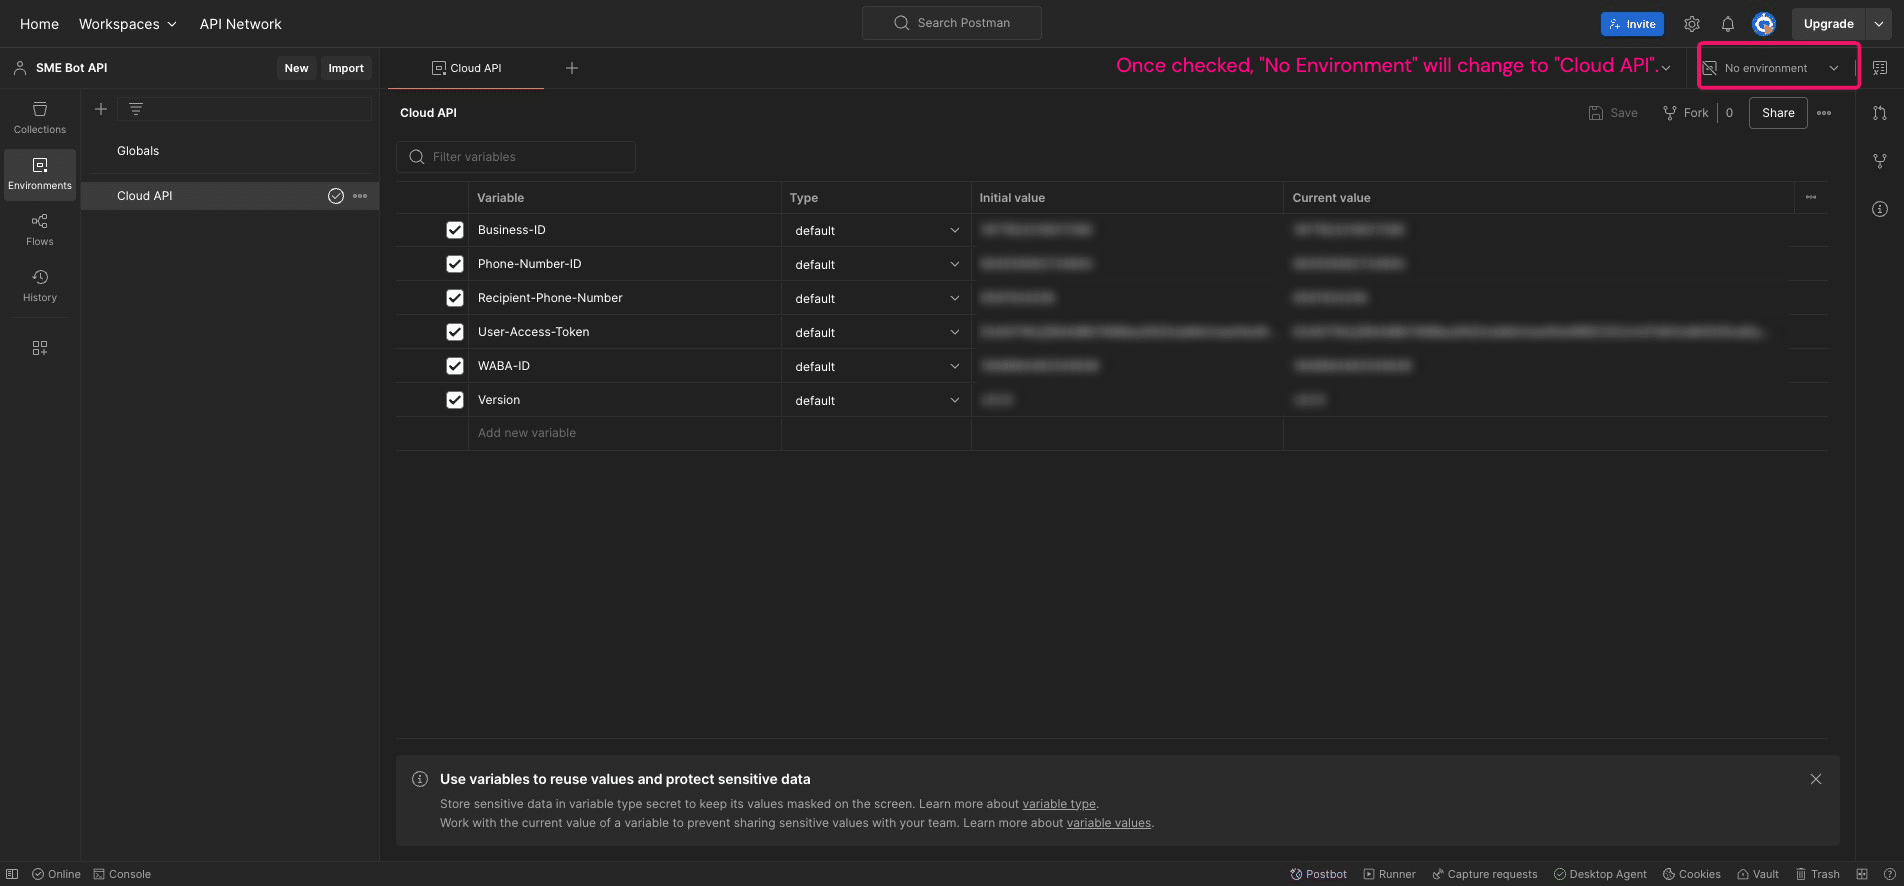
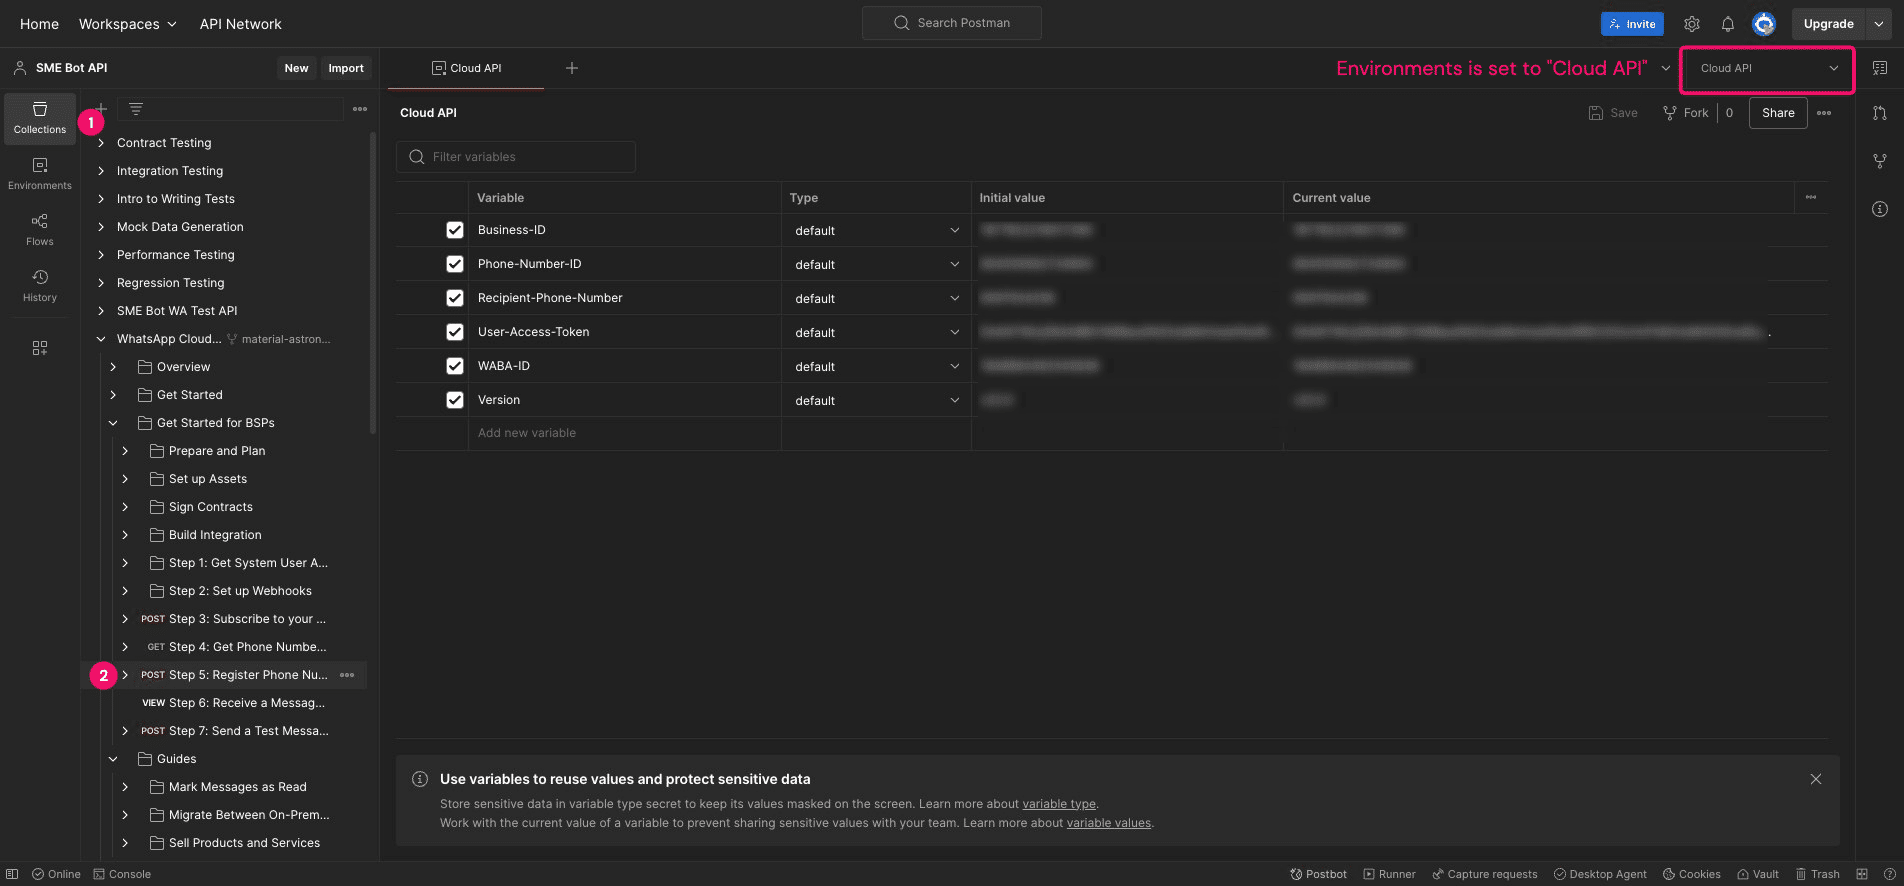
In Postman, under the "Environments" section, ensure that the "Initial" and "Current" values of the Variables match your Facebook details. Then, ensure that "Cloud API" is checked.
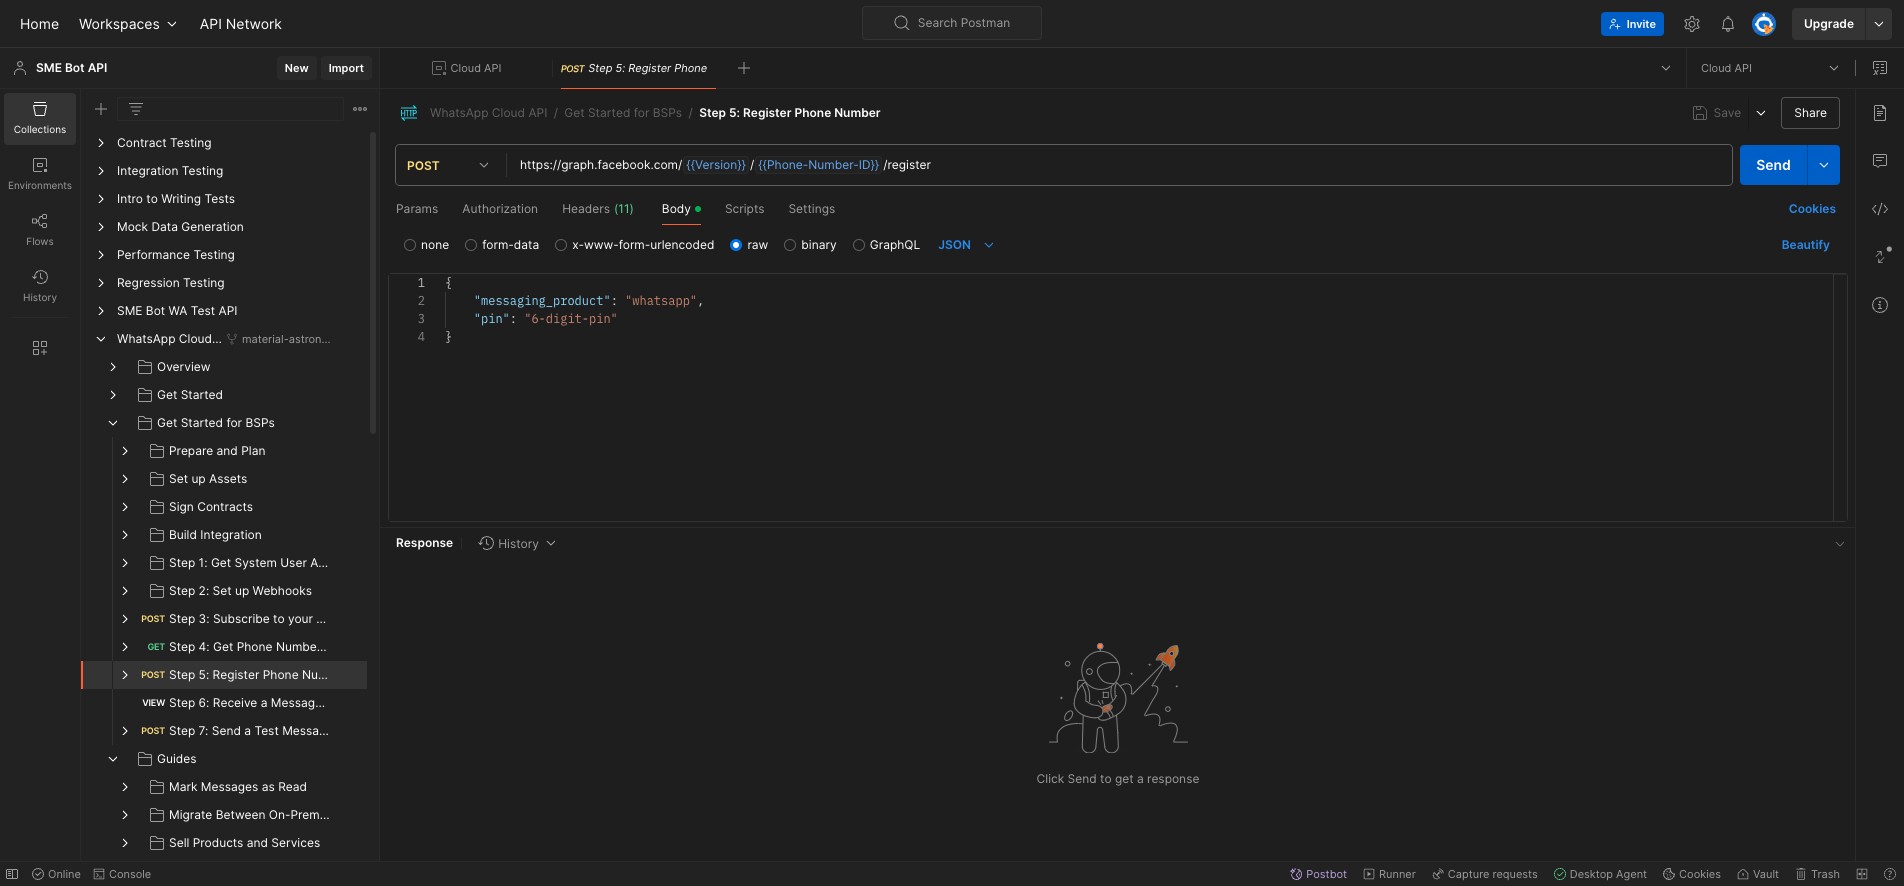
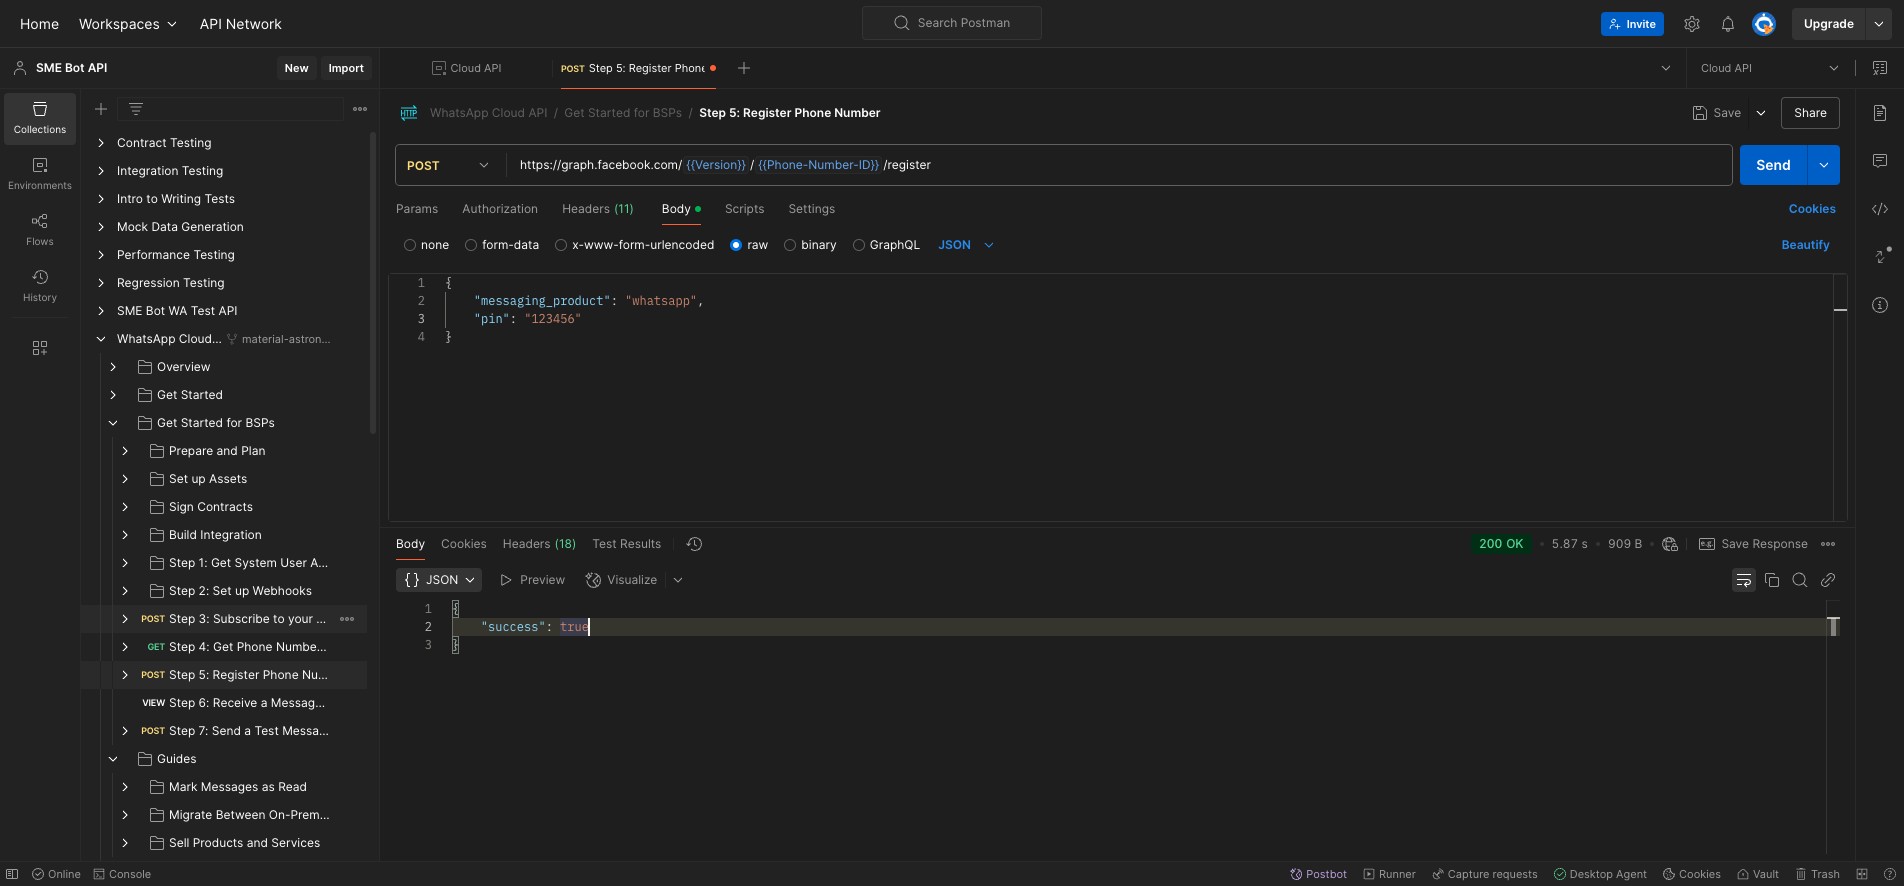
Click "Collections", then "Step 5: Register Phone Number".
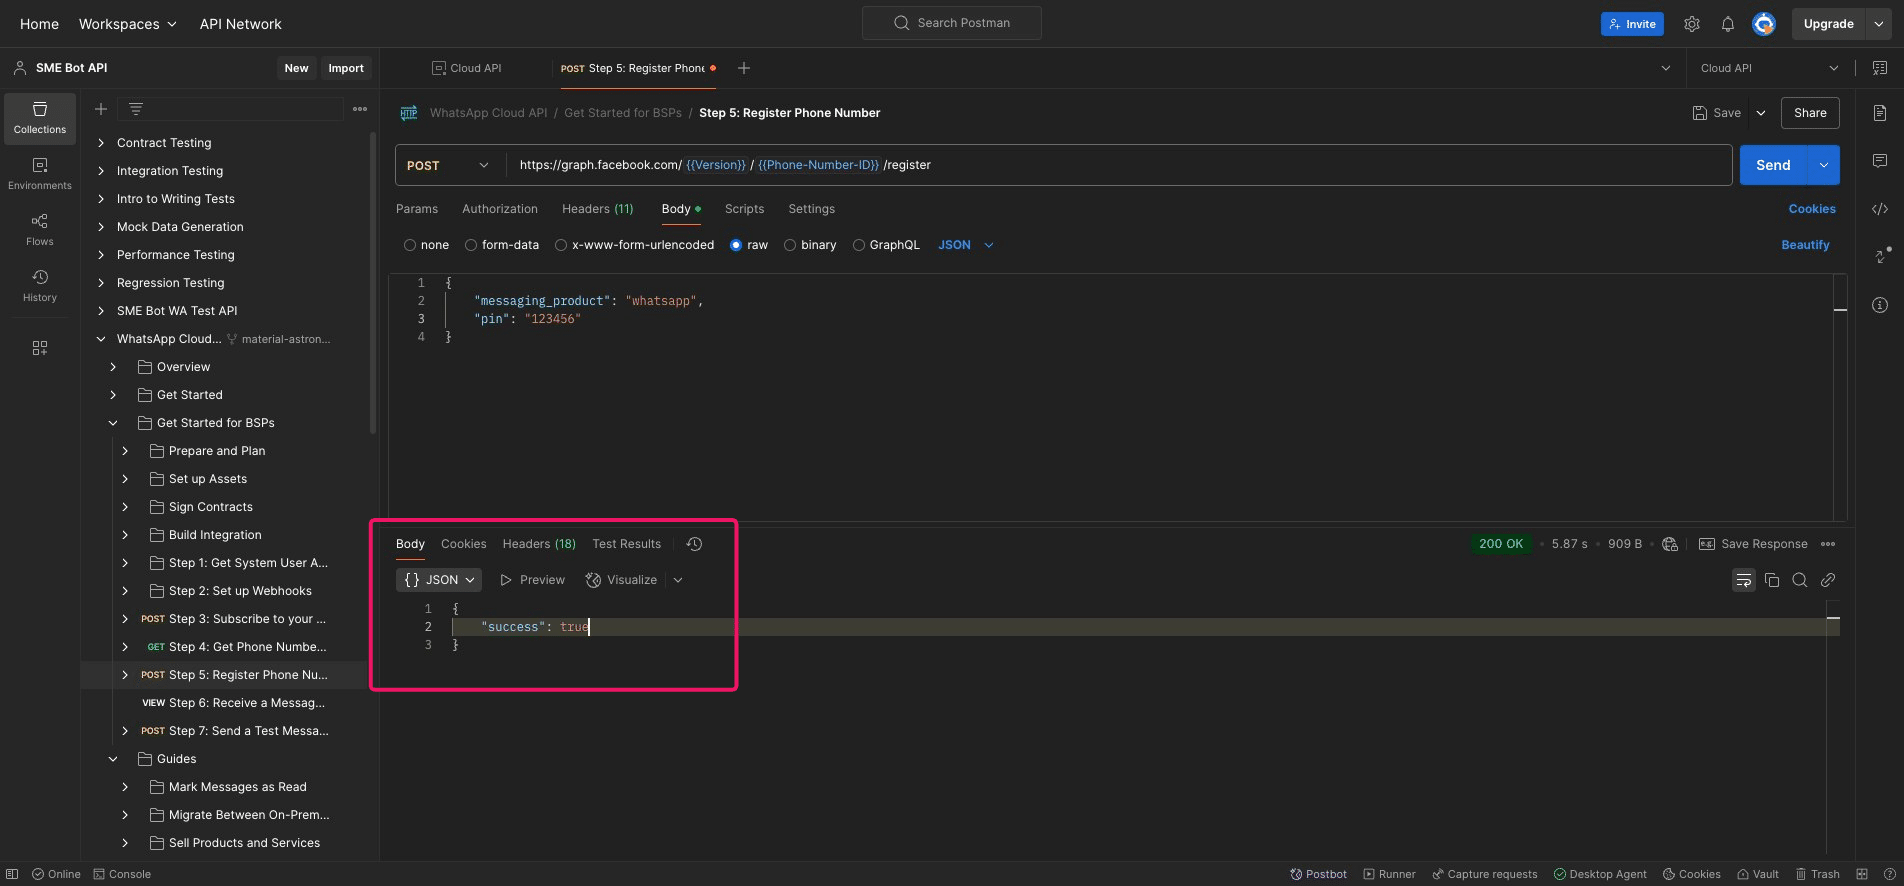
Change "6-digit-pin" to numbers.
Click "Send". Check the "Response" section at the bottom. It should display "success": true.
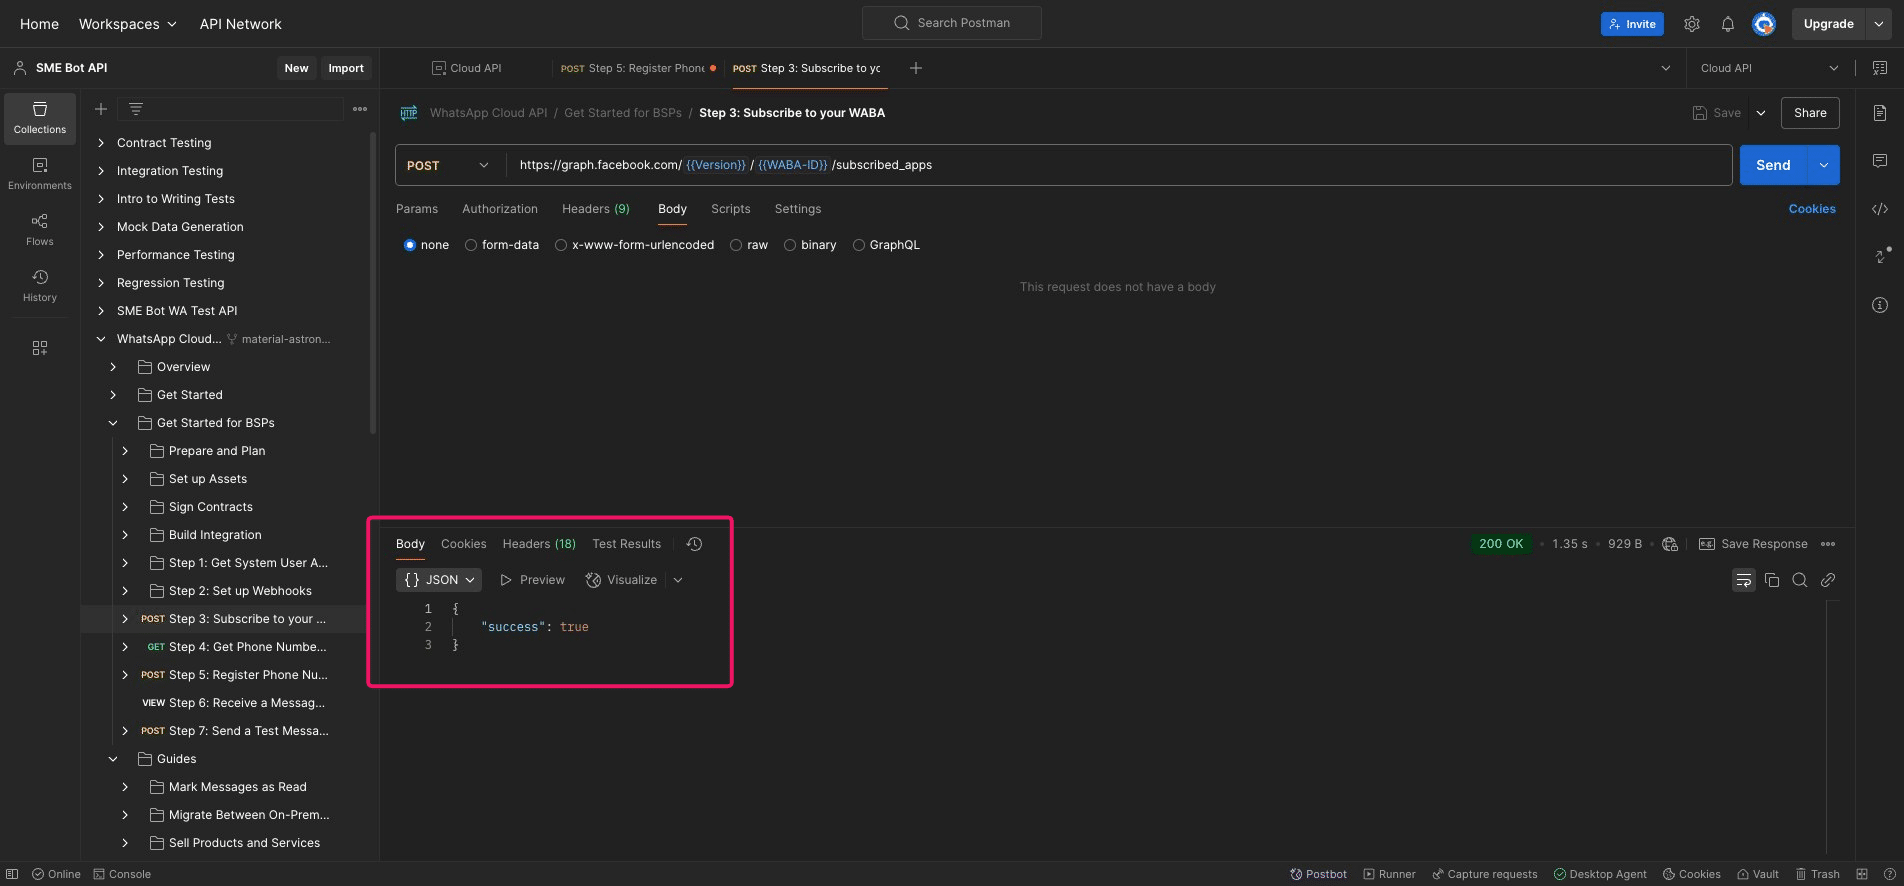
Click "Step 3: Subscribe to your WABA"
Click "Send", the "Response" section at the bottom should display "success": true.
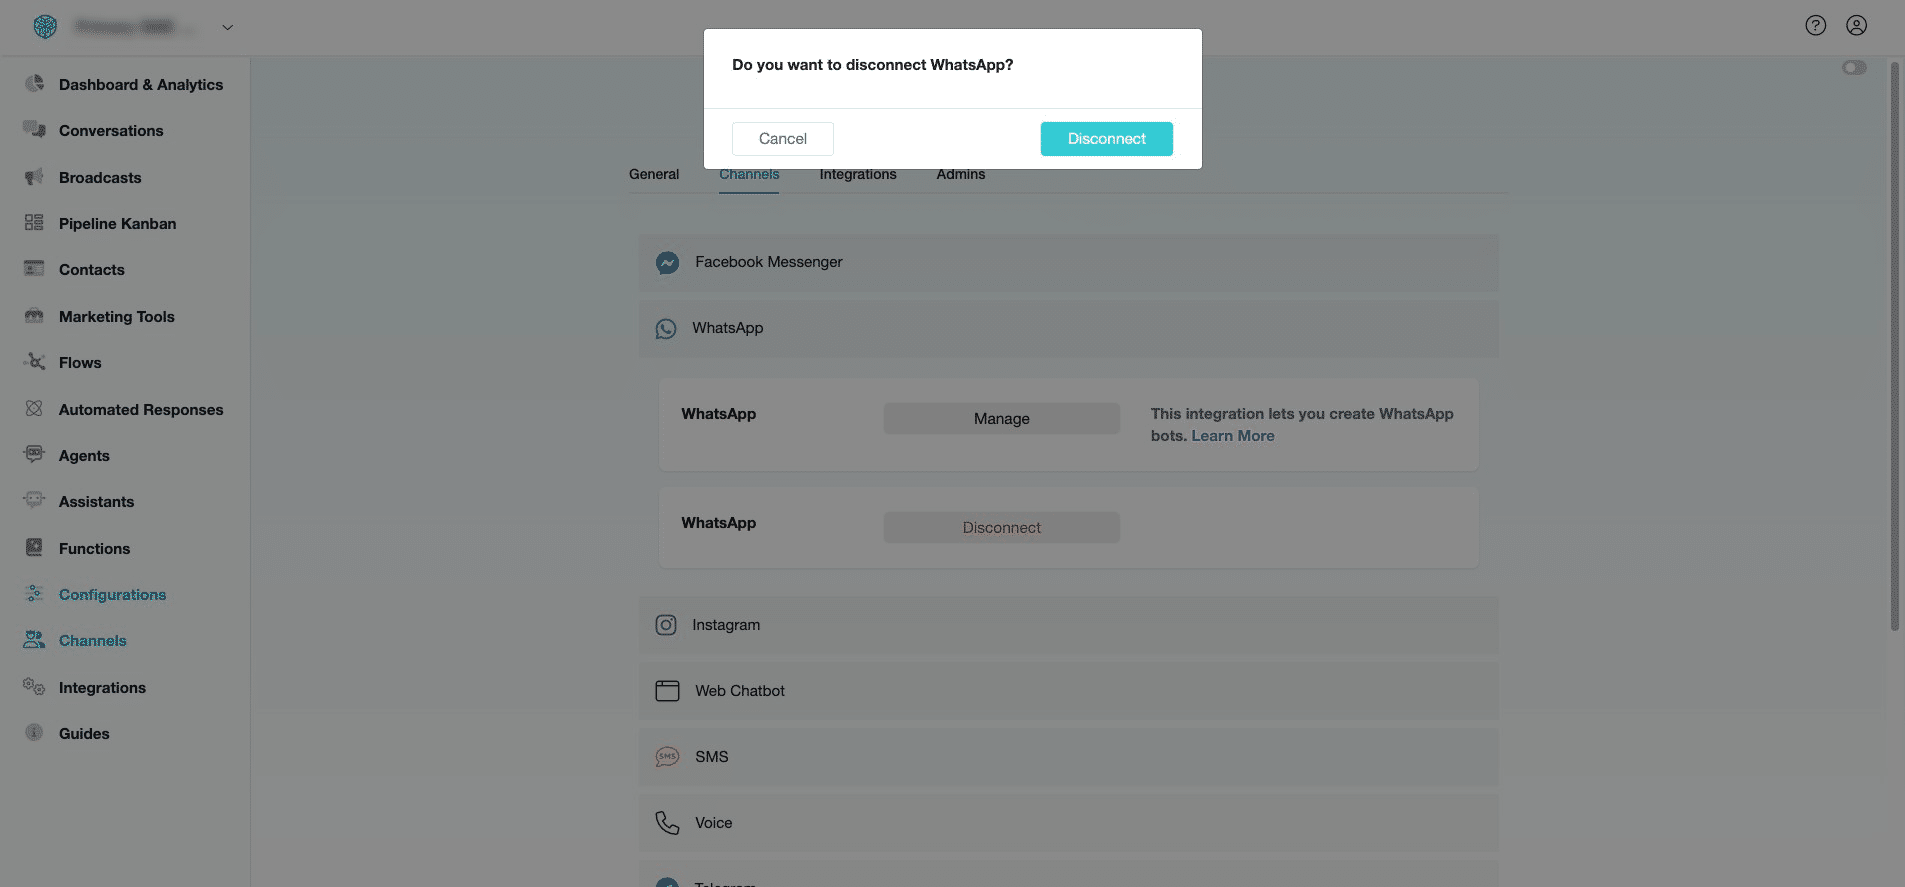
In your SME Bot, disconnect the test number and connect the added phone number. To start, click "Channels".
Under WhatsApp, click "Disconnect"
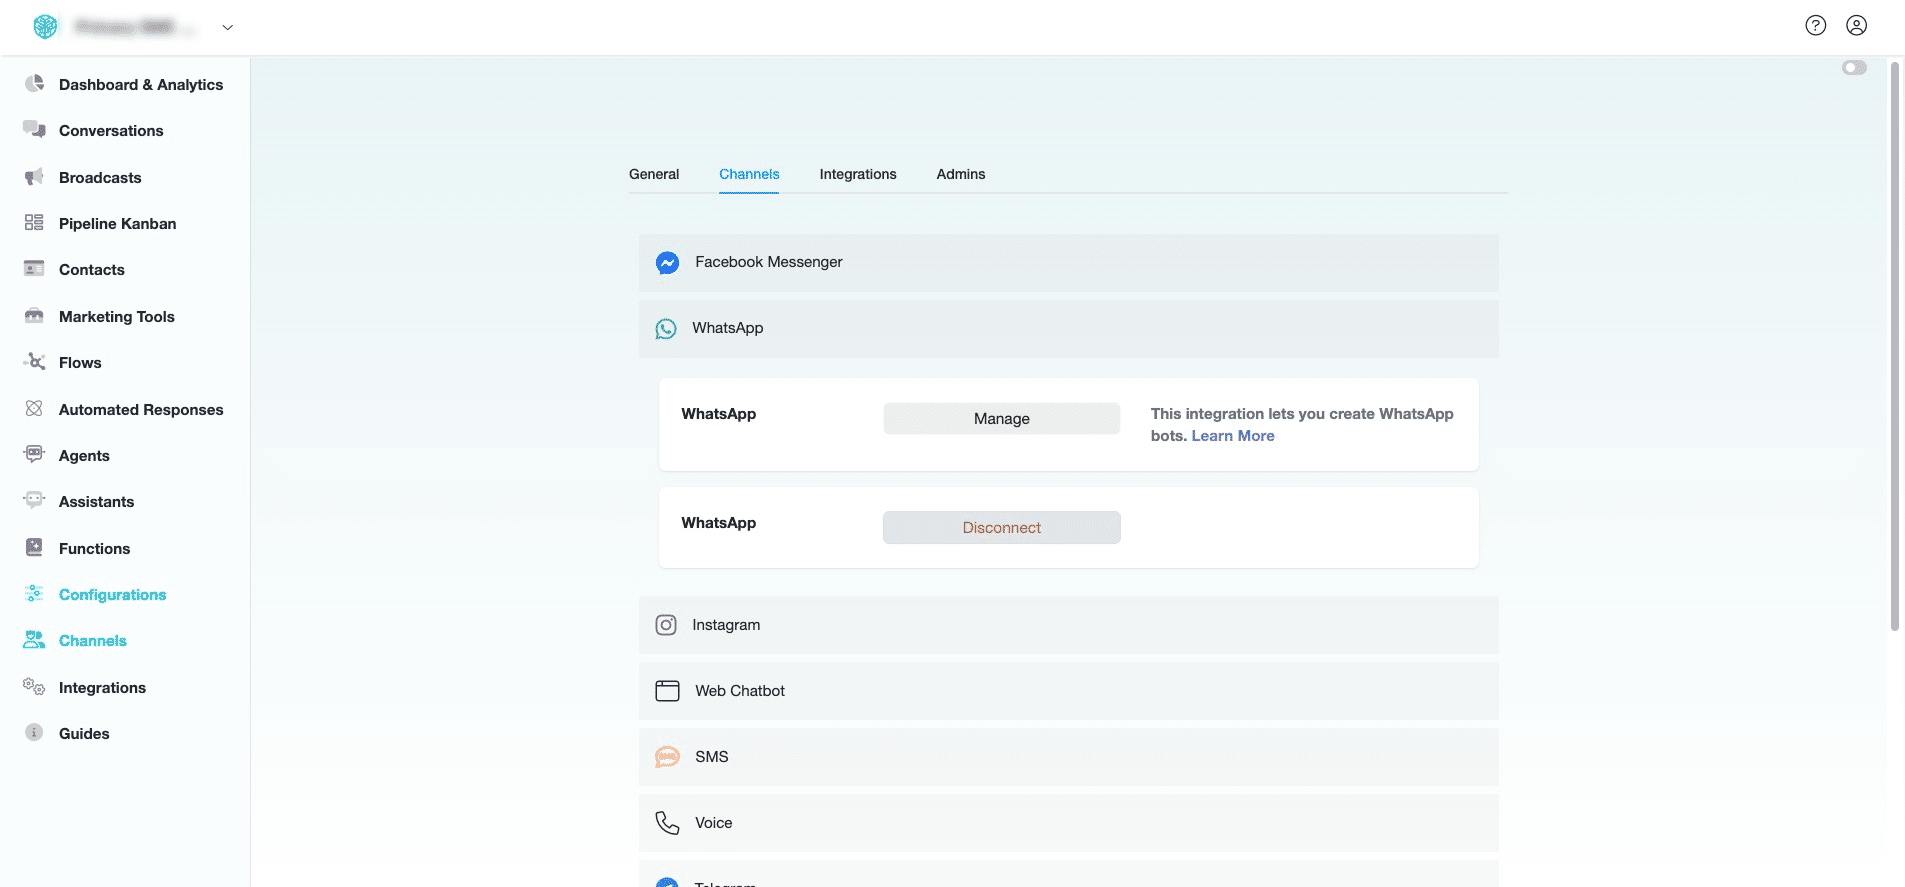
Click "Disconnect" in the pop-up to confirm.
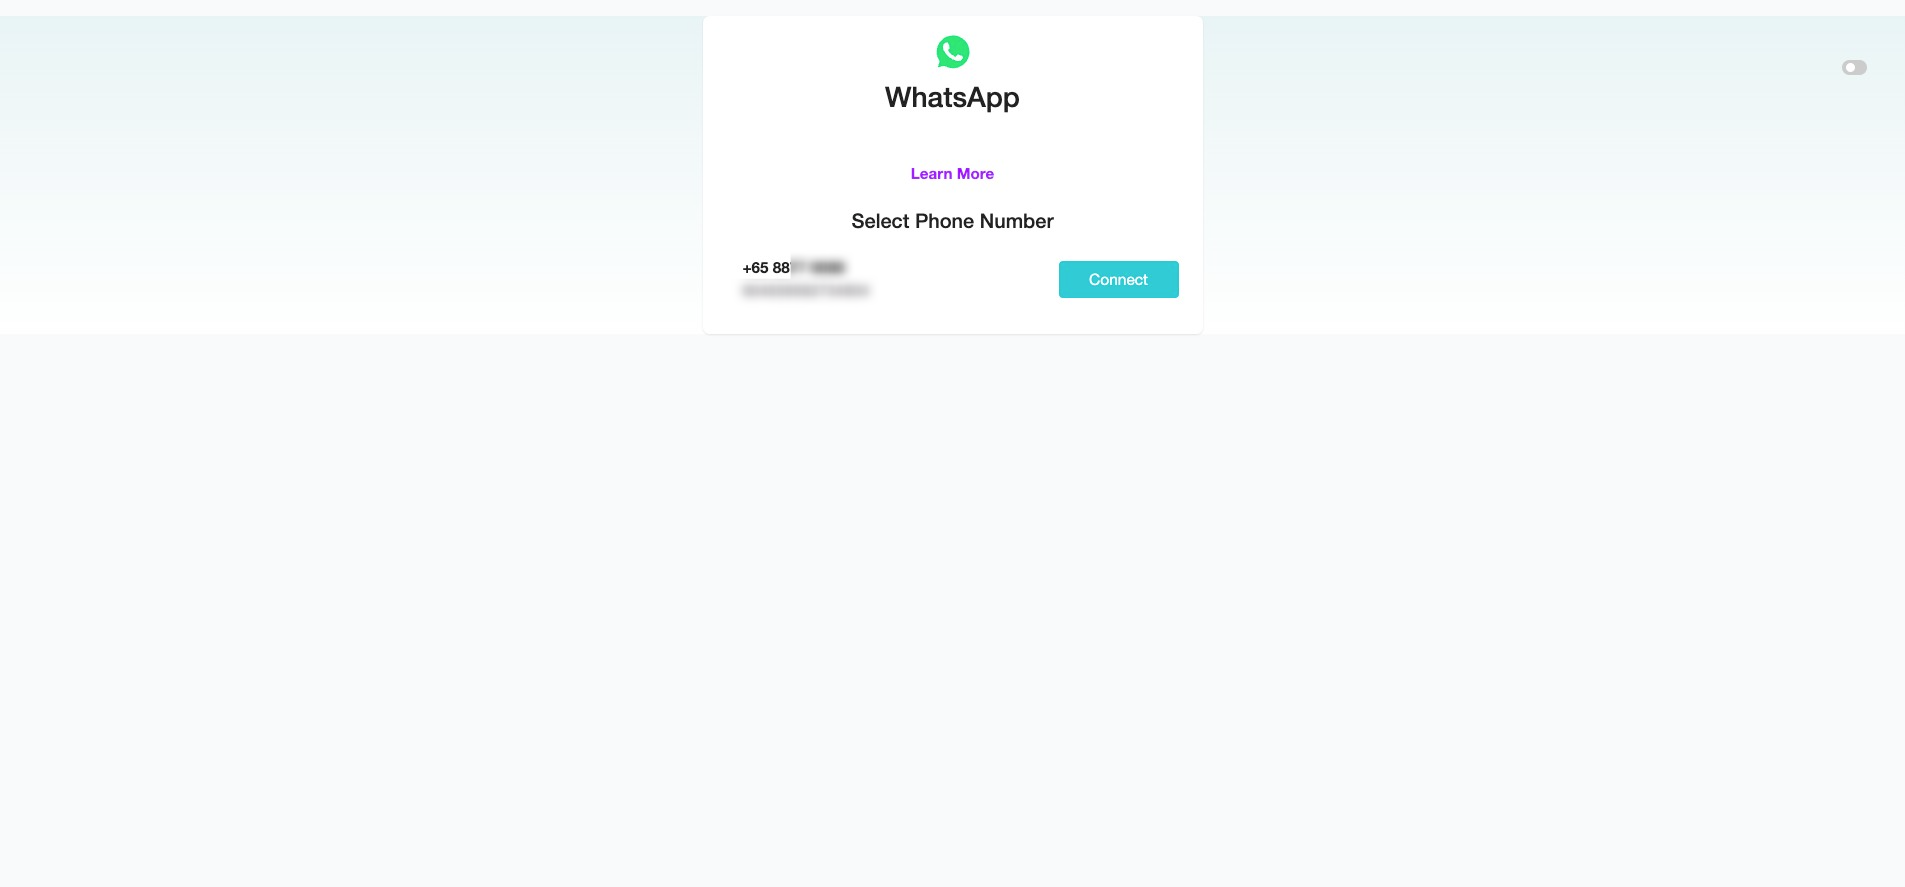
Click "Connect" to begin the process.
Enter both the WABA ID and Access Token in your SME Bot account, click "Continue".
Click "Connect" for the new number.
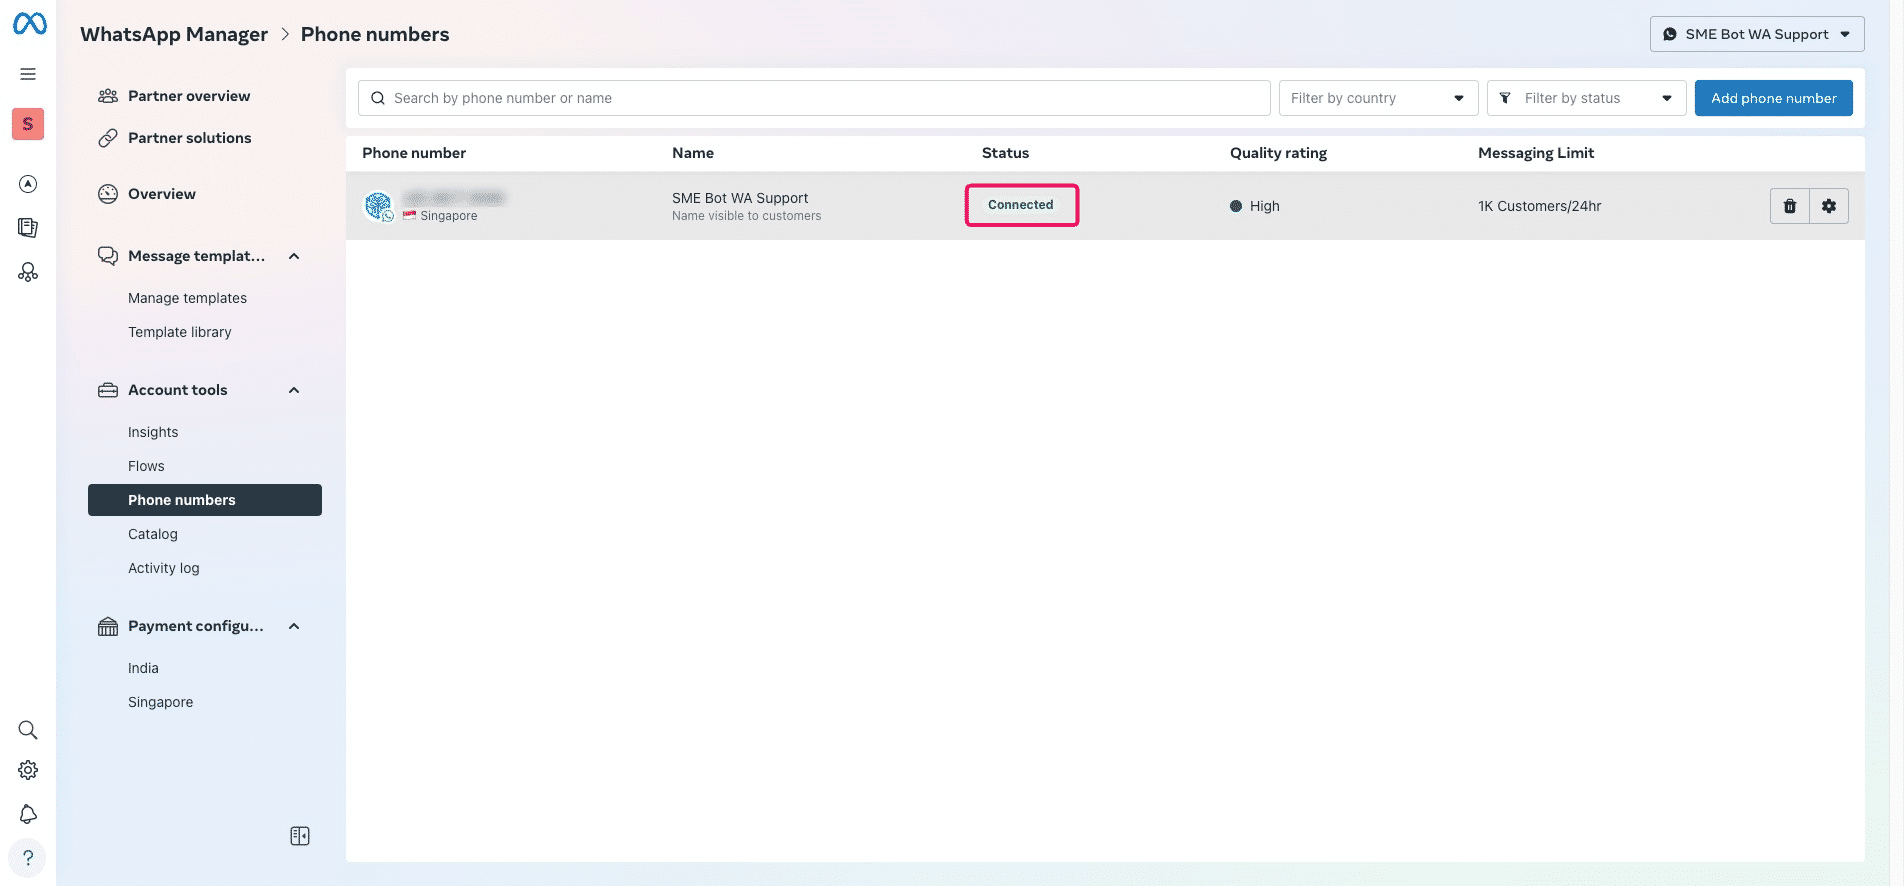
✅ Done! In your Meta Business Portfolio, under "WhatsApp Manager" → "Phone Numbers", the added number status should now show "Connected." You’ve successfully connected your number to WhatsApp Cloud API and linked it to SME Bot. 🚀
, under "WhatsApp Manager" → "Phone Numbers", the added number status should now show "Connected." You’ve successfully connected your number to WhatsApp Cloud API and linked it to SME Bot. 🚀](https://assets.guidejar.com/uploads/7b36f163-21e4-4639-8aff-a61a5e2a3e9c/oP4PD8qOFVglaEHJwcYKbX5jyJh1/240bf003-ce62-4dfb-946f-f575a61b4267/1740856364080.jpeg)